Easy Dairy-Free Frozen Yogurt Bites – A Cool Treat
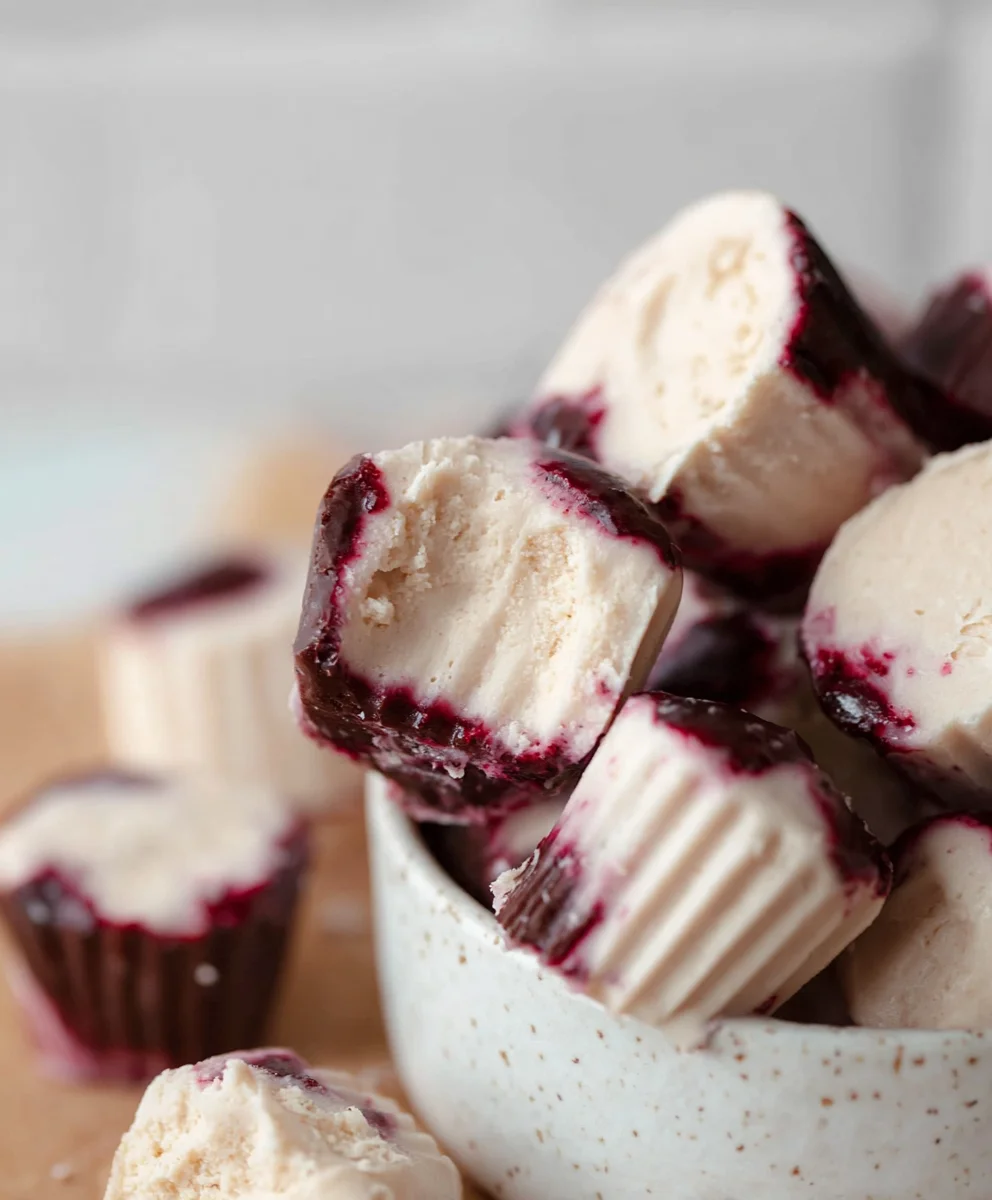
Easy Frozen Yogurt Bites (Dairy-free option) are the ultimate guilt-free indulgence, a delightful treat that satisfies your sweet cravings without the heavy feeling. We all have those moments when a craving strikes, and reaching for something cold, creamy, and refreshing is the only answer. But what if you could have all that goodness, plus a boost of healthy goodness, in a bite-sized package? That’s exactly what these easy frozen yogurt bites deliver. They’re incredibly simple to whip up, making them perfect for busy weeknights or spontaneous dessert desires. What truly sets these bites apart is their incredible versatility. You can customize them with your favorite fruits, a drizzle of honey, or a sprinkle of granola, creating a unique flavor profile every time. And for those who are lactose intolerant or prefer to avoid dairy, the dairy-free option ensures everyone can join in on the fun. Get ready to discover your new favorite healthy-ish dessert that’s as fun to make as it is to eat!
Ingredients:
- 1 cup thick Greek yogurt or coconut yogurt (unsweetened is best for controlling sweetness)
- 3 tablespoons cashew butter or almond butter (ensure it’s smooth and runny for easier mixing)
- 3 tablespoons maple syrup (adjust to your sweetness preference – an extra tablespoon is fine if you like it sweeter)
- 3 tablespoons of your favorite protein powder (optional – choose one you genuinely enjoy the taste of!)
- 1 teaspoon vanilla extract
- A generous pinch of sea salt (Maldon or Celtic sea salt recommended for their flaky texture and clean flavor)
- A handful of cacao nibs (optional, for added crunch and antioxidants)
- 3/4 cup chocolate chips or chopped chocolate (dark or semi-sweet work wonderfully)
- 1/2 tablespoon coconut oil (this helps the chocolate coating achieve a smooth, glossy finish)
Preparing Your Frozen Yogurt Bites
The first step to creating these delightful frozen yogurt bites is to get your base mixture ready. In a medium-sized mixing bowl, combine the thick Greek yogurt (or coconut yogurt for a dairy-free option) with the cashew butter (or almond butter). It’s important to use a thick yogurt for the best texture; if your yogurt is a bit thin, you can strain it through a cheesecloth for about 30 minutes to remove excess liquid. When adding the nut butter, make sure it’s at room temperature or slightly warmed so it incorporates smoothly and doesn’t clump. Stir these two ingredients together thoroughly until they are completely blended and you have a uniform, creamy mixture. This forms the foundation of our frozen treats, providing a rich and satisfying base.
Next, we’ll introduce the sweetness and flavor enhancers. To the yogurt and nut butter mixture, add the maple syrup. Start with the recommended 3 tablespoons, but don’t hesitate to add another tablespoon if you prefer a sweeter profile. Taste as you go! Then, stir in the vanilla extract for that classic, warm aroma and flavor. If you’re opting to include protein powder, now is the time to add it. Be sure to use a protein powder that you find palatable on its own, as its flavor will be present in the final bites. Whisk everything together vigorously until the protein powder is fully incorporated and there are no dry lumps. The consistency should remain thick and smooth. Finally, add that gooooood pinch of sea salt. The salt isn’t just for flavor; it actually enhances the sweetness and balances the richness of the nut butter and chocolate. Give it one last thorough stir to ensure all the ingredients are evenly distributed throughout the yogurt base.
Forming and Freezing the Bites
Once your delicious yogurt mixture is perfectly blended, it’s time to shape it. You have a couple of excellent options here. For perfectly uniform bites, using a small cookie scoop or two spoons to create little quenelles or rounded dollops is a great method. If you have mini muffin liners or small silicone molds, you can also spoon the mixture directly into these. Alternatively, you can spread the mixture onto a parchment-lined baking sheet into a layer about half an inch thick and then freeze it until firm enough to cut into small squares or shapes. Whichever method you choose, the key is to create bite-sized portions that will be easy to handle and coat later. If you’re using the spread-on-a-baking-sheet method, ensure you don’t spread it too thin, as it might become brittle when frozen.
Now, it’s crucial to get these bites solid. Carefully transfer your shaped yogurt pieces (on their baking sheet, in their liners, or in their molds) to the freezer. Allow them to freeze until they are completely firm to the touch. This typically takes about 1 to 2 hours, depending on the size of your bites and the temperature of your freezer. You want them to be solid enough to hold their shape when dipped into melted chocolate without melting too quickly themselves. Avoid over-freezing them for excessively long periods, as this can sometimes make them too hard to bite into. A good test is to press one gently with your finger; it should feel solid and not yield.
The Chocolatey Coating
While your yogurt bites are freezing, prepare your chocolate coating. In a small, microwave-safe bowl, combine the chocolate chips (or chopped chocolate) with the coconut oil. Microwave in 30-second intervals, stirring well after each interval, until the chocolate is completely melted and smooth. Be careful not to overheat the chocolate, as it can seize and become grainy. Alternatively, you can melt the chocolate and coconut oil using a double boiler method for more controlled melting. The coconut oil is essential here; it helps to thin the chocolate, making it easier to coat the frozen yogurt and also contributes to a beautiful, glossy sheen once it sets. If you find the chocolate mixture is still too thick after melting, you can add another tiny bit of coconut oil, about half a teaspoon, to achieve a smoother consistency.
Once your yogurt bites are thoroughly frozen and firm, and your chocolate coating is smooth and ready, it’s time for the final, delightful step. Gently remove the frozen yogurt bites from their liners or molds, or if they are on a baking sheet, carefully separate them. Using a fork or a small skewer, dip each frozen yogurt bite into the melted chocolate, ensuring it’s fully coated. You can also drizzle extra chocolate over the top for an attractive finish. If you’re adding cacao nibs, sprinkle them over the chocolate-coated bites immediately after dipping, while the chocolate is still wet, so they adhere properly. Place the coated bites back onto the parchment-lined baking sheet, ensuring they don’t touch each other.
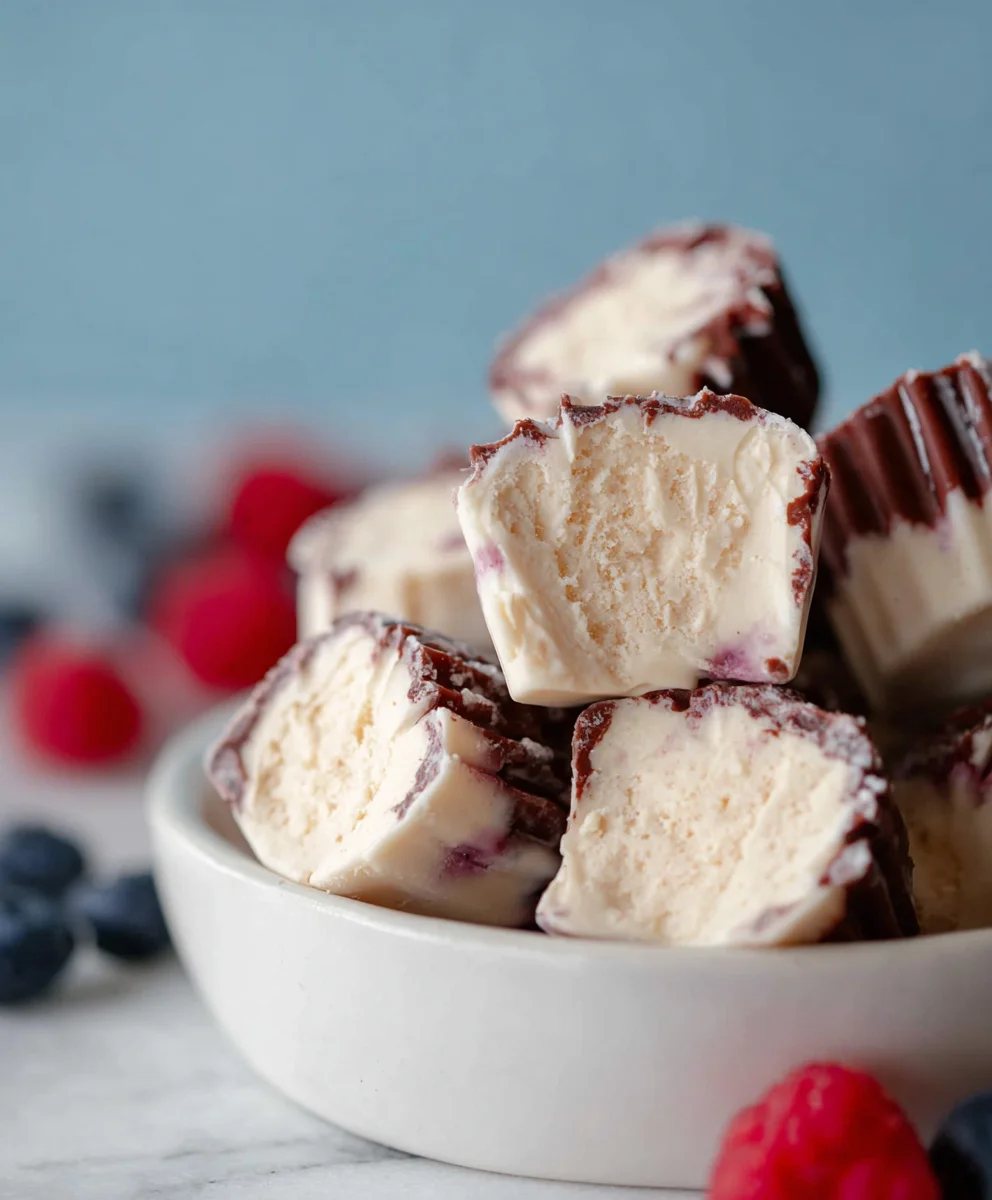
After all your bites are coated and adorned (if desired), return the baking sheet to the freezer. Let them freeze for at least another 30 minutes to an hour, or until the chocolate coating has completely hardened and set. This ensures that your delicious frozen yogurt bites are perfectly firm and ready to enjoy. Store any leftovers in an airtight container in the freezer for up to a couple of weeks. They are best enjoyed straight from the freezer!
Conclusion:
And there you have it – the wonderfully simple process for creating delicious Easy Frozen Yogurt Bites (Dairy-free option)! Whether you’re looking for a healthy dessert, a refreshing snack on a hot day, or a fun activity to do with the family, these bites are sure to be a hit. Their versatility means you can tailor them to suit any preference, making them a go-to treat in your recipe repertoire.
For serving suggestions, these frozen delights are fantastic on their own, but they also pair beautifully with fresh berries, a drizzle of honey, or even a sprinkle of granola for added texture. Don’t be afraid to experiment with variations! Try different fruit purées like mango or peach, or add a dash of vanilla extract or cinnamon for extra flavor. The dairy-free option using coconut yogurt is incredibly adaptable, ensuring everyone can enjoy these delightful frozen treats.
We truly hope you enjoy making and, more importantly, eating these Easy Frozen Yogurt Bites (Dairy-free option). They’re proof that healthy and delicious can go hand in hand, and the satisfaction of creating something so simple yet so rewarding is immense. Give them a try – you won’t regret it!
Frequently Asked Questions:
Q1: How long do the Easy Frozen Yogurt Bites (Dairy-free option) need to freeze?
Typically, these bites require at least 4-6 hours of freezing time to become firm. For best results, especially if you’re using a slightly softer yogurt base, freezing them overnight is recommended. This ensures they are fully set and have that perfect frozen texture.
Q2: Can I use different types of fruit for the Easy Frozen Yogurt Bites (Dairy-free option)?
Absolutely! The beauty of these bites is their adaptability. You can use almost any fruit purée. Berries like strawberries, blueberries, and raspberries are popular choices. Tropical fruits like mango and pineapple also work wonderfully. Just ensure the fruit is well-blended into a smooth purée before mixing with the yogurt.
Q3: How do I store the Easy Frozen Yogurt Bites (Dairy-free option)?
Once frozen, store the Easy Frozen Yogurt Bites (Dairy-free option) in an airtight container in the freezer. This will prevent them from absorbing any unwanted odors or developing ice crystals, ensuring they stay fresh and delicious for up to 1-2 months.
Easy Dairy-Free Frozen Yogurt Bites
A cool and refreshing dairy-free treat made with yogurt, nut butter, and a chocolate coating. Perfect for a healthy snack or dessert.
Ingredients
-
1 cup thick Greek yogurt or coconut yogurt
-
3 tablespoons cashew butter or almond butter
-
3 tablespoons maple syrup
-
3 tablespoons of your favorite protein powder (optional)
-
1 teaspoon vanilla extract
-
A generous pinch of sea salt
-
A handful of cacao nibs (optional)
-
3/4 cup chocolate chips or chopped chocolate
-
1/2 tablespoon coconut oil
Instructions
-
Step 1
In a mixing bowl, combine the thick yogurt and nut butter until smooth and uniform. -
Step 2
Add maple syrup, vanilla extract, optional protein powder, and sea salt. Stir vigorously until fully incorporated. -
Step 3
Shape the mixture into bite-sized portions using a small cookie scoop, spoons, or by spreading onto a parchment-lined baking sheet and freezing until firm enough to cut. -
Step 4
Freeze the shaped bites until completely firm, about 1-2 hours. -
Step 5
Melt chocolate chips and coconut oil in the microwave or using a double boiler until smooth. -
Step 6
Dip each frozen yogurt bite into the melted chocolate, coating fully. Sprinkle with cacao nibs immediately if using. -
Step 7
Place coated bites back on the parchment-lined baking sheet and freeze for at least 30 minutes until the chocolate has hardened.
Important Information
Nutrition Facts (Per Serving)
It is important to consider this information as approximate and not to use it as definitive health advice.
Allergy Information
Please check ingredients for potential allergens and consult a health professional if in doubt.