Air Fryer Garlic Bread Tortillas – Quick & Easy Recipe
Quick Air Fryer Tortilla Garlic Bread is about to become your new weeknight hero. Forget spending ages in the kitchen or dealing with fussy dough; this incredibly simple yet utterly satisfying recipe delivers that irresistible garlicky, cheesy goodness you crave in mere minutes. Imagin extracte the aroma filling your kitchen – warm tortillas transformed into golden, crispy delights, slathered with fragrant garlic butter and sprinkled with your favorite cheese. It’s the perfect accompaniment to soups, salads, or pasta, or even a delicious snack all on its own. What truly sets this Quick Air Fryer Tortilla Garlic Bread apart is its sheer speed and ease, making it accessible to even the most novice cooks. You’ll wonder how you ever lived without this genius shortcut to pure comfort food bliss.

Ingredients:
- 2 large flour tortilla shells
- 1 tablespoon unsalted butter, softened
- ½ cup shredded mozzarella cheese
- Garlic powder, to taste
- Italian seasoning, to taste
- Fresh parsley, chopped (optional, for garnish)
Preparing Your Tortilla Garlic Bread
Let’s get started on making these incredibly simple yet satisfying Quick Air Fryer Tortilla Garlic Bread. The beauty of this recipe lies in its speed and minimal effort, making it perfect for a weeknight snack, a quick side dish, or even a fun appetizer.
Assembling the Tortilla Garlic Bread
-
Step 1: Buttering the Tortillas
Begin extract by laying out your two flour tortilla shells on a clean, flat surface. Take your softened butter and evenly spread it across the entire surface of one side of each tortilla. Make sure you get a nice, even layer of butter from edge to edge. This butter layer is crucial for achieving that golden-brown crispiness and infusing the tortilla with a rich flavor. If your butter isn’t quite soft enough, a quick microwave for about 5-10 seconds should do the trick, but be careful not to melt it completely; we want it spreadable, not liquid.
-
Step 2: Seasoning for Flavor
Once the butter is applied, it’s time to add the savory seasonings. Sprinkle a generous amount of garlic powder over the buttered side of both tortillas. Don’t be shy with the garlic powder; this is where the “garlic” in our Garlic Bread truly shines. Aim for a coating that looks evenly distributed. Next, add your Italian seasoning. This blend typically includes oregano, basil, thyme, and rosemary, which complement the garlic perfectly and add a wonderful herbaceous aroma and taste. Sprinkle this over the garlic powder. You can adjust the amount of both seasonings to your personal preference. If you’re a garlic lover, add a bit more! For a more subtle hint, use less. The goal is to create a delicious flavor base that will bake beautifully.
-
Step 3: Adding the Cheesy Goodness
Now comes the cheesy part! Evenly distribute the shredded mozzarella cheese over the seasoned side of each tortilla. Try to spread the cheese so it covers most of the surface, but don’t worry too much about perfection. As it melts, it will spread slightly. The mozzarella will create that classic gooey, melted cheese topping that makes this tortilla garlic bread so irresistible. You can use pre-shredded cheese or shred your own from a block for even better melting potential.
-
Step 4: Folding and Preparing for the Air Fryer
Carefully fold each tortilla in half, creating a semi-circle. The butter and cheese should now be enclosed inside. Gently press down on the folded tortillas to help the filling adhere slightly. This also helps in creating a more compact “pocket” for the cheese to melt into. You want to ensure the edges are senon-alcoholic aled as much as possible, although they don’t need to be perfectly airtight. These folded tortillas are now ready to go into the air fryer.
-
Step 5: Air Frying to Perfection
Preheat your air fryer to 375 degrees Fahrenheit (190 degrees Celsius). Carefully place the folded tortillas into the air fryer basket, ensuring they are not overlapping. You may need to cook them in batches depending on the size of your air fryer. Air fry for approximately 5-7 minutes. Keep a close eye on them, especially during the last few minutes. You’re looking for the tortillas to become golden brown and crispy on the outside, and the cheese inside to be completely melted and bubbly. The exact time will depend on your specific air fryer model, so it’s always best to check for doneness. Once they look beautifully golden and the cheese is oozing, carefully remove them from the air fryer basket.
-
Step 6: Finishing Touches and Serving
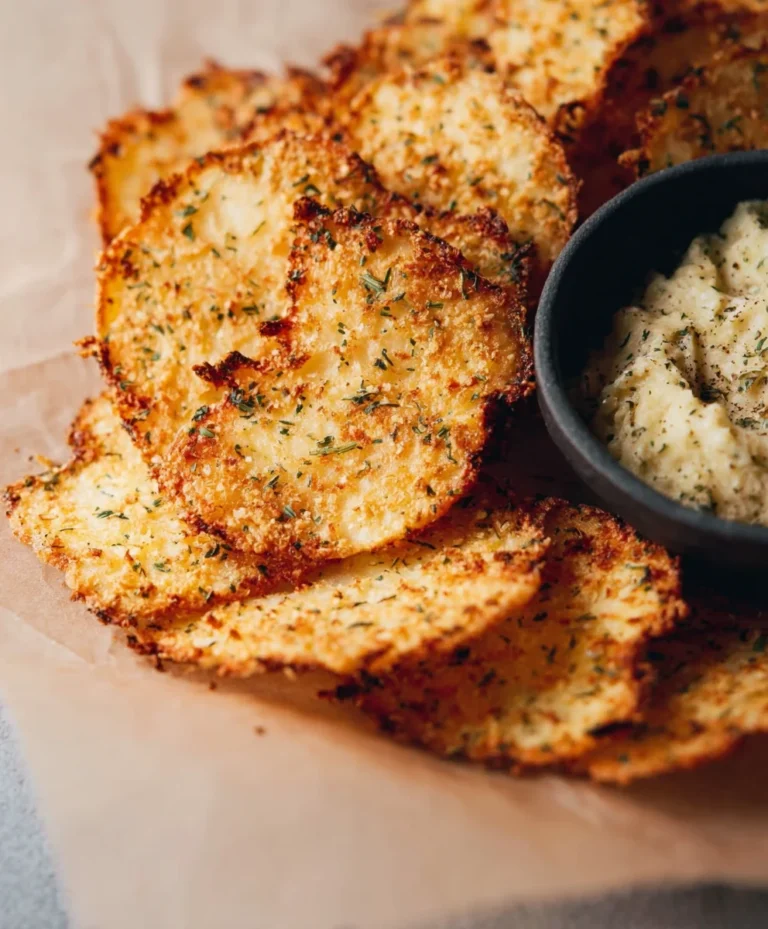
Once removed from the air fryer, let the tortilla garlic bread rest for just a minute or two. This allows the cheese to set slightly, making them easier to handle. If you’re using fresh parsley, now is the time to sprinkle it over the top. The vibrant green of the parsley adds a lovely visual appeal and a burst of freshness. You can also add a tiny pinch more Italian seasoning if you like. To serve, you can either cut each folded tortilla into wedges, like a pizza, or serve them whole. They are delicious served warm on their own, or you can pair them with your favorite soup, salad, or pasta dish. Enjoy the delightful crunch and savory garlic-cheesy flavor!

Conclusion:
And there you have it! Your delicious and incredibly simple Quick Air Fryer Tortilla Garlic Bread is ready to be devoured. We’ve walked through each step to ensure a crispy, garlicky, and satisfying treat that’s perfect for any occasion. This recipe truly lives up to its name, transforming humble tortillas into a gourmet appetizer or side dish in mere minutes. I hope you enjoy making and, more importantly, eating this fantastic creation as much as I do!
These golden delights are wonderfully versatile. Serve them alongside your favorite pasta dishes, hearty soups, or as a standalone snack with a side of marinara sauce for dipping. For a more substantial bite, try topping them with melted cheese and a sprinkle of herbs before air frying. Don’t be afraid to experiment with variations! You can add a pinch of red pepper flakes for a touch of heat, or swap out the garlic powder for fresh minced garlic. A sprinkle of Parmesan cheese right after air frying is also a game-changer.
I encourage you to give the Quick Air Fryer Tortilla Garlic Bread a try. It’s a testament to how easy it can be to create something truly special with minimal effort. Let me know your favorite ways to enjoy it in the comments below!
FAQs:
Can I use regular bread instead of tortillas for this recipe?
While this recipe is specifically designed for tortillas to achieve that unique crispiness and speed, you could adapt the garlic butter mixture for regular bread. However, the cooking time and texture will be significantly different, and it wouldn’t be the “Quick Air Fryer Tortilla Garlic Bread” anymore!
How can I store any leftover Quick Air Fryer Tortilla Garlic Bread?
For the best experience, it’s recommended to enjoy this treat fresh. If you do have leftovers, store them in an airtight container at room temperature for up to a day. Reheat them briefly in the air fryer or a toaster oven to regain some crispiness, though they won’t be as perfect as when first made.
Air Fryer Garlic Bread Tortillas – Quick & Easy Recipe
Incredibly simple and satisfying tortilla garlic bread made in the air fryer. Perfect for a weeknight snack, quick side, or fun appetizer.
Ingredients
-
2 large flour tortilla shells
-
1 tablespoon unsalted butter, softened
-
½ cup shredded mozzarella cheese
-
Garlic powder, to taste
-
Italian seasoning, to taste
-
Fresh parsley, chopped (optional, for garnish)
Instructions
-
Step 1
Lay out tortilla shells and evenly spread softened butter on one side of each. -
Step 2
Sprinkle garlic powder and Italian seasoning generously over the buttered side of both tortillas. -
Step 3
Evenly distribute shredded mozzarella cheese over the seasoned side of each tortilla. -
Step 4
Carefully fold each tortilla in half to create a semi-circle, enclosing the fillings. -
Step 5
Preheat air fryer to 375°F (190°C). Place folded tortillas in the basket, not overlapping. Air fry for 5-7 minutes until golden brown and cheese is melted and bubbly. -
Step 6
Remove from air fryer, let rest briefly. Garnish with optional fresh parsley. Cut into wedges and serve warm.
Important Information
Nutrition Facts (Per Serving)
It is important to consider this information as approximate and not to use it as definitive health advice.
Allergy Information
Please check ingredients for potential allergens and consult a health professional if in doubt.