Crispy Cheesy Beef Tacos – Oven Baked & Loaded
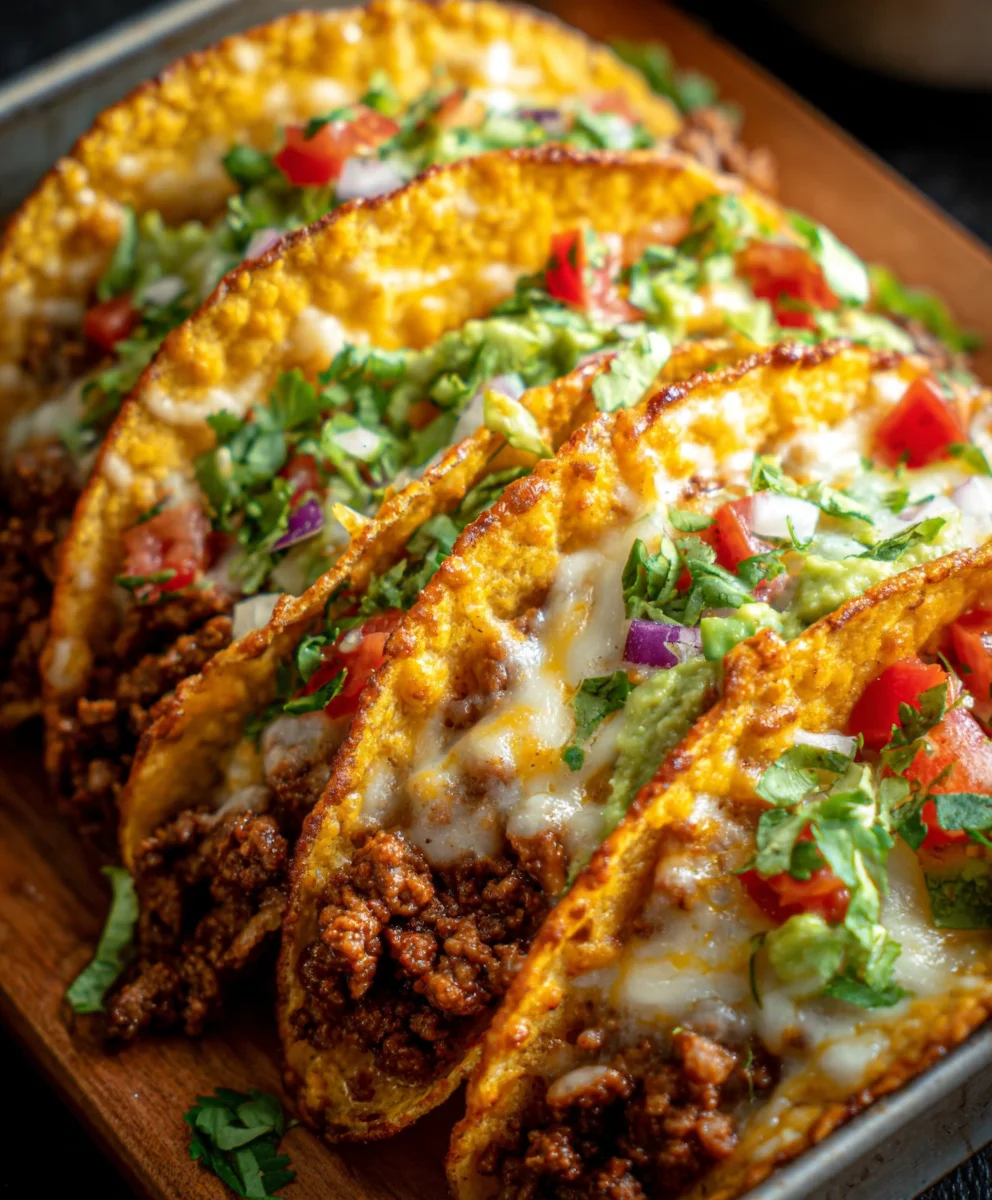
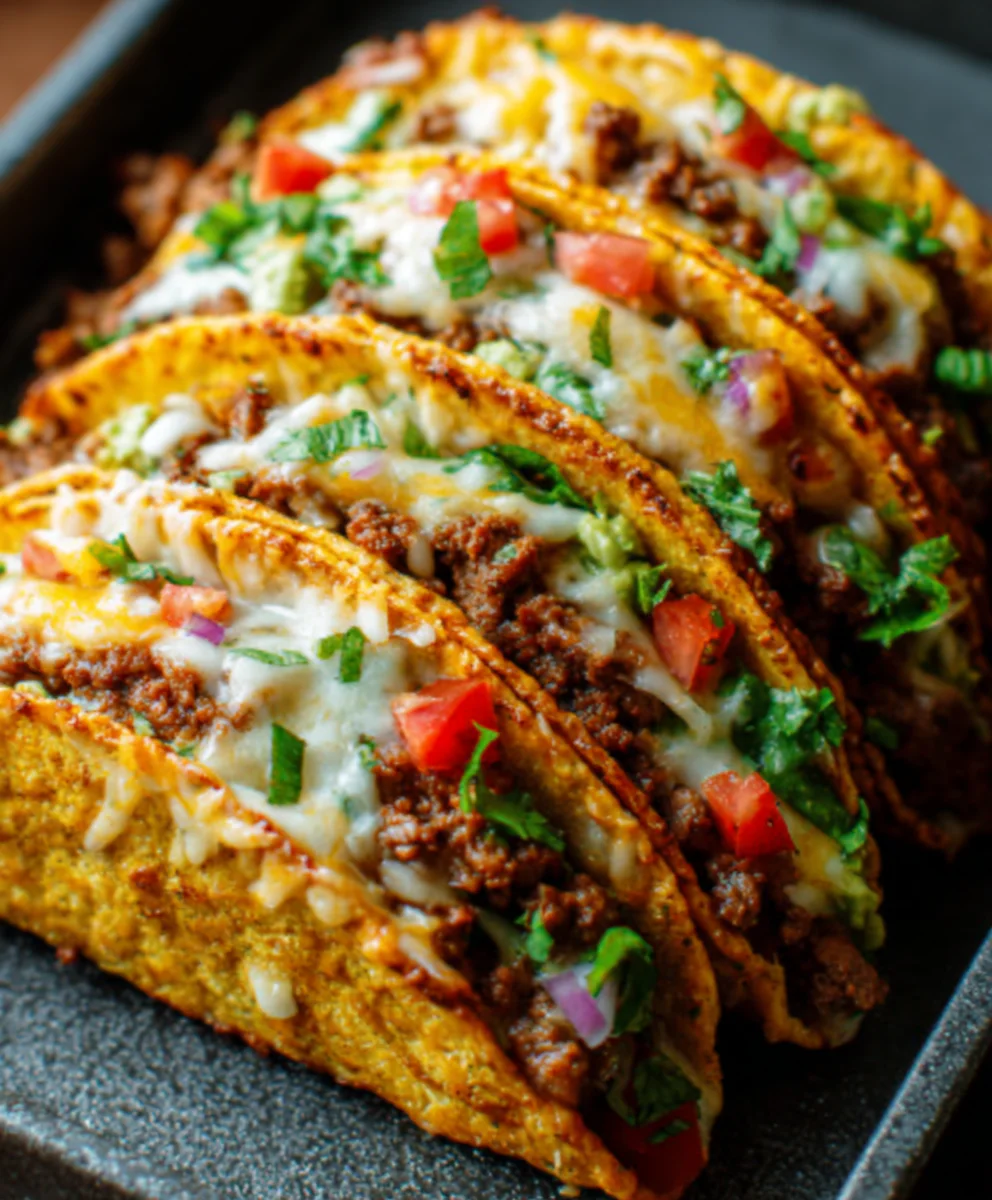
Oven-Baked Cheesy Tacos (Crispy & Loaded) You’ll Love! They’re the ultimate weeknight dinner solution, aren’t they? That perfect harmony of crunchy corn tortillas cradling savory fillings, all bound together with a generous blanket of gooey, melted cheese. It’s no wonder why oven-baked cheesy tacos have become a go-to for so many of us. They offer that satisfying textural contrast – the crispiness of the shell, the tender bite of the meat or beans, and the ooey-gooey cheese pull that makes every bite an experience. What truly sets these apart is the magic of the oven. It transforms simple ingredients into a symphony of flavors and textures, ensuring every taco is perfectly cooked and delightfully cheesy without the mess or constant attention of pan-frying. Get ready to impress your family and yourself with this incredibly satisfying and unbelievably easy recipe.
Ingredients:
- 1 lb (450 g) ground beef
- 1 small onion, finely diced
- 2 cloves garlic, minced
- 1 packet taco seasoning (or your favorite homemade mix)
- ⅔ cup tomato sauce or salsa
- Salt and pepper to taste
- 8 hard taco shells
- 2 cups shredded cheese (a blend of cheddar and Monterey Jack works beautifully, or use a pre-mixed Mexican blend)
- 1 cup shredded lettuce
- ½ cup diced tomatoes
- ¼ cup diced red onion
- 2 tablespoons chopped fresh cilantro (optional, but adds a lovely freshness)
- Sour cream (for serving, optional)
- Guacamole (for serving, optional)
- Jalapeño slices (for those who like a little heat, optional)
Preparing the Cheesy Taco Filling
Step 1: Brown the Ground Beef
Let’s start by getting our flavorful ground beef base ready. Grab a large skillet and place it over medium-high heat. Once the skillet is nice and hot, add the 1 lb of ground beef. Break it up with a spatula or wooden spoon as it cooks. You’re looking for the beef to be thoroughly browned and no longer pink. This usually takes about 7-10 minutes. As the beef cooks, a lot of fat will render out. To ensure your tacos aren’t greasy, it’s a good idea to carefully drain off most of this excess fat. You can do this by tilting the skillet slightly and spooning the fat out, or by carefully transferring the browned beef to a colander set over a bowl to drain. Once drained, return the skillet with the beef to the stove over medium heat.
Step 2: Sauté Aromatics and Season the Beef
Now it’s time to build even more flavor! Add the finely diced 1 small onion to the skillet with the drained ground beef. Cook, stirring occasionally, for about 3-5 minutes, or until the onion has softened and become translucent. Next, add the 2 cloves of minced garlic. Garlic is potent, so we only want to cook it for about 30 seconds to a minute until it’s fragrant. Be careful not to burn the garlic, as burnt garlic can turn bitter. Now, sprinkle in the entire packet of taco seasoning. Stir everything together well to coat the beef and onions evenly with the seasoning. This is where all those delicious taco spices come to life!
Step 3: Simmer the Taco Filling
To bring our taco filling together into a cohesive and saucy mixture, we’ll add the liquid. Pour in the ⅔ cup of tomato sauce or salsa. Stir it into the beef and onion mixture. Bring the contents of the skillet to a gentle simmer. Once simmering, reduce the heat to low, cover the skillet, and let it cook for at least 10-15 minutes. This simmering time allows the flavors to meld together beautifully, and the sauce to thicken slightly, creating a rich and delicious filling. Taste the mixture and season with salt and pepper as needed. Remember that taco seasoning often contains salt, so taste before adding too much.
Assembling and Baking the Crispy Tacos
Step 4: Prepare the Taco Shells for Baking
While your taco filling is simmering away, preheat your oven to 375°F (190°C). This is the perfect temperature for getting our hard taco shells delightfully crispy without burning them. Arrange the 8 hard taco shells upright in a 9×13 inch baking dish or on a baking sheet. If they tend to fall over, you can place them closer together, or prop them up with crum extractpled aluminum foil. It’s important to bake the shells before filling them to ensure maximum crispiness. If you fill them first, the shells can become soggy from the moisture of the filling.
Step 5: Fill and Cheese the Tacos
Once the taco shells are in the oven, it’s time to get them ready for their cheesy transformation. After the filling has simmered and the taco shells have been in the oven for about 5 minutes (just to warm them through and ensure they are crisp), carefully remove the baking dish from the oven. Spoon generous amounts of the seasoned ground beef mixture into each taco shell. Don’t be shy – fill them up! Then, sprinkle about ¼ cup of the shredded cheese mixture evenly over the top of the filling in each taco shell. You want that cheese to melt and ooze over the sides, creating that irresistible “loaded” look and taste.
Step 6: Bake to Golden Perfection
Return the filled and cheesy taco shells to the preheated oven. Bake for another 8-10 minutes, or until the cheese is completely melted, bubbly, and lightly golden brown. Keep an eye on them during this final baking stage to prevent the edges of the shells from burning. The goal is beautifully melted cheese and a warm, crispy shell. Once they’re done, carefully remove the baking dish from the oven. The aroma will be incredible!
Serving Your Oven-Baked Cheesy Tacos
Step 7: Load Up with Fresh Toppings
Now for the best part: dressing up your tacos! Carefully transfer the hot, cheesy tacos to a serving platter. Immediately top each taco with the shredded lettuce, diced tomatoes, and diced red onion. The heat from the tacos will slightly soften the lettuce and tomatoes, adding another delicious dimension. If you’re using cilantro, sprinkle it over the top as well for a burst of fresh flavor. For an extra layer of indulgence, offer bowls of sour cream, guacamole, and jalapeño slices on the side. This allows everyone to customize their tacos to their exact liking. These oven-baked cheesy tacos are best enjoyed fresh, straight from the oven, when the shells are at their crispiest and the cheese is perfectly melted.
Conclusion:
And there you have it – the ultimate guide to creating Oven-Baked Cheesy Tacos (Crispy & Loaded) You’ll Love! This recipe is a weeknight dinner game-changer, offering a delicious and satisfying meal with minimal fuss. The magic lies in the oven, transforming simple ingredients into crispy, cheesy perfection that everyone in the family will devour. We’ve walked through everything from preparing the seasoned meat to layering on your favorite toppings, ensuring a vibrant and flavorful taco experience every time.
For serving, these tacos are fantastic on their own, but don’t hesitate to pair them with a side of refreshing salsa, creamy guacamole, or a dollop of sour cream. Consider a simple cilantro-lime rice or a black bean and corn salad for a more complete meal. The beauty of Oven-Baked Cheesy Tacos (Crispy & Loaded) You’ll Love! lies in their versatility. Feel free to experiment with different ground meats like turkey or chicken, or even go vegetarian with seasoned black beans or lentils. Adding different cheeses, unique salsa combinations, or pickled onions can also create exciting new flavor profiles. Don’t be afraid to get creative and make these tacos your own!
Frequently Asked Questions:
Can I make the filling ahead of time?
Absolutely! You can prepare the seasoned meat filling a day in advance and store it in an airtight container in the refrigerator. Simply reheat it gently on the stovetop or in the microwave before assembling your tacos. This makes assembly even quicker on busy evenings!
What can I do if my taco shells are too soft?
If you find your taco shells aren’t getting as crispy as you’d like, ensure they are well-separated and not overcrowded on the baking sheet. You can also try pre-baking the empty shells for a few minutes before adding the filling and cheese to give them a head start on crisping up. Ensure your oven is preheated to the correct temperature.
Crispy Cheesy Beef Tacos – Oven Baked & Loaded
Enjoy these incredibly crispy and cheesy oven-baked beef tacos, loaded with flavor and your favorite toppings. A perfect weeknight meal!
Ingredients
-
1 lb (450 g) ground beef
-
1 small onion, finely diced
-
2 cloves garlic, minced
-
1 packet taco seasoning
-
⅔ cup tomato sauce or salsa
-
Salt and pepper to taste
-
8 hard taco shells
-
2 cups shredded cheese (cheddar, Monterey Jack, or Mexican blend)
-
1 cup shredded lettuce
-
½ cup diced tomatoes
-
¼ cup diced red onion
-
2 tablespoons chopped fresh cilantro (optional)
-
Sour cream (for serving, optional)
-
Guacamole (for serving, optional)
-
Jalapeño slices (for serving, optional)
Instructions
-
Step 1
Brown the ground beef in a large skillet over medium-high heat until no longer pink. Drain off excess fat. Return to medium heat. -
Step 2
Add the diced onion and cook until softened, about 3-5 minutes. Stir in minced garlic and cook for 30 seconds until fragrant. Sprinkle in taco seasoning and stir to coat. -
Step 3
Pour in tomato sauce or salsa. Bring to a simmer, then reduce heat to low, cover, and cook for 10-15 minutes to meld flavors. Season with salt and pepper to taste. -
Step 4
Preheat oven to 375°F (190°C). Arrange taco shells upright in a baking dish or on a baking sheet and bake for 5 minutes to warm and crisp them. -
Step 5
Remove shells from oven. Spoon the beef filling generously into each shell. Sprinkle about ¼ cup of shredded cheese over the filling in each taco. -
Step 6
Return tacos to the oven and bake for another 8-10 minutes, or until cheese is melted, bubbly, and lightly golden brown. -
Step 7
Carefully remove tacos from the oven. Top with shredded lettuce, diced tomatoes, diced red onion, and cilantro (if using). Serve with optional sour cream, guacamole, and jalapeño slices.
Important Information
Nutrition Facts (Per Serving)
It is important to consider this information as approximate and not to use it as definitive health advice.
Allergy Information
Please check ingredients for potential allergens and consult a health professional if in doubt.