Fried Strawberry Cheesecake Sandwiches-Sweet Dessert
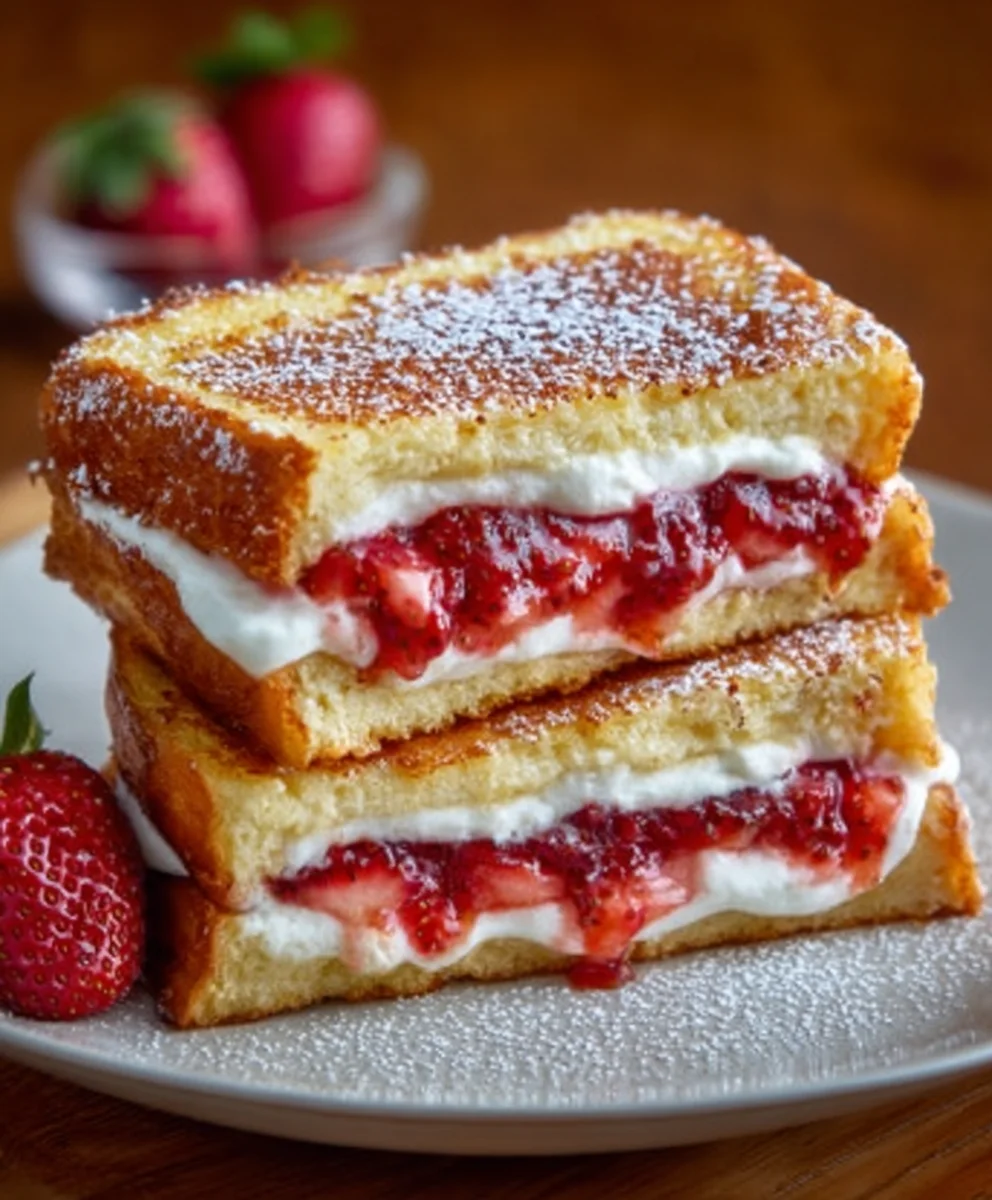
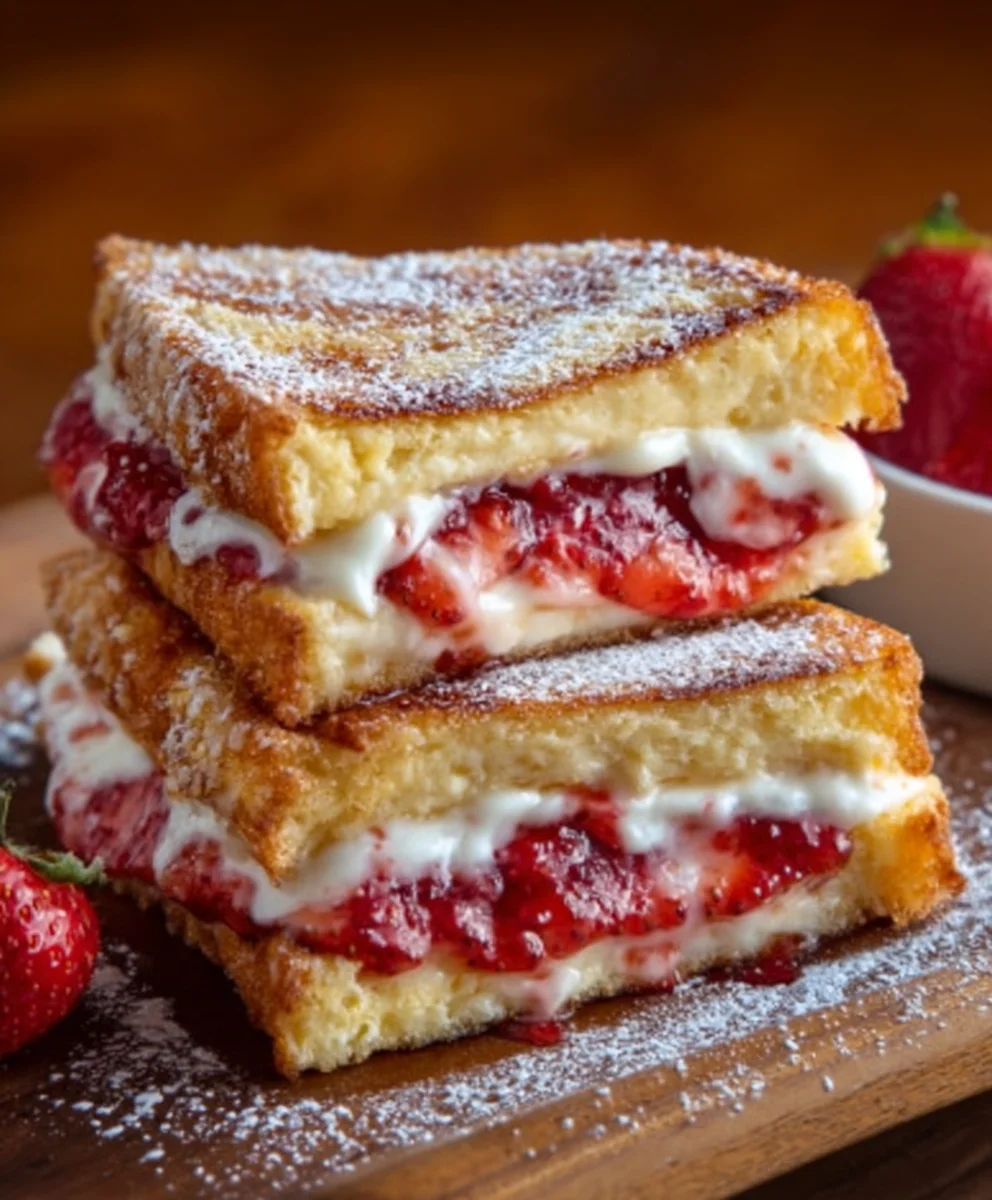
Fried Strawberry Cheesecake Sandwiches are more than just a dessert; they’re a nostalgic trip for your taste buds, a delightful explosion of textures and flavors that beckons you back to childhood joy. Imagin extracte biting into a warm, crispy shell, giving way to a luscious, creamy filling laced with sweet, slightly tart strawberries, all encased in a dreamy cheesecake embrace. It’s this irresistible combination that makes Fried Strawberry Cheesecake Sandwiches so utterly beloved. People are drawn to them for the sheer indulgence, the comforting sweetness, and the unexpected delight of a familiar dessert transformed into something utterly magical. What truly sets these apart is the ingenious way we marry the comforting familiarity of cheesecake with the irresistible crispiness of a perfectly fried exterior, creating a treat that’s both deeply satisfying and wonderfully exciting. Get ready to elevate your dessert game with this incredible recipe!
Ingredients:
- 8 slices of brioche or challah bread
- 4 oz cream cheese, softened
- 2 tbsp powdered sugar (plus more for dusting)
- 1/2 cup fresh strawberries, sliced
- 1/4 cup strawberry jam
- 2 large eggs
- 3 tbsp milk
- 2 tbsp butter (for frying)
Preparing the Cream Cheese Filling
Step 1: Combine Cream Cheese and Sugar
First, let’s get our delicious cream cheese filling ready. In a medium bowl, place the softened cream cheese. Ensure it’s properly softened – this means it should be easy to press with a fork without much resistance, almost like thick butter. This will make it much easier to mix and ensure a smooth, lump-free filling. To the softened cream cheese, add the 2 tablespoons of powdered sugar. Powdered sugar, also known as confectioners’ sugar or icing sugar, is key here because its fine texture dissolves beautifully into the cream cheese, creating a smooth sweetness without any grittiness.
Using a fork or a whisk, vigorously mix the cream cheese and powdered sugar together until they are thoroughly combined and have a uniform, pnon-alcoholic ale color. Scrape down the sides of the bowl occasionally to make sure all the ingredients are incorporated. You’re looking for a consistency that is smooth and spreadable. If your cream cheese wasn’t quite soft enough, you might need to do a little extra mixing to break down any stubborn lumps. Set this creamy mixture aside for now.
Step 2: Add Fresh Strawberries
Next, we’ll incorporate the fresh fruit into our cream cheese mixture to add a delightful burst of strawberry flavor and a pleasant texture. Take your 1/2 cup of fresh strawberries. It’s best to slice them into relatively small, manageable pieces. Aim for slices that are about 1/4 inch thick. You want pieces that will distribute evenly within the filling and won’t make the sandwiches too bulky.
Gently fold the sliced strawberries into the cream cheese and powdered sugar mixture. Be careful not to overmix at this stage. You want the strawberries to be coated in the cream cheese, but you don’t want to mash them into oblivion. The goal is to have distinct pieces of strawberry within the creamy filling, offering little surprises of fresh fruit with every bite.
Assembling the Sandwiches
Step 3: Spread the Filling and Jam
Now it’s time to assemble our Fried Strawberry Cheesecake Sandwiches. Take four of your brioche or challah bread slices. Brioche and challah are excellent choices because their slightly sweet and rich eggy flavor complements the cheesecake filling beautifully, and they hold up well to frying. Lay these four slices flat on your work surface.
Evenly spread the cream cheese and strawberry filling you prepared in the previous steps onto these four slices of bread. Distribute it generously, making sure to get close to the edges but not so close that it will all ooze out during cooking. On top of the cream cheese mixture, carefully spoon the 1/4 cup of strawberry jam. You can swirl it in slightly with a toothpick if you like, or just dollop it on. The jam adds an extra layer of intense strawberry flavor and a lovely sticky sweetness that pairs perfectly with the cream cheese.
Step 4: Close the Sandwiches
Take the remaining four slices of brioche or challah bread and place them on top of the filled slices, creating complete sandwiches. Gently press down on the sandwiches to compact the filling slightly and ensure the bread slices adhere well. This also helps to make them a bit more stable for the next cooking step. Don’t press too hard, though, as you don’t want to completely flatten the bread or squeeze all the filling out. You can trim the crusts off at this point if you prefer a more refined presentation, though it’s entirely optional and many enjoy the rustic charm of the crusts.
Frying the Sandwiches
Step 5: Prepare the Egg Wash and Fry
This is where the magic happens and our sandwiches turn golden brown and delicious! In a shallow dish or pie plate, whisk together the 2 large eggs and 3 tablespoons of milk. This creates your egg wash, also known as a custard bath. The eggs and milk will coat the bread, creating a crispy, golden exterior when fried. Whisk until the eggs and milk are fully incorporated and there are no streaks of yolk or white visible.
Heat the 2 tablespoons of butter in a large skillet or griddle over medium heat. You want the butter to melt and shimmer but not burn. Once the butter is hot, carefully dip each sandwich into the egg wash, ensuring both sides are fully coated. Let any excess egg wash drip back into the dish. Place the coated sandwiches into the hot buttered skillet. Don’t overcrowd the pan; you may need to cook them in batches to ensure they fry evenly and don’t steam.
Step 6: Cook to Golden Perfection
Cook the sandwiches for approximately 3 to 4 minutes per side, or until they are a beautiful, deep golden brown and the cream cheese filling is warm and slightly melted. Keep an eye on them, as brioche and challah bread can brown quite quickly. Adjust the heat as needed to prevent burning. Flip them carefully using a spatula. Once both sides are perfectly golden brown and the filling is gooey and enticing, remove the sandwiches from the skillet.
Step 7: Serve and Enjoy
Transfer the Fried Strawberry Cheesecake Sandwiches to a plate lined with paper towels to absorb any excess grease. While they are still warm, you can dust them lightly with a little extra powdered sugar for an extra touch of sweetness and visual appeal. Serve them immediately. The contrast between the crispy, golden exterior and the warm, gooey strawberry cheesecake filling is absolutely divine. These are wonderful on their own, or you can serve them with a dollop of whipped cream or a side of fresh berries for an extra treat. Enjoy every decadent bite of your homemade Fried Strawberry Cheesecake Sandwiches!
Conclusion:
There you have it – a delightful recipe for Fried Strawberry Cheesecake Sandwiches that’s sure to impress! We’ve walked through each step, from preparing the creamy cheesecake filling to achieving that perfect golden-brown crust. These sandwiches are a wonderful balance of sweet, tangy strawberries and rich, decadent cheesecake, all encased in a crispy fried shell. They are surprisingly simple to make and offer a fantastic dessert option for any occasion, from a casual family gathering to a special celebration. Don’t be afraid to get creative and adapt this recipe to your own tastes!
For serving, I love to dust these Fried Strawberry Cheesecake Sandwiches with a little powdered sugar or a drizzle of chocolate syrup. A dollop of fresh whipped cream or a scoop of vanilla ice cream makes them even more indulgent. When it comes to variations, consider adding a pinch of cinnamon to the cheesecake filling for a warm spice note, or swap out the strawberries for other berries like blueberries or raspberries. You could even add a touch of lemon zest for extra brightness.
I truly hope you enjoy making and savoring these unique treats as much as I do. They are a testament to how simple ingredients can be transformed into something truly spectacular with a little effort and imagin extractation. So, gather your ingredients, put on your apron, and let’s get frying!
FAQs
Q: Can I make the cheesecake filling ahead of time for the Fried Strawberry Cheesecake Sandwiches?
A: Absolutely! The cheesecake filling can be made up to a day in advance and stored in an airtight container in the refrigerator. This will save you time on the day you plan to assemble and fry the sandwiches.
Q: What is the best way to prevent the Fried Strawberry Cheesecake Sandwiches from leaking during frying?
A: Ensuring the edges of the bread are well-senon-alcoholic aled is key. Press down firmly with a fork around the entire edge of each sandwich after filling and before cooking. Also, be careful not to overfill them.
Fried Strawberry Cheesecake Sandwiches
A delightful sweet dessert featuring creamy cheesecake filling with fresh strawberries and jam, sandwiched between slices of rich bread and fried to golden perfection.
Ingredients
-
8 slices of brioche or challah bread
-
4 oz cream cheese, softened
-
2 tbsp powdered sugar
-
1/2 cup fresh strawberries, sliced
-
1/4 cup strawberry jam
-
2 large eggs
-
3 tbsp milk
-
2 tbsp butter (for frying)
Instructions
-
Step 1
In a medium bowl, combine the softened cream cheese and powdered sugar until smooth and creamy. Gently fold in the sliced fresh strawberries, being careful not to mash them. -
Step 2
Spread the cream cheese and strawberry filling evenly onto four slices of brioche or challah bread. Spoon the strawberry jam on top of the cream cheese mixture. -
Step 3
Place the remaining four slices of bread on top to form sandwiches. Gently press down. -
Step 4
In a shallow dish, whisk together the eggs and milk to create an egg wash. Heat the butter in a large skillet over medium heat. -
Step 5
Dip each sandwich into the egg wash, ensuring both sides are coated, and place them in the hot skillet. Fry for 3-4 minutes per side, until golden brown. -
Step 6
Remove sandwiches from the skillet and drain on paper towels. Dust with additional powdered sugar if desired and serve warm.
Important Information
Nutrition Facts (Per Serving)
It is important to consider this information as approximate and not to use it as definitive health advice.
Allergy Information
Please check ingredients for potential allergens and consult a health professional if in doubt.