Fried Strawberry Cheesecake Sandwiches – Sweet Treat
Fried strawberry cheesecake sandwiches are about to become your new obsession. Imagin extracte this: the crisp, golden-brown crunch of perfectly fried bread giving way to a warm, creamy, decadent interior of sweet cheesecake and bursts of fresh strawberry. It’s a dessert that hits all the right notes – a delightful textural contrast and a flavor explosion that’s simply irresistible. We all love cheesecake, right? That velvety smooth, tangy sweetness is pure comfort. And strawberries? Their bright, summery zing is the perfect foil. But when you combine them, encase them in fluffy bread, and then – get this – fry it? You’ve elevated a classic into something truly extraordinary. These fried strawberry cheesecake sandwiches are more than just a treat; they’re an experience. They’re that showstopper dessert that will have everyone asking for the recipe, or at least another bite. Get ready to fall head over heels for this magical creation!
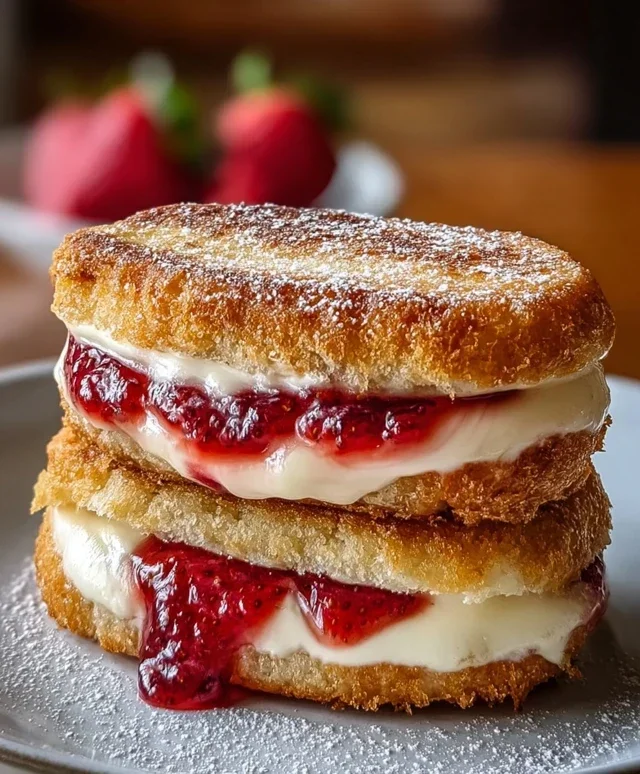
Fried Strawberry Cheesecake Sandwiches
Get ready for a dessert experience that’s utterly decadent and surprisingly simple to whip up! These Fried Strawberry Cheesecake Sandwiches take the creamy, dreamy goodness of cheesecake and the sweet burst of fresh strawberries, all wrapped up in golden, crispy fried brioche. It’s like your favorite dessert got a whimsical makeover, perfect for a special brunch, an afternoon treat, or even a playful dessert after dinner. The magic lies in the combination of textures – the soft, slightly sweet bread, the luscious cream cheese filling, the bright tang of strawberries, and that satisfying crunch from frying. Trust me, one bite and you’ll be hooked.
Ingredients:
Cooking Instructions
Let’s get started on crafting these delightful treats. The process is broken down into manageable steps, and I’ll guide you through each one to ensure perfect results.
Step 1: Prepare the Cream Cheese Filling and Bread Assembly
First things first, we need to get our filling ready and our sandwiches assembled. Take that softened cream cheese and place it in a medium bowl. The key here is to ensure it’s truly softened; this will make it much easier to incorporate the powdered sugar and achieve a smooth, lump-free filling. Add the 2 tablespoons of powdered sugar to the cream cheese. Using a fork or an electric mixer on low speed, whip the cream cheese and powdered sugar together until they are completely combined and the mixture is light and fluffy. Don’t overmix, but ensure all the powdered sugar is incorporated.
Now, it’s time to assemble our sandwiches. Lay out four of the thick slices of brioche or challah bread on a clean work surface. Spread a generous layer of the cream cheese mixture evenly over each of these four slices. Don’t be shy – this is the cheesecake part, after all! Next, arrange the thinly sliced fresh strawberries on top of the cream cheese. Try to create an even layer so you get that delicious strawberry flavor in every bite. Drizzle a bit of the strawberry preserves over the strawberries on each sandwich. This adds another layer of fruity sweetness and helps bind the strawberries slightly. Finally, place the remaining four slices of bread on top of the strawberry-filled slices, completing your sandwiches. Gently press down on them to secure the filling.
Step 2: Create the Egg Wash for Dipping
This step is crucial for achieving that beautiful golden-brown, crispy exterior. In a shallow dish or pie plate, crack the 2 large eggs. Make sure the eggs are straight from the fridge, as colder eggs tend to create a more stable batter. Add the 3 tablespoons of whole milk to the eggs. Whisk everything together vigorously with a fork or a whisk until the egg and milk are thoroughly combined and no streaks of egg white remain. This mixture, often called an egg wash, will coat the bread and create a delicious custardy crust when fried.
Step 3: Heat the Pan and Begin extract Frying
Now, let’s get our cooking surface ready. Place a large non-stick skillet or griddle over medium heat. Add the 2 tablespoons of butter to the skillet. Allow the butter to melt and coat the bottom of the pan. You want the pan to be hot enough that the butter sizzles gently when it hits the surface, but not so hot that it burns. This medium heat is essential for ensuring the sandwiches cook through evenly without burning on the outside.
Step 4: Dipping and Frying the Sandwiches
With the pan heated and the butter melted, it’s time to dip and fry. Carefully take one of your assembled sandwiches and gently place it into the egg wash. Let it soak for about 10-15 seconds per side, allowing the bread to absorb some of the mixture. Don’t let it sit too long, or the bread will become too soggy and fall apart. Once dipped, carefully lift the sandwich and let any excess egg wash drip back into the dish.
Now, gently place the dipped sandwich into the hot, buttered skillet. Repeat this dipping and placing process with the remaining sandwiches, ensuring you don’t overcrowd the pan. Cook each sandwich for about 3-4 minutes per side, or until it’s beautifully golden brown and crispy. You’re looking for that irresistible crunch that signals perfect frying. Keep an eye on the heat; if the bread is browning too quickly, reduce the heat slightly. If it’s not browning enough, increase it slightly.
Step 5: Finishing and Serving
Once your Fried Strawberry Cheesecake Sandwiches are golden brown and cooked through on both sides, carefully remove them from the skillet and place them on a plate lined with paper towels. This will help absorb any excess grease. Let them cool for just a minute or two – they are best served warm. For an extra special touch, lightly dust the tops of the warm sandwiches with a little extra powdered sugar. You can serve them as is, or with a dollop of whipped cream or a scoop of vanilla ice cream for an even more indulgent experience. Enjoy the delightful contrast of the crispy exterior, the creamy cheesecake filling, and the burst of fresh, sweet strawberries!
Conclusion:
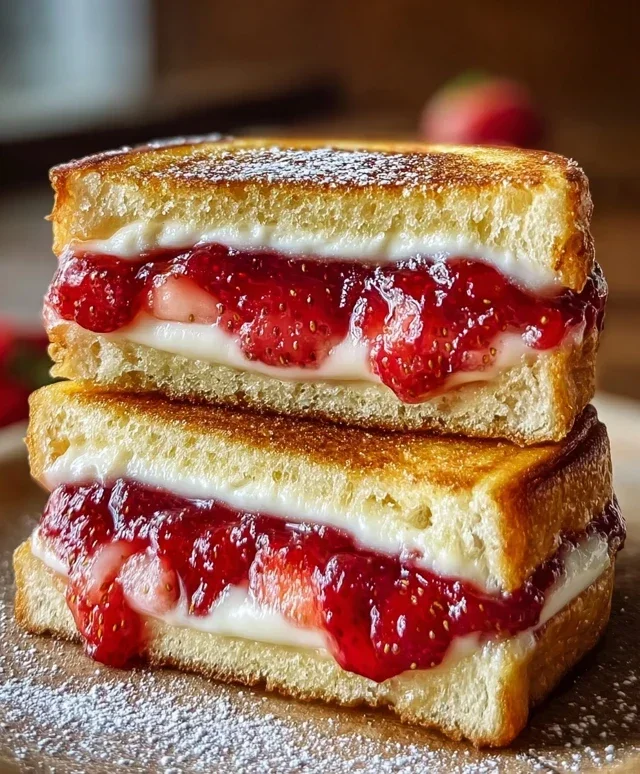
There you have it – the ultimate guide to creating these absolutely delightful Fried Strawberry Cheesecake Sandwiches! We’ve explored how simple yet incredibly rewarding this recipe is. The combination of warm, crispy fried outer layers giving way to a cool, creamy, and slightly tangy strawberry cheesecake filling is simply irresistible. It’s the perfect fusion of textures and flavors that will have everyone asking for seconds. Imagin extracte the golden-brown crust giving way to that luscious, sweet-tart strawberry cheesecake – pure bliss!
For serving, these are fantastic on their own, dusted with a little powdered sugar or drizzled with extra strawberry sauce. They also make a stunning dessert centerpiece at parties or a special treat for a cozy night in. Don’t be afraid to get creative with variations! Consider adding a pinch of cinnamon to the cream cheese mixture for warmth, or using different fruit preserves like raspberry or blueberry. You could even add a few chocolate chips for an extra decadent twist. I truly encourage you to give this Fried Strawberry Cheesecake Sandwich recipe a try; it’s surprisingly easy to master and delivers an explosion of deliciousness that’s sure to impress!
Frequently Asked Questions:
Can I make the strawberry cheesecake filling ahead of time?
Absolutely! You can prepare the strawberry cheesecake filling up to 24 hours in advance and store it covered in the refrigerator. This makes assembling the sandwiches even quicker when you’re ready to fry them.
What’s the best way to prevent the cream cheese from leaking out during frying?
Ensure the edges of the bread are well-senon-alcoholic aled after filling. Press down firmly with a fork to crimp the edges, creating a good seal. Also, avoid overfilling the bread; a generous but not overflowing amount of filling works best.
Can I bake these instead of frying them?
While frying provides that signature golden, crispy exterior, you could bake them at around 375°F (190°C) until golden brown. The texture will be different, less crispy and more bread-like, but they would still be delicious.
Fried Strawberry Cheesecake Sandwiches
A decadent and delightful fried sandwich featuring a creamy cheesecake filling and sweet strawberry compote, all encased in golden-brown brioche.
Ingredients
-
8 thick slices of brioche or challah bread
-
2 tablespoons butter, for the pan
-
4 ounces cream cheese, softened
-
2 tablespoons powdered sugar
-
1/2 cup fresh strawberries, cut into thin slices
-
1/4 cup strawberry preserves
-
2 large eggs
-
3 tablespoons whole milk
Instructions
-
Step 1
In a medium bowl, beat together the softened cream cheese and powdered sugar until smooth and creamy. -
Step 2
Gently fold in the sliced fresh strawberries and strawberry preserves into the cream cheese mixture. -
Step 3
Spread the cream cheese and strawberry mixture evenly onto four slices of bread, then top with the remaining four slices to form sandwiches. -
Step 4
In a shallow dish, whisk together the eggs and milk until well combined. -
Step 5
Heat the butter in a large non-stick skillet over medium heat. Dip each sandwich into the egg mixture, coating both sides, and carefully place into the hot skillet. -
Step 6
Cook for 3-5 minutes per side, or until golden brown and the filling is warm and slightly gooey. -
Step 7
Remove from skillet, let cool slightly, and dust with extra powdered sugar before serving.
Important Information
Nutrition Facts (Per Serving)
It is important to consider this information as approximate and not to use it as definitive health advice.
Allergy Information
Please check ingredients for potential allergens and consult a health professional if in doubt.