Country Fried Chicken Recipe – Crispy & Delicious
Country fried chicken. Just the words conjure up images of Sunday dinners, cozy kitchens, and that irresistible aroma wafting through the air. There’s something truly magical about a perfectly executed piece of country fried chicken, isn’t there? It’s a dish that speaks to our comfort food souls, a culinary hug that never fails to bring a smile to our faces. We love it for its incredible crispy, golden-brown exterior, giving way to juicy, tender chicken within. What makes this particular style of country fried chicken so special? It’s the simple, honest ingredients, the time-honored technique, and that little bit of culinary love we pour into every batch. Today, we’re diving deep into what makes this classic so beloved and sharing how you can recreate that authentic, soul-satisfying flavor in your own home. Get ready to experience the ultimate in comfort food!
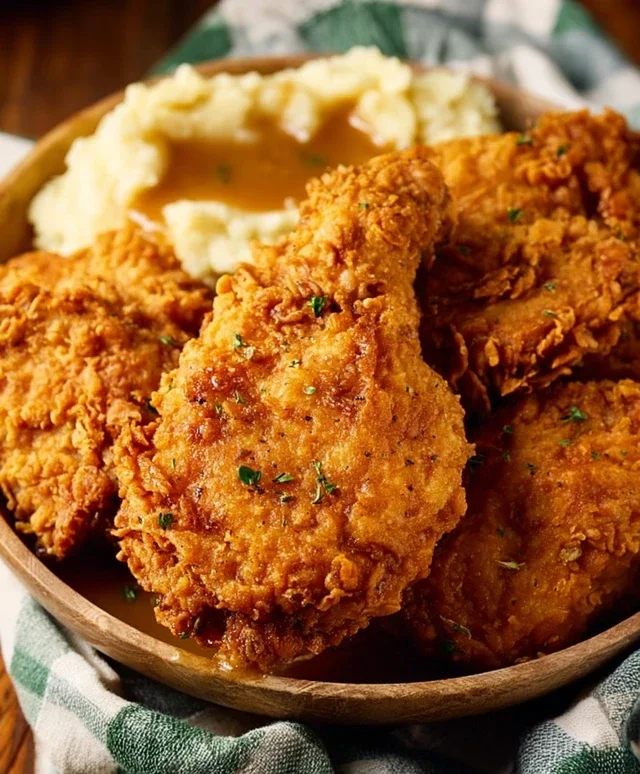
Country Fried Chicken
There’s something undeniably comforting and satisfying about a plate of perfectly cooked country fried chicken. The crispy, golden-brown crust giving way to tender, juicy chicken is a timeless classic that never disappoints. Forget the greasy diner versions; we’re going to create a masterpiece in your own kitchen. This recipe focuses on achieving that sought-after crunch and rich flavor that makes country fried chicken a true crowd-pleaser. It’s a bit of a process, but I promise, the result is well worth every step.
Ingredients:
Preparation and Coating
The secret to truly delicious country fried chicken starts with proper preparation and a well-seasoned coating. First, take your 4 boneless, skinless chicken breasts. You’ll want to trim any excess fat. For more even cooking and a better texture, I like to cut each breast in half horizontally, creating thinner cutlets. This also ensures more surface area for that glorious crispy coating. If your breasts are particularly thick, you can even pound them slightly to an even thickness, about ½ to ¾ inch. This helps prevent the outside from burning before the inside is cooked through.
Next, we prepare our dredgin extractg stations. In one medium bowl, whisk together the 2 large eggs until they are well combined and slightly frothy. In a separate large bowl or shallow dish, combine the 1 ½ cups all-purpose flour, ½ cup breadcrum extractbs, 2 ½ teaspoons seasoned salt, ¾ teaspoon paprika, ½ teaspoon cayenne pepper, and 1 ½ teaspoons black pepper. Whisk these dry ingredients together thoroughly to ensure the seasonings are evenly distributed. This is where the flavor really begin extracts!
Now, for the crucial wet coating. In a third bowl, pour your 2 cups of buttermilk. If you don’t have buttermilk on hand, you can easily make a substitute. Simply add 2 tablespoons of white vinegar or lemon juice to a measuring cup, then fill it up to the 2-cup mark with milk. Let it sit for about 5-10 minutes until it thickens slightly. This acidic liquid helps to tenderize the chicken and provides a fantastic base for the flour mixture to adhere to.
Take your prepared chicken pieces and first dip them into the buttermilk, ensuring each piece is fully coated. Let any excess drip off for a moment, then transfer the chicken to the seasoned flour mixture. Press the chicken firmly into the flour on all sides, making sure it’s completely covered. Shake off any excess flour, then dip the chicken back into the buttermilk for a second time, letting the excess drip off. Finally, dredge the chicken back into the seasoned flour mixture, pressing firmly again. This double-dipping method is key to achieving an extra crispy, thick crust. Place the coated chicken pieces on a wire rack set over a baking sheet. Allowing the coated chicken to rest for about 10-15 minutes before frying helps the coating adhere even better, reducing the chance of it flaking off in the hot oil.
Frying to Golden Perfection
Now comes the exciting part: frying! In a large, heavy-bottomed skillet or Dutch oven, heat 1 ½ cups of vegetable oil over medium-high heat. It’s important to use enough oil so that the chicken pieces are at least partially submerged. You want to test the oil temperature by dropping a tiny pinch of flour into it. If it sizzles immediately and floats to the surface, your oil is ready. If it burns or turns dark brown instantly, the oil is too hot. If it barely sizzles, it’s not hot enough. Aim for an oil temperature of around 350°F (175°C).
Carefully place 2-3 pieces of the coated chicken into the hot oil, being careful not to overcrowd the pan. Overcrowding will cause the oil temperature to drop too quickly, resulting in soggy chicken. Fry the chicken for about 6-8 minutes per side, or until it’s a deep golden brown and cooked through. The exact cooking time will depend on the thickness of your chicken pieces. You can test for doneness by inserting a meat thermometer into the thickest part of a piece; it should register 165°F (74°C).
Using tongs, carefully remove the fried chicken from the skillet and place it on a clean wire rack set over a baking sheet. This allows the excess oil to drain away, keeping the crust wonderfully crisp. If you’re cooking the remaining chicken pieces, allow the oil temperature to return to 350°F (175°C) before adding the next batch. You might need to adjust the heat slightly during the frying process to maintain the correct temperature.
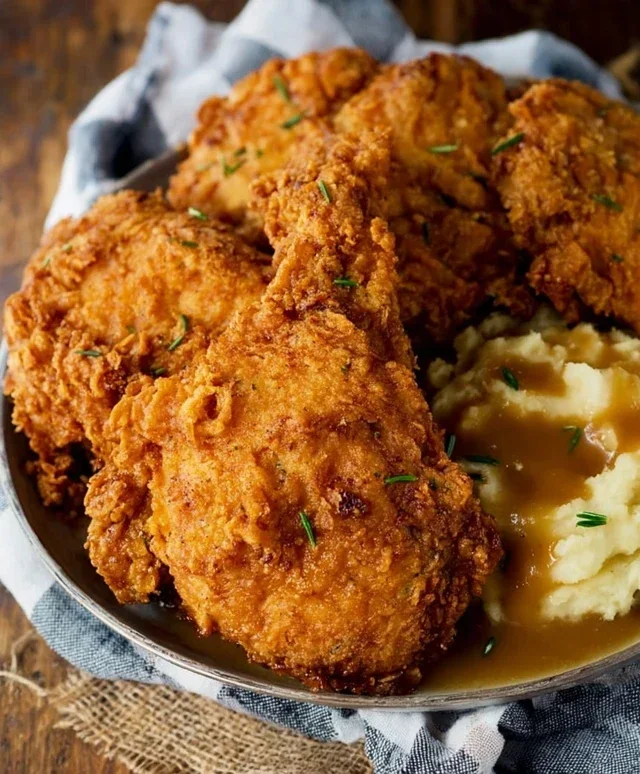
Once all your chicken is fried to perfection, you can lightly sprinkle it with a little extra seasoned salt or black pepper if you like. Serve your delicious country fried chicken hot with your favorite sides, such as mashed potatoes, gravy, or a fresh green salad. Enjoy the fruits of your labor – a truly satisfying and flavorful meal!
Conclusion:
There you have it – the ultimate guide to crafting delicious, crispy, and incredibly flavorful Country Fried Chicken right in your own kitchen! This recipe truly delivers that comforting, homestyle taste we all crave. The secret lies in the perfect brine, a seasoned flour dredge that creates an irresistible crunch, and the ideal frying temperature for that golden-brown perfection. I love serving this up with creamy mashed potatoes, a side of collard greens, and maybe some warm biscuits for a truly decadent meal. Don’t be afraid to get creative with your seasoning blends – consider adding a pinch of smoked paprika or a dash of cayenne for a little kick. I truly encourage you to give this recipe a try; it’s a guaranteed crowd-pleaser and a fantastic way to bring a taste of classic Southern comfort food to your table. Get ready for some serious compliments!
Frequently Asked Questions:
What is the best oil for frying Country Fried Chicken?
For authentic Country Fried Chicken, a neutral-flavored oil with a high smoke point is ideal. Vegetable oil, canola oil, or peanut oil are excellent choices. They allow the chicken to fry to a beautiful golden-brown without imparting any unwanted flavors and can withstand the higher temperatures needed for perfect crispiness.
Can I make this ahead of time?
While the absolute best flavor and texture come from frying it fresh, you can prepare some components in advance. You can brine the chicken up to 24 hours ahead of time. The flour dredge can also be mixed and stored in an airtight container. However, it’s best to dredge and fry the chicken just before serving to ensure maximum crispiness.
What makes the chicken so moist and flavorful?
The key to incredibly moist and flavorful Country Fried Chicken is a combination of brining and proper cooking. Brining the chicken in a seasoned liquid (often buttermilk-based for this recipe) helps to tenderize the meat and infuse it with moisture and flavor. Frying at the correct temperature also ensures that the chicken cooks through without drying out, resulting in that perfect balance of crispy exterior and juicy interior.
Country Fried Chicken
A classic and comforting country-style fried chicken recipe, featuring crispy, golden-brown chicken coated in a seasoned flour and breadcrumb mixture.
Ingredients
-
4 boneless skinless chicken breasts
-
1 ½ cups vegetable oil
-
2 cups buttermilk
-
2 large eggs (whisked)
-
3 teaspoons salt
-
1 ½ cup all-purpose flour
-
½ cup breadcrumbs
-
2 ½ teaspoons seasoned salt
-
¾ teaspoon paprika
-
½ teaspoon cayenne pepper
-
1 ½ teaspoon black pepper
Instructions
-
Step 1
Prepare the chicken: Cut each chicken breast into two or three pieces, depending on desired serving size. Set aside. -
Step 2
Set up dredging stations: In one shallow dish, whisk together the buttermilk and eggs. In another shallow dish, combine the all-purpose flour, breadcrumbs, salt, seasoned salt, paprika, cayenne pepper, and black pepper. Mix well. -
Step 3
Coat the chicken: Dip each piece of chicken into the buttermilk mixture, ensuring it’s fully coated. Then, dredge it in the flour mixture, pressing gently to adhere. Repeat the process for each piece of chicken. -
Step 4
Heat the oil: In a large, heavy-bottomed skillet or Dutch oven, heat the vegetable oil over medium-high heat until it reaches about 350°F (175°C). -
Step 5
Fry the chicken: Carefully place the coated chicken pieces into the hot oil, being careful not to overcrowd the pan. Fry for about 6-8 minutes per side, or until golden brown and cooked through. The internal temperature should reach 165°F (74°C). -
Step 6
Drain and serve: Remove the fried chicken from the skillet and place on a wire rack set over a baking sheet to drain off excess oil. Serve hot.
Important Information
Nutrition Facts (Per Serving)
It is important to consider this information as approximate and not to use it as definitive health advice.
Allergy Information
Please check ingredients for potential allergens and consult a health professional if in doubt.