Creamy Peaches and Cream Pie Recipe-Easy & Delicious
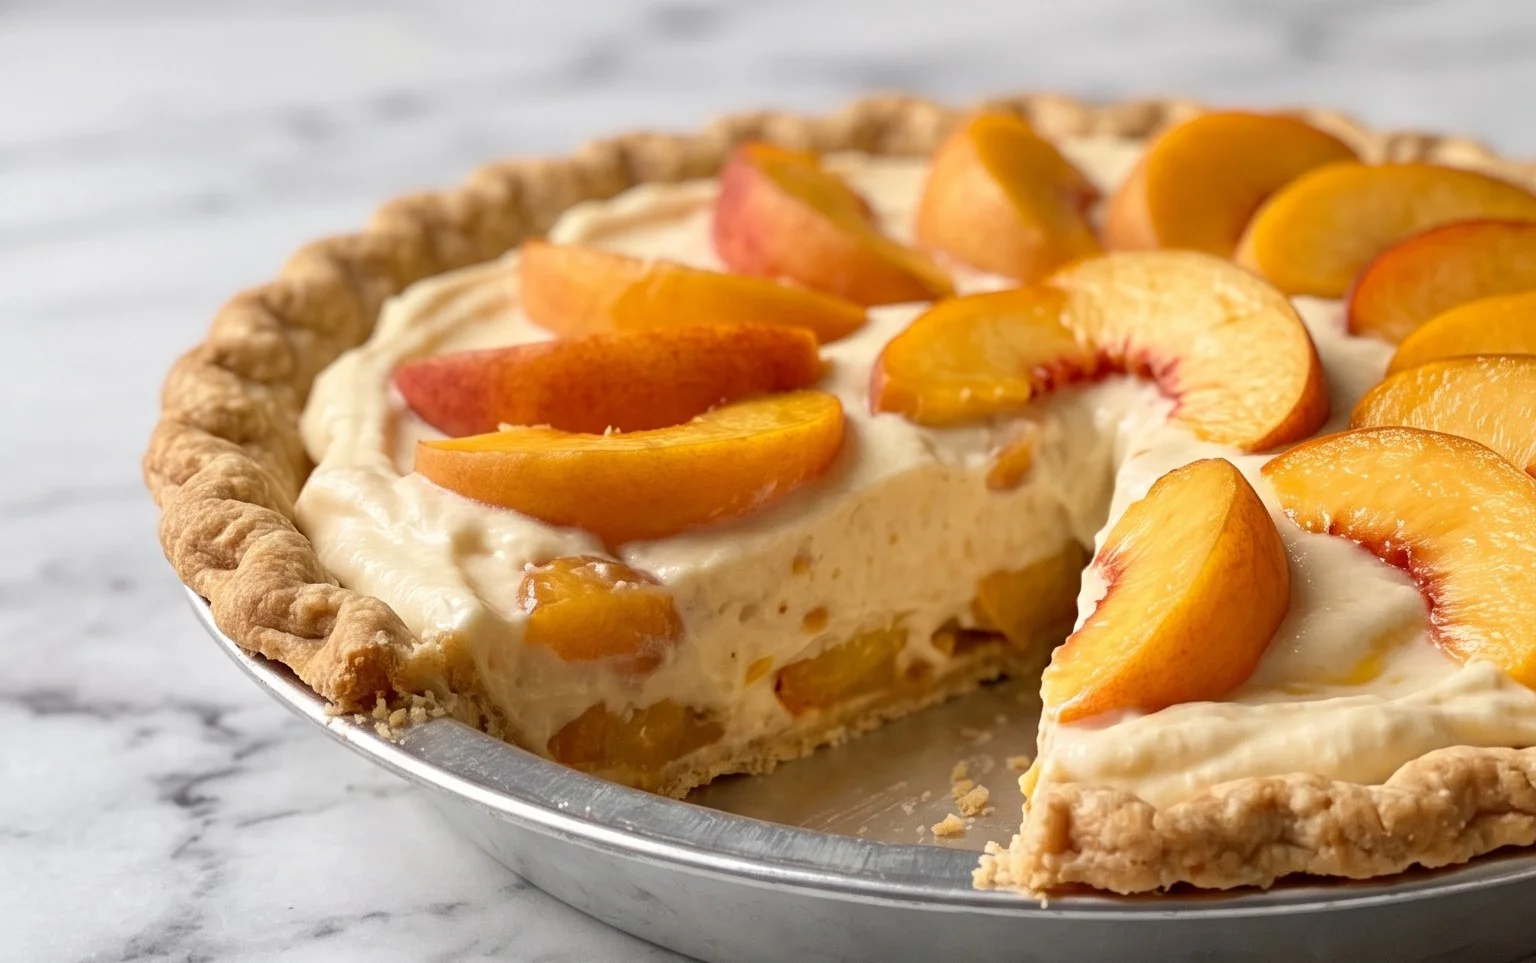
Peaches and Cream Pie is a quintessential taste of summer, a dessert that whispers of sun-drenched orchards and lazy afternoons. There’s something undeniably magical about the combination of sweet, juicy peaches and luscious, velvety cream, isn’t there? It’s a dessert that evokes nostalgia, bringin extractg back memories of childhood picnics and family gatherings. What makes this Peaches and Cream Pie so incredibly special is its harmonious balance of textures and flavors. The slight tartness of ripe peaches cuts through the rich, creamy filling, all nestled within a buttery, flaky crust. It’s a simple yet elegant creation that celebrates the natural bounty of the season. Imagin extracte biting into that tender crust, followed by the burst of warm, sweet peaches, and then the cool, smooth embrace of the cream. Pure bliss, I tell you!
Peaches and Cream Pie
There are some desserts that just scream comfort and nostalgia, and for me, Peaches and Cream Pie is undeniably one of them. The sweet, juicy burst of peaches, married with the smooth, creamy filling, all nestled in a tender, buttery crust… it’s pure bliss. This pie is surprisingly easy to make, making it a fantastic option for both seasoned bakers and those just starting out. The combination of a light, cake-like base, a layer of luscious peaches, and a rich cream cheese topping creates a delightful texture and flavor profile that will have everyone asking for seconds. Let’s get baking!
Ingredients:
Cooking Instructions:
This recipe is wonderfully straightforward, broken down into three distinct, delicious layers. We’ll start by creating a tender, slightly cakey base that holds everything together beautifully.
Preparing the Base Layer:
First things first, preheat your oven to 350 degrees Fahrenheit (175 degrees Celsius). Lightly grease a 9-inch pie plate. In a medium bowl, whisk together the all-purpose flour, salt, baking powder, and the entire package of non-instant vanilla pudding mix. This dry mixture is key to getting that unique texture in our base. Now, add the softened butter to this dry mixture. You can use a pastry blender, a fork, or even your fingertips to cut the butter into the dry ingredients until the mixture resembles coarse crum extractbs. It’s important that the butter is softened, not melted, for this to work best. Next, in a separate small bowl, whisk together the egg and the milk until they’re well combined. Pour this wet mixture into the dry ingredients and stir just until everything is moistened and combined. Be careful not to overmix at this stage; a few small lumps are perfectly fine. Spread this batter evenly into the prepared pie plate, pressing it gently to form an even base. This will be our bottom crust and part of the filling all in one!
Adding the Peach Layer:
Now for the star of the show – the peaches! If you’re using canned peaches, drain them thoroughly, making sure to reserve that sweet, flavorful juice for the topping. If you’re opting for fresh peaches, peel them, pit them, and slice them into about 1/4-inch thick pieces. You’ll want roughly 3 cups of sliced or cubed peaches to get a good, generous layer. Arrange the drained sliced peaches evenly over the batter in the pie plate. Try to distribute them as evenly as possible so you get a lovely peach presence in every slice.
Creating the Cream Cheese Topping:
In a medium bowl, beat the softened cream cheese and granulated sugar together until the mixture is smooth and creamy. Again, ensure your cream cheese is properly softened for the best results – this will prevent any lumps. This is where that reserved peach juice comes in! Gradually beat in the 3 tablespoons of reserved peach juice until the mixture is smooth and well combined. It should have a lovely, slightly tangy sweetness. Gently spoon or spread this cream cheese mixture evenly over the layer of peaches. This topping will bake into a wonderfully rich and tangy counterpoint to the sweet peaches and the cakey base.
Baking the Pie:
Carefully place the pie in your preheated oven. Bake for approximately 35 to 45 minutes, or until the edges of the crust are golden brown and the center is set. You can test for doneness by gently inserting a toothpick near the center; it should come out mostly clean. The cream cheese topping might puff up slightly and develop a few golden spots, which is perfectly normal and delicious.
Cooling and Serving:
Once baked, remove the pie from the oven and let it cool completely on a wire rack. This cooling process is crucial. As the pie cools, the filling will set up properly, ensuring clean slices. It might take a couple of hours, but the patience is absolutely worth it! Once it has cooled to room temperature, you can then refrigerate it for at least another hour to fully chill. Serve this Peaches and Cream Pie chilled, perhaps with a dollop of whipped cream or a scoop of vanilla ice cream for an extra decadent treat. The textures and flavors are truly divine, a perfect balance of sweet, creamy, and fruity goodness. Enjoy every bite!

Conclusion:
There you have it – a truly delightful Peaches and Cream Pie that’s surprisingly simple to make and utterly irresistible! This recipe is a winner because it perfectly balances the sweet, juicy burst of fresh peaches with the luscious, velvety cream filling, all nestled within a buttery, flaky crust. It’s the epitome of summer comfort food and a guaranteed crowd-pleaser for any occasion, from casual backyard barbecues to more elegant gatherings.
I love serving this pie slightly chilled, allowing the creamy filling to set beautifully while the peaches retain a delightful freshness. It’s fantastic on its own, but for an extra touch of indulgence, a dollop of freshly whipped cream or a scoop of vanilla bean ice cream takes it to another level.
Don’t be afraid to get creative with variations! If you’re a fan of a little warmth, a pinch of cinnamon or nutmeg added to the peach filling can be wonderful. For a touch of tang, a tablespoon of lemon zest mixed in with the peaches will brighten the flavors. And if you don’t have fresh peaches, frozen (thawed and drained) or even good-quality canned peaches can work in a pinch, though fresh is always best for that peak summer flavor. I wholeheartedly encourage you to give this Peaches and Cream Pie a try. It’s a taste of sunshine in every slice!
Frequently Asked Questions about Peaches and Cream Pie:
Can I make this pie ahead of time?
Absolutely! This Peaches and Cream Pie is a great make-ahead dessert. You can prepare it a day in advance. Store it covered in the refrigerator. The flavors often meld even more beautifully overnight!
What kind of crust is best for this pie?
While the recipe assumes a standard pastry crust, you could also experiment with a grabeef ham cracker crust or a shortbread crust for a different textural element. A blind-baked crust will help prevent a soggy bottom, especially with the juicy peaches.
My peaches seem watery. How can I prevent a soggy pie?
To avoid a soggy bottom with your Peaches and Cream Pie, ensure your peaches are well-drained if using frozen or canned. For fresh peaches, you can lightly toss them with a tablespoon of cornstarch or flour before adding them to the pie. This will help absorb any excess moisture during baking.
Peaches and Cream Pie
A delightful and easy no-bake pie featuring a buttery crust, creamy peach filling, and a luscious cream cheese layer.
Ingredients
-
3/4 cup all purpose flour
-
1/2 teaspoon salt
-
1 teaspoon baking powder
-
1 (3 ounce) package non-instant vanilla pudding mix
-
3 Tablespoons butter, softened
-
1 egg
-
1/2 cup milk
-
1 (28 ounce) can sliced peaches, drained
-
1 (8 ounce) package cream cheese, softened
-
1/2 cup granulated sugar
-
3 Tablespoons reserved peach juice
Instructions
-
Step 1
Preheat oven to 375°F (190°C). In a medium bowl, whisk together flour, salt, and baking powder. -
Step 2
Add the vanilla pudding mix and softened butter. Mix until crumbly. -
Step 3
In a separate small bowl, whisk together the egg and milk. Add this wet mixture to the dry ingredients and stir until just combined. The batter will be thick. -
Step 4
Press the batter evenly into the bottom and up the sides of a 9-inch pie plate. Bake for 12-15 minutes, or until lightly golden. Let cool completely. -
Step 5
While the crust cools, prepare the filling. In a large bowl, beat the softened cream cheese and granulated sugar until smooth. -
Step 6
Stir in the reserved peach juice until well combined. -
Step 7
Gently fold in the drained sliced peaches. Spoon this mixture evenly into the cooled pie crust. -
Step 8
Chill the pie for at least 2-3 hours, or until firm, before slicing and serving.
Important Information
Nutrition Facts (Per Serving)
It is important to consider this information as approximate and not to use it as definitive health advice.
Allergy Information
Please check ingredients for potential allergens and consult a health professional if in doubt.