Easy Buster Bar Ice Cream Dessert Recipe-Homemade Treat
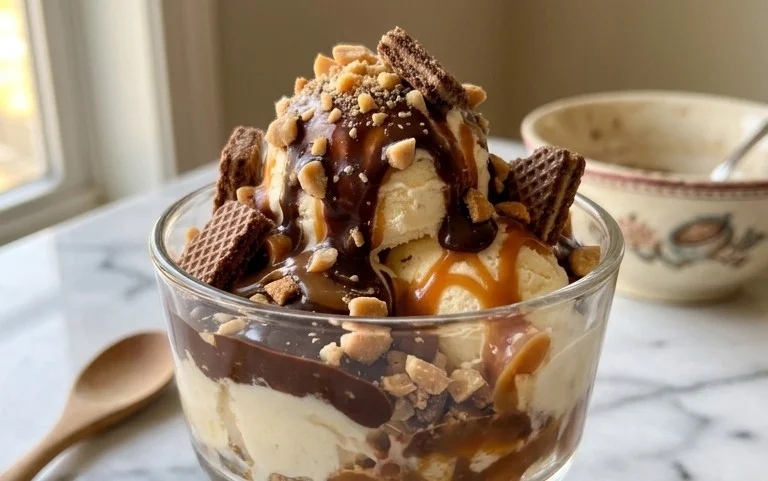
Buster Bar Ice Cream Dessert holds a special place in many hearts, mine included! If you’ve ever craved that perfect combination of creamy, chocolatey, and slightly nutty goodness, you’re in for a treat. This iconic dessert, often reminiscent of a childhood favorite candy bar, is more than just ice cream; it’s an experience. What makes the Buster Bar Ice Cream Dessert so beloved? It’s the masterful balance of textures and flavors – the cool, smooth ice cream enveloped in a rich chocolate shell, studded with those irresistible crunchy peanuts. It’s simple enough to whip up at home, yet feels incredibly indulgent and celebratory. Get ready to recreate this classic, or perhaps discover your new favorite go-to dessert. We’re going to dive deep into making a truly spectacular Buster Bar Ice Cream Dessert that will have everyone asking for seconds!
Buster Bar Ice Cream Dessert
Ah, the Buster Bar! For those who remember this iconic frozen treat, or for those who are about to discover its magic, this homemade version is going to be an absolute revelation. It captures all the nostalgic goodness of the origin extractal – that perfect combination of crunchy chocolate, creamy ice cream, and salty peanuts – but with the added satisfaction of making it yourself. This dessert is a guaranteed crowd-pleaser, perfect for birthdays, summer gatherings, or just a special treat to brighten any day. Don’t be intimidated by the ingredient list; we’re going to break it down step-by-step to create something truly delicious. Get ready to impress yourself and everyone lucky enough to snag a bite!
Ingredients:
Preparing the Base
The foundation of our Buster Bar dessert starts with a delicious, no-bake crust. This isn’t just any crum extractb crust; it’s a rich and chocolatey blend that sets the stage for all the delicious layers to come.
1. First things first, let’s get our Oreo cookies ready. For this recipe, you’ll want to crush the entire 14.3 oz package of Oreo cookies. You can do this by placing them in a sturdy zip-top bag and using a rolling pin to smash them into fine crum extractbs. Alternatively, a food processor will make quick work of this task. The goal is to have a fine, sand-like texture with no large chunks remaining. Once crushed, transfer these glorious chocolatey crum extractbs to a medium-sized bowl.
2. Next, we’ll melt our butter. Measure out 1/2 cup of butter and place it in a microwave-safe bowl or a small saucepan. Melt it gently until it’s completely liquid. Be careful not to overheat it, as we just want it melted, not browned.
3. Pour the melted butter over the crushed Oreo crum extractbs. Using a fork or a spatula, stir everything together until the crum extractbs are evenly moistened. The mixture should resemble wet sand and hold together when squeezed.
4. Now, let’s assemble our crust. You’ll need a 9×13 inch baking dish. Press the Oreo crum extractb mixture firmly and evenly into the bottom of the baking dish. It’s important to get a good, compact layer so that your crust holds its shape. You can use the back of a spoon or the bottom of a measuring cup to help press it down. Once pressed, place the baking dish in the freezer for about 15-20 minutes to firm up while we prepare the next layer. This chilling step is crucial for a solid base.
Building the Layers
With our chocolatey base chilling, it’s time to introduce the creamy, dreamy vanilla ice cream and those irresistible peanuts.
1. Take your softened vanilla ice cream out of the freezer. It should be soft enough to stir but not completely melted into a liquid. If it’s still too hard, let it sit at room temperature for another 10-15 minutes, checking it periodically.
2. Gently spread the softened vanilla ice cream evenly over the chilled Oreo crust. Try to get it as smooth as possible, creating a uniform layer. Use an offset spatula or the back of a spoon to achieve this.
3. Now for the peanuts! We’ll be using a whole pound of Spanish peanuts. These add a wonderful salty crunch that perfectly contrasts with the sweet ice cream and chocolate. Sprinkle the Spanish peanuts generously and evenly over the layer of vanilla ice cream. Make sure they’re distributed throughout the entire surface.
4. Once the peanuts are in place, gently press them down into the ice cream with your hands or the back of a spatula. This helps them adhere to the ice cream and prevents them from falling off when you slice the dessert.
Crafting the Chocolatey Shell
This is where the magic truly happens – creating that signature crunchy chocolate coating that makes the Buster Bar so iconic. This part requires a little bit of stovetop work, but it’s straightforward and oh-so-worth-it.
1. In a medium, heavy-bottomed saucepan, combine the semi-sweet chocolate chips, 1/2 cup of butter, and the 12 oz of evaporated milk. Place the saucepan over low to medium-low heat.
2. Stir the mixture constantly as it heats. The butter will melt, and the chocolate chips will begin extract to soften and melt into the milk. It’s important to use low heat to prevent the chocolate from scorching. Keep stirring until you have a smooth, glossy, and completely melted chocolate sauce. The consistency should be pourable but thick enough to coat the back of a spoon.
3. Once the chocolate mixture is smooth, remove it from the heat. Now, here’s a tip for achieving that perfect shell: let the chocolate mixture sit for a few minutes, stirring occasionally, until it has cooled slightly. It should still be warm and pourable, but not piping hot. This prevents it from melting the ice cream too quickly when you pour it.
4. Retrieve your dessert from the freezer. Carefully and slowly pour the slightly cooled chocolate mixture over the entire top of the peanut-covered ice cream layer. Try to get an even coating across the entire surface, ensuring all the peanuts are covered. You can tilt the baking dish gently to help the chocolate spread into all the nooks and crannies.
The Final Chill and Serving
The final steps are all about letting the flavors meld and the chocolate shell set. Patience is key here!
1. Once the chocolate has been poured, return the entire baking dish to the freezer. It needs to freeze until the chocolate shell is completely firm and set. This typically takes at least 4-6 hours, but overnight is even better. The longer it freezes, the firmer the chocolate will be, which will give you that satisfying crack when you cut into it.
2. To serve, let the dessert sit at room temperature for about 5-10 minutes before cutting. This will make it easier to slice without breaking the chocolate shell. Use a sharp knife dipped in hot water and wiped dry for cleaner cuts. You can then cut it into squares or bars, just like the origin extractal Buster Bar.
Enjoy this homemade Buster Bar Ice Cream Dessert! It’s a labor of love, but the taste of nostalgia and pure deliciousness will make every single step worthwhile.
Conclusion:
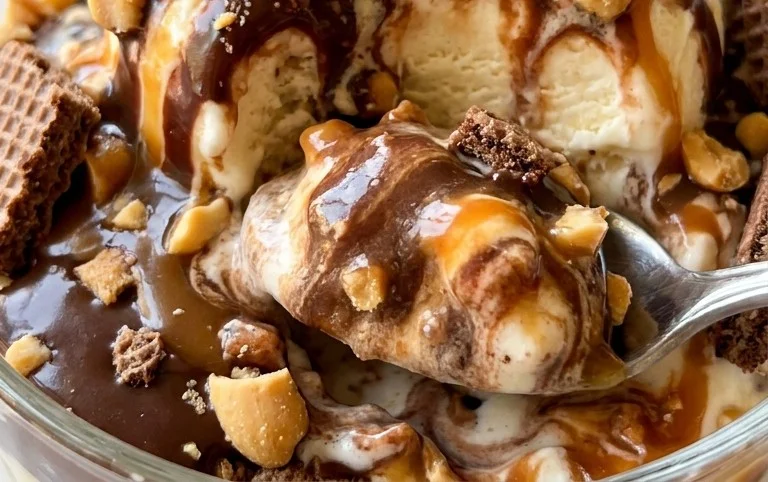
There you have it – a simple yet incredibly satisfying way to recreate the beloved Buster Bar Ice Cream Dessert at home! This recipe is a true winner because it captures that perfect balance of creamy ice cream, crunchy peanuts, and a rich chocolatey shell, all without the fuss of a complicated ice cream maker. It’s the ideal treat for warm weather gatherings, a special weekend indulgence, or whenever that craving for a classic Buster Bar strikes.
I love serving these individual desserts directly from the freezer, perhaps with a sprinkle of extra chopped peanuts or a drizzle of chocolate sauce for an added touch of decadence. For variations, don’t be afraid to experiment! You could try different ice cream flavors like strawberry or mint chocolate chip, or even swap out the peanuts for chopped almonds or pecans. The possibilities are endless, and each version promises to be a delightful experience.
I genuinely encourage you to give this Buster Bar Ice Cream Dessert recipe a try. It’s a fun project that yields fantastic results, and you’ll be so proud of your homemade creation. Get ready to impress your friends and family, or simply treat yourself to a taste of pure bliss.
Frequently Asked Questions:
Can I make these ahead of time?
Absolutely! These Buster Bars are perfect for making ahead. Once they’re fully frozen, you can wrap them individually in plastic wrap and then store them in an airtight container in your freezer for up to a couple of weeks. This makes them super convenient for last-minute dessert needs!
What’s the best way to get a smooth chocolate shell?
To achieve a smooth and crackly chocolate shell, ensure your melted chocolate is combined with a bit of coconut oil or a neutral vegetable oil. This helps thin the chocolate slightly, making it easier to coat the frozen ice cream evenly and allowing it to harden with a satisfying snap rather than a thick, clumpy coating.
Buster Bar Ice Cream Dessert
A delightful no-bake ice cream dessert layered with crushed Oreos, creamy vanilla ice cream, crunchy peanuts, and a rich chocolate topping.
Ingredients
-
1 14.3 oz pkg. of Oreo cookies, crushed
-
1/2 C butter, melted
-
1/2 gal. vanilla ice cream, softened
-
1 lb. Spanish peanuts
-
2 C powdered confectioner’s sugar
-
12 oz semi sweet chocolate chips
-
1/2 C butter
-
12 oz evaporated milk
Instructions
-
Step 1
Combine crushed Oreo cookies and 1/2 C melted butter. Press into the bottom of a 9×13 inch pan. -
Step 2
Spread softened vanilla ice cream evenly over the cookie crust. -
Step 3
Sprinkle Spanish peanuts over the ice cream layer. -
Step 4
In a saucepan, melt 1/2 C butter with semi sweet chocolate chips and evaporated milk. Stir until smooth. -
Step 5
Whisk in the powdered confectioner’s sugar until fully incorporated and smooth. -
Step 6
Pour the chocolate mixture over the peanuts and ice cream. Freeze for at least 4 hours until firm.
Important Information
Nutrition Facts (Per Serving)
It is important to consider this information as approximate and not to use it as definitive health advice.
Allergy Information
Please check ingredients for potential allergens and consult a health professional if in doubt.