Easy Homemade Dinner Rolls-So Soft & Delicious
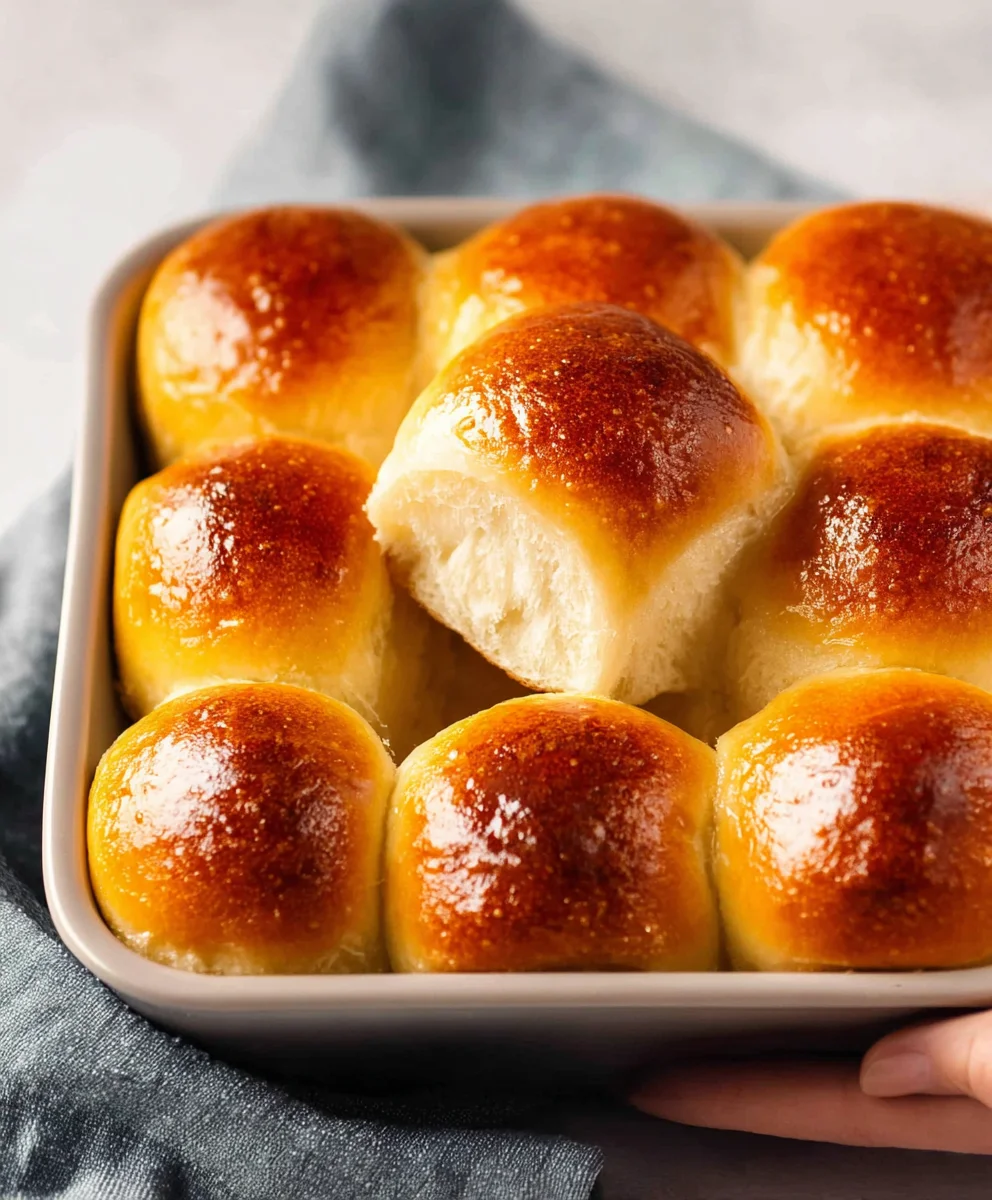
Easy Homemade Dinner Rolls are more than just a side dish; they’re a warm embrace on a plate, a comforting whisper that transforms any meal into something truly special. Imagin extracte pulling a batch of these golden beauties from your oven, the air filled with the irresistible aroma of freshly baked bread. There’s an inherent magic in creating something so wonderfully satisfying from scratch, and these Easy Homemade Dinner Rolls deliver that magic with surprising simplicity. We all love them because they offer that perfect pillowy-soft texture and a delicate, slightly sweet flavor that pairs beautifully with everything from a hearty stew to a light salad. What truly sets these rolls apart is their approachable nature; they don’t require advanced baking skills, making them accessible to everyone looking to elevate their weeknight dinners or impress guests with minimal fuss. Get ready to discover how truly delightful Easy Homemade Dinner Rolls can be.
Ingredients:
- 1 envelope active dry yeast
- 1/2 cup warm water (around 105-115°F or 40-46°C)
- 1 cup milk (whole milk or 2% is best for richness)
- 4 tablespoons unsalted butter, melted
- 2 tablespoons granulated sugar
- 4 cups all-purpose flour, plus more for dusting
- 1/2 tablespoon salt
- 1 large egg, beaten (for egg wash)
- Melted unsalted butter, for brushing on warm rolls
Preparing the Dough
Step 1: Activate the Yeast
First, we need to wake up our yeast. In a large mixing bowl, or the bowl of your stand mixer, combine the 1/2 cup of warm water with the 2 tablespoons of sugar. Sprinkle the 1 envelope of active dry yeast over the top. Give it a gentle stir to ensure the yeast is mostly submerged. Now, let this mixture sit undisturbed for about 5 to 10 minutes. You’ll know the yeast is alive and ready when it becomes foamy and bubbly on the surface, almost like a frothy cappuccino. If you don’t see any activity, your yeast might be old or the water wasn’t the right temperature, and you’ll need to start with fresh yeast.
Step 2: Combine Wet Ingredients and Start Mixing
Once the yeast is bubbly, it’s time to add the other wet ingredients. Pour in the 1 cup of milk and the 4 tablespoons of melted butter. If you’re using a stand mixer, attach the dough hook. If you’re mixing by hand, have a sturdy spoon or spatula ready. Add about half of the flour (2 cups) and the 1/2 tablespoon of salt to the bowl. Begin extract mixing on low speed, or stirring with your spoon, until the ingredients are just combined and a shaggy dough starts to form. This initial mixing helps develop the gluten structure gently.
Step 3: Developing the Dough and Adding More Flour
Continue to gradually add the remaining 2 cups of all-purpose flour to the mixture, about 1/2 cup at a time. Mix or knead until the dough starts to pull away from the sides of the bowl. It should be slightly sticky but manageable. If you’re using a stand mixer, increase the speed to medium-low and knead for about 5-7 minutes. If you’re kneading by hand on a lightly floured surface, this will take a bit longer, around 8-10 minutes. The dough should become smooth, elastic, and less sticky. You should be able to stretch a small piece of the dough thinly without it tearing. If the dough is too sticky, add a tablespoon of flour at a time until it’s no longer sticking excessively to your hands or the bowl.
Proofing and Shaping the Rolls
Step 4: First Rise (Bulk Fermentation)
Lightly grease a clean large bowl with a little oil or cooking spray. Place the kneaded dough into the prepared bowl, turning it once to coat the surface with oil. This prevents a dry skin from forming. Cover the bowl tightly with plastic wrap or a clean kitchen towel. Find a warm, draft-free spot for the dough to rise. This could be a slightly warmed oven (turned off, of course!), or just a sunny spot in your kitchen. Let the dough rise for about 1 to 1.5 hours, or until it has doubled in size. The time can vary depending on the room temperature.
Step 5: Punching Down and Shaping
Once the dough has doubled in size, gently punch it down to release the air. Transfer the dough to a lightly floured surface. You can divide the dough into 12 equal portions for standard-sized rolls, or 16 smaller ones. To shape, take each portion and gently flatten it into a rough circle. Then, pull the edges of the circle into the center to create a taut ball. Pinch the seam closed. Alternatively, for a classic roll shape, you can flatten each piece into a small disc, then roll it up tightly like a jelly roll, pinching the seam at the end. Arrange the shaped rolls, seam-side down, in a greased 9×13 inch baking pan, leaving about 1 inch of space between them to allow for expansion.
Second Rise and Baking
Step 6: Second Rise and Egg Wash
Cover the pan loosely with plastic wrap or a clean kitchen towel and let the shaped rolls rise again in a warm place for another 30-45 minutes, or until they look puffy and have nearly doubled in size again. While the rolls are having their second rise, preheat your oven to 375°F (190°C). Once the rolls are puffy and the oven is preheated, prepare the egg wash. In a small bowl, beat the 1 egg with a tablespoon of water or milk. Gently brush this egg wash over the tops of the rolls. This will give them a beautiful golden-brown sheen when baked.
Step 7: Baking and Finishing
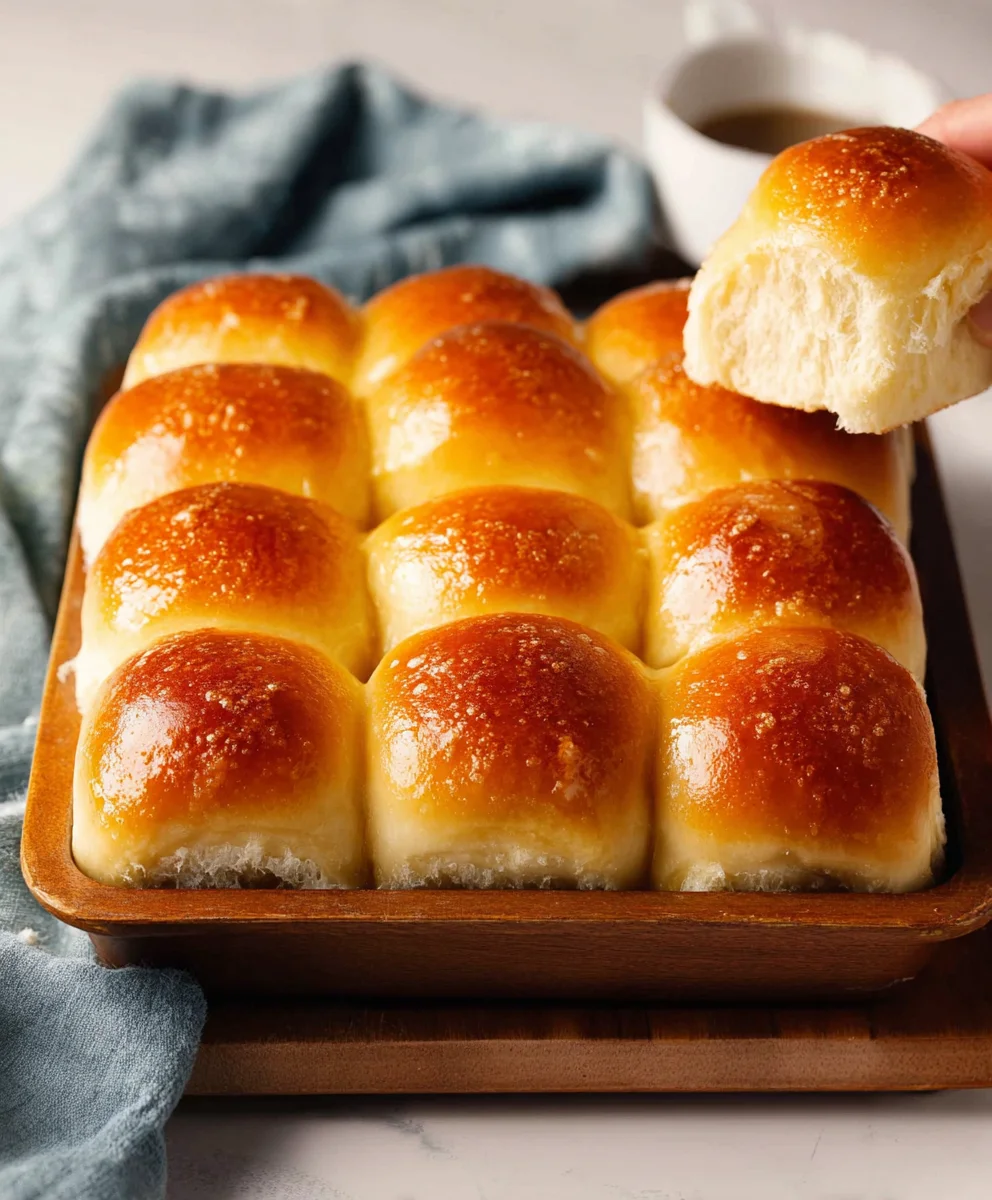
Bake the rolls in the preheated oven for 15-20 minutes, or until they are golden brown on top and sound hollow when tapped on the bottom. The exact baking time will depend on your oven. Keep an eye on them to prevent over-browning. As soon as the rolls come out of the oven, while they are still piping hot, brush the tops generously with the melted butter. This step is crucial for achieving that signature soft, buttery crust. Let the rolls cool in the pan for a few minutes before transferring them to a wire rack. These are best served warm, straight from the oven!
Conclusion:
There you have it! Our guide to making the most delicious Easy Homemade Dinner Rolls. We’ve walked through each simple step, from activating the yeast to achieving that perfect golden-brown crust. These rolls are incredibly versatile and are sure to impress your family and friends. Don’t be intimidated by baking bread; this recipe is designed for success, even for begin extractners. The aroma that fills your kitchen as these bake is simply wonderful, and the taste of freshly baked, warm rolls is unparalleled.
For serving suggestions, these Easy Homemade Dinner Rolls are a perfect accompaniment to almost any meal. They’re fantastic alongside hearty stews, comforting pasta dishes, or a simple roasted chicken. You can also get creative with variations! Consider adding a sprinkle of sesame seeds or poppy seeds to the tops before baking for extra flavor and visual appeal. For a richer taste, try brushing the tops with melted garlic butter right after they come out of the oven. Experiment with different flours, like adding a quarter cup of whole wheat flour for a nuttier flavor profile. We encourage you to give this recipe a try and experience the joy of baking your own bread. Happy baking!
Frequently Asked Questions about Easy Homemade Dinner Rolls:
Q1: Can I make the dough for these Easy Homemade Dinner Rolls ahead of time?
Yes, you absolutely can! Once the dough has risen for the first time, you can punch it down, wrap it tightly in plastic wrap or place it in an airtight container, and refrigerate it for up to 24 hours. This slow fermentation can actually deepen the flavor of your Easy Homemade Dinner Rolls. When you’re ready to bake, simply take the dough out of the refrigerator, let it come to room temperature for about 30-60 minutes, and then proceed with shaping and the second rise as per the recipe.
Q2: My Easy Homemade Dinner Rolls didn’t rise very much. What could be the reason?
There are a few common culprits for poor rising. First, ensure your yeast was fresh and properly activated. If the water you used was too hot or too cold, it could have killed the yeast or prevented it from activating. Also, make sure your dough had a warm, draft-free place to rise. In cooler environments, it might take longer. Finally, ensure you didn’t add too much flour, which can make the dough too dense for the yeast to lift effectively. A slightly sticky dough is often preferable for light and airy Easy Homemade Dinner Rolls.
Easy Homemade Dinner Rolls-So Soft & Delicious
Learn how to make incredibly soft and delicious homemade dinner rolls from scratch. Perfect for any meal, these rolls are easy to prepare and have a delightful texture.
Ingredients
-
1 envelope active dry yeast
-
1/2 cup warm water
-
1 cup milk
-
4 tablespoons unsalted butter, melted
-
2 tablespoons granulated sugar
-
4 cups all-purpose flour
-
1/2 tablespoon salt
-
1 large egg, beaten (for egg wash)
-
Melted unsalted butter, for brushing on warm rolls
Instructions
-
Step 1
Activate the yeast by combining warm water and sugar in a bowl. Sprinkle yeast over the top and let sit for 5-10 minutes until foamy. -
Step 2
Add milk and melted butter to the yeast mixture. Combine half of the flour and salt, and mix until a shaggy dough forms. -
Step 3
Gradually add the remaining flour, mixing or kneading until the dough is smooth, elastic, and slightly sticky. Knead for 5-7 minutes in a stand mixer or 8-10 minutes by hand. -
Step 4
Place the dough in a greased bowl, cover, and let rise in a warm place for 1 to 1.5 hours, or until doubled in size. -
Step 5
Punch down the dough, divide into 12-16 portions, and shape into balls or classic rolls. Arrange in a greased baking pan. -
Step 6
Cover and let the shaped rolls rise again for 30-45 minutes until puffy. Preheat oven to 375°F (190°C). Brush rolls with egg wash. -
Step 7
Bake for 15-20 minutes until golden brown. Immediately brush the hot rolls with melted butter.
Important Information
Nutrition Facts (Per Serving)
It is important to consider this information as approximate and not to use it as definitive health advice.
Allergy Information
Please check ingredients for potential allergens and consult a health professional if in doubt.