Crispy Baked Zucchini Chips- Easy & Delicious Snack
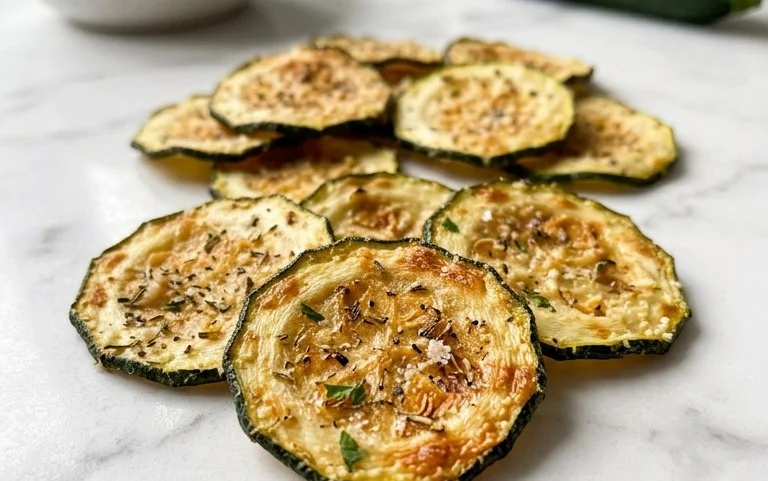
Crispy Baked Zucchini Chips are an absolute game-changer for your snack repertoire! If you’ve ever found yourself staring at a bounty of zucchini, wondering how to transform those garden gems into something truly irresistible, then you’ve come to the right place. Forget soggy, bland disappointments. These crispy baked zucchini chips are the answer to your healthy snacking prayers, delivering an intensely satisfying crunch with every bite. What’s not to love? They’re ridiculously easy to make, incredibly healthy, and they boast a flavor that’s both subtle and addictive. The magic lies in achieving that perfect crisp without a drop of oil, making them a guilt-free indulgence. Prepare to be amazed by how simple ingredients can create such a delightful treat that even the pickiest eaters will devour.
Crispy Baked Zucchini Chips
Are you looking for a delicious and healthy way to enjoy your zucchini bounty? Look no further! These Crispy Baked Zucchini Chips are a game-changer. Forget soggy, oil-drenched fried versions; this recipe delivers satisfying crunch with a fraction of the fat. They’re perfect as an appetizer, a healthy snack, or even a fun side dish. The best part? They’re incredibly easy to make, requiring just a few simple ingredients and a bit of patience in the oven. Get ready to transform your humble zucchini into a crave-worthy treat that even the pickiest eaters will love.
Ingredients:
Equipment You’ll Need:
Getting Started: Preparing Your Zucchini
The key to perfectly crispy zucchini chips lies in how you prepare the zucchini. First, wash your zucchini thoroughly. You can choose to peel them or leave the skin on; both options yield delicious results, though leaving the skin on can add a touch more color and texture. The most crucial step is slicing them thinly and evenly. For best results, I highly recommend using a mandoline slicer. This ensures consistent 1/8-inch thickness, which is vital for even cooking and crisping. If you don’t have a mandoline, a very sharp knife and a steady hand will work, but it will take more time and care. Aim for perfectly uniform rounds. Once sliced, you’ll notice the zucchini releases a lot of moisture. This is good! We want to draw out as much of that excess water as possible to achieve that delightful crispiness.
Drawing Out Moisture for Ultimate Crispiness
This step is non-negotiable if you want truly crispy zucchini chips. After slicing your zucchini into uniform rounds, place them in a large bowl. Sprinkle them generously with about 1/2 teaspoon of salt (not listed in the main ingredients, but a crucial step for drawing out moisture – you can adjust the main salt measurement accordingly). Gently toss the zucchini rounds to coat them with the salt. Let them sit for about 20-30 minutes. You’ll be amazed at how much liquid they release. After the resting period, you’ll see a puddle of water at the bottom of the bowl. This is exactly what we want! Now, take paper towels and carefully pat each zucchini slice dry. Press down gently but firmly to absorb as much moisture as possible. The drier the slices, the crispier your chips will be. This step might seem tedious, but it’s the secret weapon for achieving that perfect crunch.
Creating Your Flavorful Coating
While your zucchini is busy shedding its moisture, it’s time to prepare the irresistible coating. In a small bowl, combine the panko breadcrum extractbs, grated Parmesan cheese, and the 1/4 teaspoon of salt. Panko breadcrum extractbs are fantastic because their larger, irregular flakes create a superior crunch compared to regular breadcrum extractbs. The Parmesan cheese adds a savory, slightly nutty flavor that pairs beautifully with zucchini. Give this mixture a good stir to ensure the cheese and salt are evenly distributed throughout the breadcrum extractbs. This ensures every zucchini chip gets a consistent and delicious coating.
Now, in a separate larger bowl, or directly back into the bowl you used for drying if it’s clean and dry, add the 1.5 tablespoons of olive oil. You’ll then add your thoroughly dried zucchini slices to the bowl with the olive oil. Gently toss them to ensure each slice is lightly coated. This olive oil acts as a binder, helping the breadcrum extractb mixture adhere to the zucchini. Don’t go overboard with the oil; a light coating is all you need.
Baking to Golden Perfection
Preheat your oven to 400°F (200°C). This relatively high temperature is key to achieving a crispy texture quickly without overcooking the zucchini and making it mushy. Line two large baking sheets with parchment paper. Parchment paper prevents sticking and makes cleanup a breeze. If you have a wire rack that fits inside your baking sheets, I highly recommend placing it on top of the parchment paper. This allows air to circulate around the zucchini slices, promoting even crisping on both sides.
Now, take your lightly oiled zucchini slices and place them, one by one, into the breadcrum extractb and Parmesan mixture. Gently press each side of the zucchini slice into the coating, ensuring it’s well-covered. Don’t overcrowd the bowl; work in batches if necessary. Once coated, arrange the zucchini chips in a single layer on the prepared baking sheets. Make sure there’s a little space between each chip. Overlapping them will cause them to steam instead of crisping.
The Baking Process and Achieving Peak Crispiness
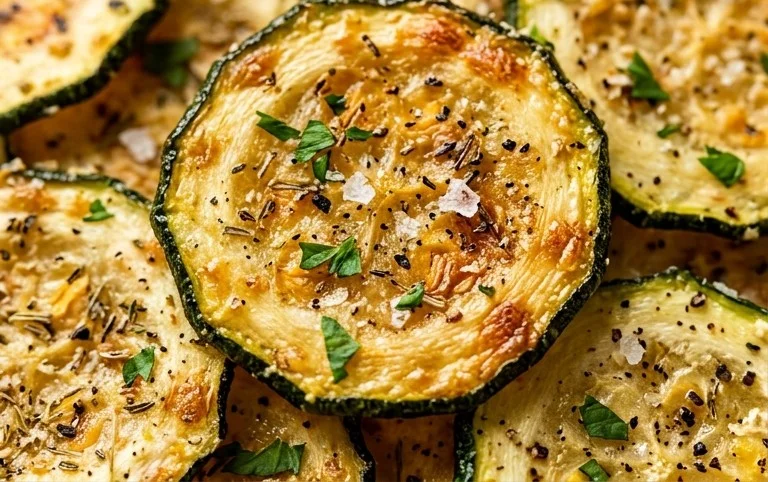
Place the baking sheets in the preheated oven. Bake for 10-15 minutes. At this point, carefully flip each zucchini chip. You’ll likely see they’ve started to brown and crisp up. Flipping them ensures that both sides get equally golden and crunchy. Continue baking for another 5-10 minutes, or until the edges are golden brown and the chips are firm and crispy to the touch. Keep a close eye on them during this second baking phase, as they can go from perfectly crisp to burnt very quickly due to their thinness. The exact baking time will depend on your oven and the thickness of your zucchini slices. The goal is a delightful crunch that makes you want to reach for another chip.
Once they’ve reached your desired level of crispiness, remove the baking sheets from the oven. Let the zucchini chips cool on the baking sheets for a few minutes before transferring them to a wire rack to cool completely. They will continue to crisp up as they cool. Serve them warm or at room temperature. These are best enjoyed the same day they are made, as they will lose some of their crispness over time.
Enjoy your homemade Crispy Baked Zucchini Chips with a side of Greek yogurt ranch for dipping, or simply as a delicious and healthy snack on their own! They’re surprisingly addictive and a fantastic way to use up those garden-fresh zucchini.
Conclusion:
So there you have it! Making your own crispy baked zucchini chips is incredibly simple, rewarding, and a fantastic way to enjoy a healthy snack. We’ve transformed a humble vegetable into a guilt-free, satisfying treat that’s both delicious and good for you. The beauty of this recipe lies in its simplicity and the incredibly satisfying crunch it delivers, all without the mess and extra calories of frying. They are perfect as a light appetizer, a delightful side dish, or even a fun snack for kids (and adults!) who might otherwise shy away from veggies.
Get creative with your serving suggestions! These chips are wonderfully versatile. Pair them with your favorite dips like hummus, ranch, or a zesty marinara sauce. They also make a fantastic crunchy topping for salads or even a bed for your favorite protein. Feeling adventurous? Experiment with different seasonings! Try a sprinkle of smoked paprika for a smoky kick, garlic powder and onion powder for an extra savory punch, or even a pinch of red pepper flakes for a touch of heat. The possibilities are truly endless!
I truly encourage you to give this crispy baked zucchini chips recipe a try. You might be surprised at just how addictive and satisfying they are. It’s a simple step towards healthier snacking and a testament to how delicious vegetables can be when prepared with a little care and creativity. Don’t hesitate to invite friends over and share this delightful snack!
Frequently Asked Questions:
How do I get my zucchini chips really crispy?
The key to super crispy zucchini chips is ensuring they are sliced thinly and evenly. After slicing, it’s crucial to salt them and let them sit for about 15-20 minutes to draw out excess moisture. Pat them thoroughly dry with paper towels before baking. Baking at a slightly higher temperature and ensuring they have enough space on the baking sheet so they aren’t overcrowded will also help air circulate and promote crispiness.
Can I make these ahead of time?
While they are best enjoyed fresh out of the oven for maximum crispiness, you can store cooled zucchini chips in an airtight container at room temperature for a day or two. However, they may lose some of their initial crispness over time. To revive them, you can briefly pop them back into a warm oven (around 300°F or 150°C) for a few minutes.
What other vegetables can I use for chips?
This method works wonderfully with other firm vegetables! Thinly sliced sweet potatoes, eggplant, or even firm apples can be prepared similarly to create delicious baked chips. Adjust baking times slightly based on the vegetable’s density and moisture content.
Crispy Baked Zucchini Chips
Deliciously crispy baked zucchini chips, a healthy and satisfying snack alternative to fried chips. Perfect for dipping!
Ingredients
-
2 medium zucchini (sliced into 1/8″ rounds; see note 2)
-
1.5 tablespoons olive oil
-
1/3 cup panko breadcrumbs
-
1/3 cup grated parmesan cheese
-
1/4 teaspoon salt
-
Greek yogurt ranch (for dipping (optional))
Instructions
-
Step 1
Preheat your oven to 400°F (200°C). Line a baking sheet with parchment paper. -
Step 2
In a large bowl, toss the sliced zucchini with olive oil until evenly coated. -
Step 3
In a separate shallow dish, combine panko breadcrumbs, grated Parmesan cheese, and salt. Mix well. -
Step 4
Dredge each zucchini slice in the breadcrumb mixture, ensuring both sides are well coated. -
Step 5
Arrange the coated zucchini slices in a single layer on the prepared baking sheet. -
Step 6
Bake for 15-20 minutes, flipping halfway through, until golden brown and crispy. -
Step 7
Serve immediately with Greek yogurt ranch for dipping, if desired.
Important Information
Nutrition Facts (Per Serving)
It is important to consider this information as approximate and not to use it as definitive health advice.
Allergy Information
Please check ingredients for potential allergens and consult a health professional if in doubt.