Easy Apple Pie Bars – Delicious Dessert Bars
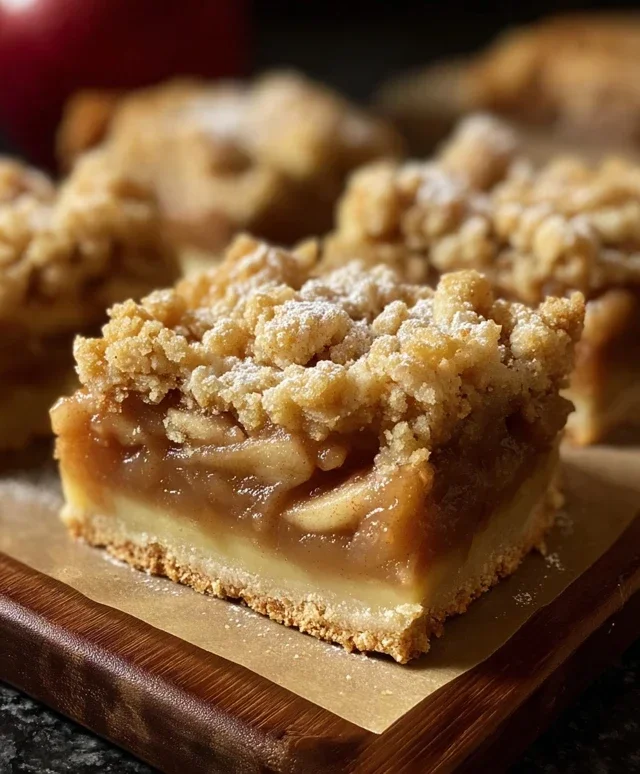
Apple Pie Bars are the ultimate crowd-pleaser, bringin extractg all the comforting flavors of a classic apple pie into a convenient, dippable, and utterly delicious bar form. There’s something undeniably magical about a warm apple pie, isn’t there? That perfect blend of tender, spiced apples nestled in a flaky crust just screams cozy evenings and happy gatherings. But let’s be honest, sometimes slicing a pie can be a bit of a production. That’s where these Apple Pie Bars truly shine! They deliver that same nostalgic taste and aroma, but with a streamlined presentation that makes them perfect for picnics, potlucks, or even just a weeknight treat. What makes these Apple Pie Bars so special is their ease of preparation without sacrificing an ounce of that beloved apple pie essence. You get all the gooey, cinnamon-kissed goodness in every single bite, and they’re incredibly fun to make and share.
Apple Pie Bars
There’s something undeniably comforting about apple pie. The warm spices, the tender, sweet apples, the flaky crust – it’s a classic for a reason. But sometimes, you want all that deliciousness in a more convenient, shareable package. That’s where Apple Pie Bars come in! These bars capture the essence of a traditional apple pie, but in an easy-to-eat, portable format that’s perfect for picnics, potlucks, or just a cozy afternoon treat. They’re simpler to make than a full pie, require no fancy lattice work, and are wonderfully crowd-pleasing. Get ready to impress yourself and everyone around you with these delightful bars.
Ingredients:
Getting Started: The Crust and Crum extractb Topping
The foundation of our apple pie bars is a wonderfully tender and slightly crum extractbly crust that doubles as the topping. We’ll achieve this by incorporating cold butter into our dry ingredients, which creates those lovely flaky layers.
1. In a large bowl, whisk together the 2½ cups all-purpose flour, 1 cup granulated sugar, 1 tsp baking powder, and ½ tsp salt. This ensures that all the dry ingredients are evenly distributed, which is crucial for a consistent texture.
2. Add the 1 cup (2 sticks) cold unsalted butter, cubed, to the flour mixture. Using cold butter is key here; it won’t melt immediately, and as it bakes, it will create steam pockets that contribute to a light and flaky crust. You can use a pastry blender, two forks, or your fingertips to cut the butter into the dry ingredients until the mixture resembles coarse crum extractbs with some pea-sized pieces of butter still visible. This is exactly what we want for that rustic, crum extractbly texture.
3. In a small separate bowl, lightly beat 1 egg with 1 tsp vanilla extract. Add this wet mixture to the flour and butter mixture. Stir with a fork until just combined and the dough starts to come together. Be careful not to overmix; overworking the dough can lead to a tough crust. The dough will be crum extractbly, but should hold together when squeezed.
Preparing the Apple Filling
Now for the star of the show: the apples! We want them tender and bursting with cinnamon-spiced sweetness.
4. In a medium bowl, combine the 4 cups peeled & diced apples with 2 tbsp lemon juice. The lemon juice not only adds a bright, zesty note that cuts through the sweetness but also helps prevent the apples from browning while we prepare the rest of the filling.
5. Add ½ cup brown sugar, 2 tsp cinnamon, and 1 tsp cornstarch to the apples. Toss everything together gently until the apples are evenly coated. The brown sugar will caramelize beautifully as it bakes, and the cinnamon is our classic apple pie spice. The cornstarch acts as a thickener, preventing our filling from becoming too watery and ensuring a beautifully set bar.
Assembling and Baking Your Apple Pie Bars
With our crust and filling ready, it’s time to bring it all together.
6. Preheat your oven to 375°F (190°C). Grease and flour a 9×13 inch baking pan, or line it with parchment paper, leaving an overhang on the sides to help lift the bars out later. This step is important to prevent sticking and make for easy removal.
7. Take about two-thirds of the crum extractbly dough mixture and press it evenly into the bottom of the prepared baking pan to form the base crust. Make sure it’s a solid, even layer.
8. Spread the prepared apple filling evenly over the crust. Try to distribute the apples and any accumulated juices as uniformly as possible.
9. Take the remaining one-third of the crum extractbly dough mixture and sprinkle it evenly over the apple filling. This creates our delicious streusel-like topping.
10. Bake for 35-45 minutes, or until the topping is golden brown and the filling is bubbly. You’ll know it’s done when you see those lovely golden edges on the topping and can smell the irresistible aroma of baked apples and cinnamon filling your kitchen.
11. Once baked, carefully remove the pan from the oven and let the bars cool completely in the pan on a wire rack. This is a crucial step! Cutting into them too early will result in a messy, unformed bar. Patience is key to allow the filling to set properly. Once completely cooled, use the parchment paper overhang to lift the entire block out of the pan, then slice into bars. Enjoy these delightful Apple Pie Bars with a scoop of ice cream or a dollop of whipped cream!
Conclusion:
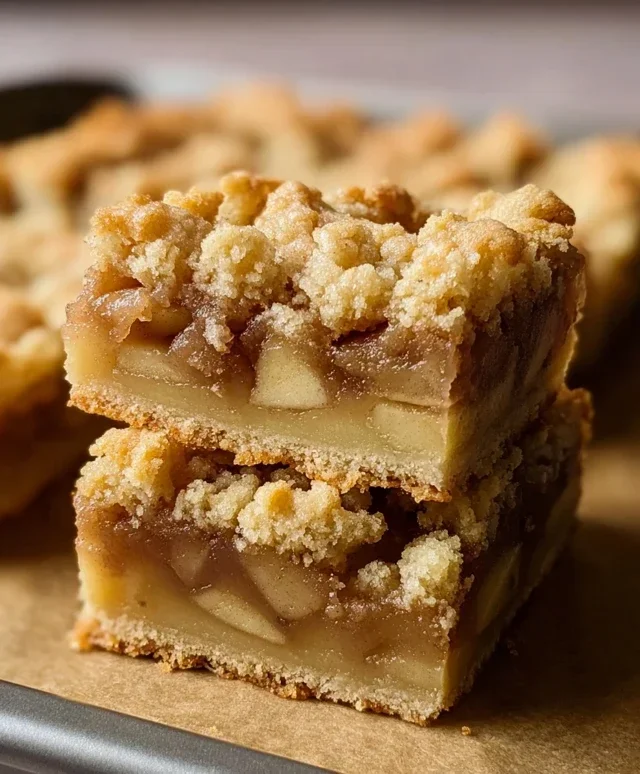
I hope you’ve enjoyed learning how to make these delightful Apple Pie Bars! They truly offer all the comforting flavors of classic apple pie with the convenience of a handheld treat. The buttery, crum extractbly crust paired with the warm, spiced apple filling is simply irresistible. They are perfect for any occasion, from casual gatherings and potlucks to a special dessert after a family dinner. I find they are particularly wonderful served warm with a scoop of vanilla ice cream or a dollop of whipped cream – pure bliss! Don’t be afraid to get creative with your fillings; adding a pinch of nutmeg or even a splash of bourbon extract can elevate these bars to a new level. I really encourage you to give this recipe a try; it’s surprisingly simple and incredibly rewarding. You’ll be amazed at how quickly they disappear!
Frequently Asked Questions:
Q: Can I make Apple Pie Bars ahead of time?
Absolutely! These bars are fantastic for making in advance. You can bake them completely, let them cool, and then store them in an airtight container at room temperature for up to 2-3 days. For longer storage, they can be refrigerated for up to a week or even frozen for a couple of months. Just thaw them at room temperature before serving.
Q: What kind of apples work best for Apple Pie Bars?
For the best flavor and texture, I recommend using a mix of apples. A combination of tart and sweet apples creates a more complex and balanced filling. Good choices include Granny Smith (for tartness), Honeycrisp, Fuji, or Gala (for sweetness and crispness). Avoid apples that tend to turn mushy when cooked, like Red Delicious.
Apple Pie Bars
A delightful twist on classic apple pie, baked into convenient bar form with a buttery crust and spiced apple filling.
Ingredients
-
2½ cups all-purpose flour
-
1 cup granulated sugar
-
1 tsp baking powder
-
½ tsp salt
-
1 cup (2 sticks) cold unsalted butter, cubed
-
1 egg
-
1 tsp vanilla extract
-
4 cups peeled & diced apples
-
2 tbsp lemon juice
-
½ cup brown sugar
-
2 tsp cinnamon
-
1 tsp cornstarch
Instructions
-
Step 1
Preheat oven to 375°F (190°C). Grease and flour a 9×13 inch baking pan. -
Step 2
In a large bowl, whisk together the flour, granulated sugar, baking powder, and salt for the crust. -
Step 3
Cut in the cold butter using a pastry blender or your fingers until the mixture resembles coarse crumbs. Stir in the egg and vanilla extract until just combined. -
Step 4
Press about two-thirds of the dough evenly into the bottom of the prepared pan for the crust. -
Step 5
In a separate bowl, combine the diced apples, lemon juice, brown sugar, cinnamon, and cornstarch for the filling. Mix well. -
Step 6
Spread the apple filling evenly over the pressed crust. -
Step 7
Crumble the remaining one-third of the dough over the apple filling. -
Step 8
Bake for 30-35 minutes, or until the topping is golden brown and the filling is bubbly. -
Step 9
Let cool completely in the pan before cutting into bars.
Important Information
Nutrition Facts (Per Serving)
It is important to consider this information as approximate and not to use it as definitive health advice.
Allergy Information
Please check ingredients for potential allergens and consult a health professional if in doubt.