Easy Bunny Rabbit Cake Recipe- Fun & Festive
Bunny Rabbit Cake is more than just a dessert; it’s a delightful journey back to childhood, a whimsical centerpiece that ignites smiles and sprinkles a little magic onto any occasion. Whether you’re celebrating Easter, a birthday, or simply craving a dose of pure joy, this charming cake is guaranteed to hop to the top of your favorites list. What is it about a bunny cake that captures our hearts so completely? Perhaps it’s the playful design, the soft, fluffy texture that reminds us of the real thing, or the sheer delight of cutting into such an adorable creation. This particular Bunny Rabbit Cake recipe is special because it balances classic charm with simple, achievable steps, ensuring that even novice bakers can create a showstopper. Get ready to bake a treat that’s as fun to make as it is to devour!
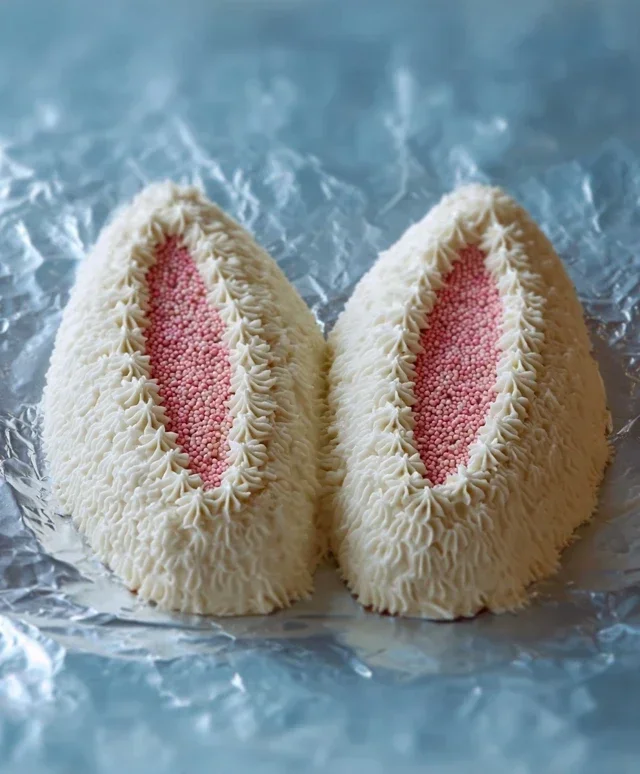
Bunny Rabbit Cake
There’s something truly magical about a cake that brings a smile to everyone’s face, and our Bunny Rabbit Cake is guaranteed to do just that! Perfect for Easter, a child’s birthday, or just because you want to add a little whimsy to your day, this adorable cake is surprisingly straightforward to make. We’ll guide you through each step to create a fluffy, delicious bunny that’s as delightful to look at as it is to eat. Get ready to impress your friends and family with this charming creation!
Ingredients:
Baking the Cake
First, we need to get our cake layers ready. This recipe uses simple pantry staples, so you probably have most of what you need already. Preheat your oven to 350°F (175°C). Grease and flour two 8-inch round cake pans. This is a crucial step to ensure your cakes don’t stick to the pans, making for a much cleaner release and easier decorating later on. You can also line the bottoms with parchment paper for extra insurance.
In a large mixing bowl, whisk together the dry ingredients: the all-purpose flour, granulated sugar, baking soda, and salt. Make sure everything is well combined so the leavening agents are evenly distributed. In a separate bowl, cream together the softened unsalted butter until it’s light and fluffy. Then, beat in the eggs one at a time, ensuring each is fully incorporated before adding the next. Next, add the buttermilk and vanilla extract to the wet ingredients and mix until just combined. Gradually add the dry ingredients to the wet ingredients, alternating with the buttermilk mixture, begin extractning and ending with the dry ingredients. Mix until just combined; overmixing can lead to a tough cake. Finally, stir in the vegetable oil until the batter is smooth. Divide the batter evenly between the prepared cake pans.
Bake for 30-35 minutes, or until a wooden skewer inserted into the center of the cakes comes out clean. Let the cakes cool in the pans for about 10 minutes before inverting them onto a wire rack to cool completely. It’s essential that the cakes are fully cooled before you even think about frosting them. Warm cake and frosting are a recipe for a messy disaster!
Assembling and Frosting the Bunny
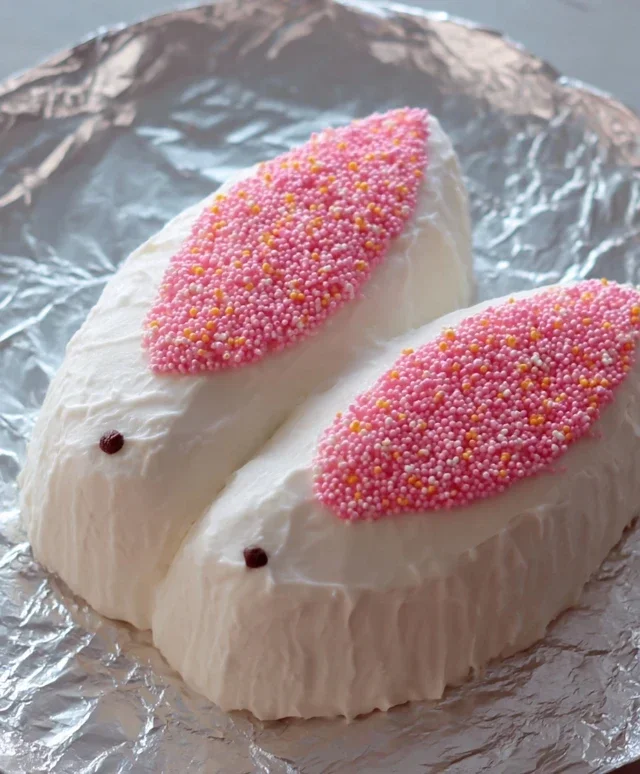
Once our cake layers are completely cool, it’s time to bring our bunny to life! This is where the real fun begin extracts. You’ll need to shape your cake into a bunny. Take one of the cake rounds and place it on your serving plate or cake board. This will be the main body of our bunny. Now, take the second cake round and, using a sharp knife, carefully cut a large, rounded oval shape from it. This oval will serve as the bunny’s head. You’ll also want to cut two smaller, rounded shapes from the remaining cake for the ears. Don’t worry about perfection here; the frosting and coconut will hide any imperfections.
Now for the frosting! In a large bowl, beat together the softened butter until creamy. Gradually add the powdered sugar, alternating with the milk, until you achieve a smooth and spreadable consistency. Stir in the vanilla extract. This is your basic buttercream frosting. To make the bunny’s fur, we’ll divide the frosting. Leave about two-thirds of the frosting white. In a separate small bowl, tint the remaining one-third of the frosting a lovely pnon-alcoholic ale pink color using your food coloring. This pink frosting will be for the inside of the bunny’s ears and its nose.
Decorating Your Adorable Bunny
First, spread a thin layer of white frosting all over the body and head of the cake. This is your crum extractb coat, which will help trap any loose crum extractbs and give you a smooth surface for the final frosting. Chill the cake for about 15-20 minutes to set this layer. Once the crum extractb coat is firm, apply a thicker, generous layer of white frosting over the entire cake. Use an offset spatula or a butter knife to create a slightly textured effect, mimicking bunny fur. Don’t aim for perfectly smooth here; a little texture is good!
Now, it’s time to attach the head and ears. Gently place the head cake on top of the body cake. Position the two ear shapes on top of the head, angled slightly forward. Now, take your pink frosting and carefully frost the inside of each ear. You can also use a small dollop of pink frosting for the bunny’s nose. For the eyes, use candies like M&M’s, chocolate chips, or even small circles of black frosting. Press them gently into the cake.
Finally, the best part – the fur! Generously sprinkle shredded coconut all over the white frosting. Gently pat it down so it adheres to the frosting. The coconut gives our bunny its wonderfully fluffy, soft appearance. You can even add a few pink candies to the tips of the ears for a sweet touch. And there you have it – your very own homemade Bunny Rabbit Cake, ready to bring joy to any occasion! Enjoy this delightful creation!
Conclusion:
Baking this delightful Bunny Rabbit Cake is truly a joy, and the results are always spectacular! This recipe is a winner because it’s surprisingly straightforward, creating a moist and flavorful cake that’s perfect for any occasion, especially Easter or a child’s birthday. Its adorable presentation is guaranteed to bring smiles, making it more than just a dessert – it’s a centerpiece of fun and festivity. Whether you’re a seasoned baker or just starting out, don’t be intimidated; the step-by-step instructions make it accessible for everyone. I truly encourage you to give this recipe a try!
When it comes to serving, this Bunny Rabbit Cake is fantastic on its own, but can also be elevated. Consider pairing it with fresh berries, a dollop of whipped cream, or even a light fruit compote. For variations, feel free to experiment with the cake flavor – a classic vanilla or a rich chocolate would both be divine. You could also try different frosting colors to match your theme or add edible glitter for extra sparkle. This versatile recipe is perfect for a playful celebration!
Frequently Asked Questions:
Can I make this Bunny Rabbit Cake ahead of time?
Yes, absolutely! You can bake the cake layers and frost them a day in advance. Store the frosted cake in an airtight container at room temperature. This saves you time on the day of your event, allowing you to focus on other preparations.
What if I don’t have a specific bunny-shaped cake pan?
No problem at all! You can adapt this recipe by baking the cake in a standard round or rectangular pan and then cutting and shaping it into a bunny. Alternatively, you can bake two round cakes, one slightly smaller than the other, and arrange them in a bunny shape, using a separate cupcake for the tail. Get creative with your cake assembly!
Bunny Rabbit Cake
A delightful and festive cake shaped like a bunny, perfect for Easter celebrations or any whimsical occasion.
Ingredients
-
2 cups all-purpose flour
-
1.5 cups granulated sugar
-
1 teaspoon baking soda
-
0.5 teaspoon salt
-
1 cup unsweetened applesauce
-
0.5 cup vegetable oil
-
2 large eggs
-
1 teaspoon vanilla extract
-
1 cup buttermilk
Instructions
-
Step 1
Preheat oven to 350°F (175°C). Grease and flour two 8-inch round cake pans. -
Step 2
In a large bowl, whisk together flour, sugar, baking soda, and salt. -
Step 3
In a separate bowl, whisk together applesauce, vegetable oil, eggs, and vanilla extract. -
Step 4
Gradually add the wet ingredients to the dry ingredients, mixing until just combined. Stir in the buttermilk until the batter is smooth. -
Step 5
Pour the batter evenly into the prepared cake pans. -
Step 6
Bake for 30-35 minutes, or until a wooden skewer inserted into the center comes out clean. -
Step 7
Let the cakes cool in the pans for 10 minutes before inverting them onto a wire rack to cool completely. -
Step 8
Once cooled, assemble and decorate the cakes to resemble a bunny.
Important Information
Nutrition Facts (Per Serving)
It is important to consider this information as approximate and not to use it as definitive health advice.
Allergy Information
Please check ingredients for potential allergens and consult a health professional if in doubt.