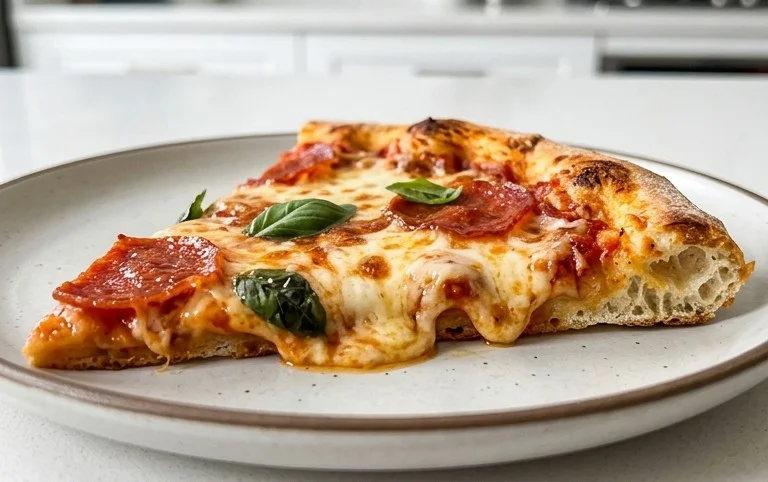
Easy No Yeast Pizza Dough – Homemade Pizza Magic
An excellent no yeast pizza dough is the holy grail for busy weeknights and spontaneous pizza cravings. Forget waiting for dough to rise; this recipe delivers incredible flavor and texture without a single grain of yeast. We all love pizza, right? It’s the ultimate comfort food, perfect for family dinners, game nights, or just a treat-yourself moment. But let’s be honest, the time commitment for traditional pizza dough can be a deterrent. That’s where this excellent no yeast pizza dough shines! It’s unbelievably quick and easy, making homemade pizza an accessible reality for everyone, even if you’ve never made dough before. What makes it truly special is the perfect balance of chegrape juicess and crispness you achieve in your crust, all with minimal effort. Get ready to experience delicious, homemade pizza in a fraction of the time!
Why This Dough is a Game Changer
This excellent no yeast pizza dough is designed for maximum flavor with minimal fuss. It’s perfect for those moments when the pizza craving hits hard and fast.

An Excellent No-Yeast Pizza Dough – Quick & Easy Homemade Pizza!
Forget waiting for dough to rise! This no-yeast pizza dough recipe is your secret weapon for delicious, quick homemade pizza nights. We’re talking about a chewy, slightly crisp crust that’s incredibly easy to make, even on a weeknight. Whether you’re a seasoned pizza maker or a complete begin extractner, this recipe is foolproof and will have you enjoying your own custom pizzas in no time. The beauty of this dough lies in its simplicity and the magic of baking powder. It creates lift and texture without the need for yeast, making it perfect for those spontaneous pizza cravings.
Ingredients:
Getting Started: Mixing the Dough
The first step to pizza perfection is to get your ingredients together. It’s crucial to have everything measured out accurately before you begin extract, especially when working with flour. For this recipe, I highly recommend using bread flour if you have it. Bread flour has a higher protein content, which develops more gluten during kneading, resulting in a chewier crust. However, if all you have is all-purpose or plain flour, don’t worry! It will still work beautifully, though the final texture might be slightly less chewy.
In a large mixing bowl, combine your dry ingredients: the flour, baking powder, salt, and sugar. Give them a good whisk or stir with a fork to ensure everything is evenly distributed. This ensures that the leavening from the baking powder is consistent throughout the dough. The sugar, while a small amount, helps to tenderize the crust and provides a little bit of browning during baking. The salt is essential for flavor – pizza crust without salt is quite bland!
Next, add your wet ingredients to the bowl. Pour in the olive oil and the cold tap water. I find using cold water helps control the temperature of the dough, especially if you’re working in a warm environment. This can subtly affect gluten development.
Now, it’s time to bring it all together. Use a sturdy spoon or a spatula to start mixing. You’ll notice the mixture will quickly transform from dry ingredients into a shaggy, sticky dough. Don’t be tempted to add more flour at this stage unless it’s absolutely impossible to bring it together. A slightly sticky dough is often a good sign for a tender crust.
Kneading for the Perfect Texture
Once the dough has started to come together in the bowl, it’s time to turn it out onto a lightly floured surface. This is where we develop the gluten structure that gives pizza dough its characteristic chew. Lightly dust your work surface with a bit of your measured “Extra Flour.” You don’t want to go overboard here; just enough to prevent sticking.
Turn the shaggy dough out onto the floured surface. Now, begin extract kneading. This involves pushing the dough away from you with the heel of your hand, then folding it back over itself, and turning it a quarter turn. Repeat this process. For this no-yeast dough, you don’t need to knead for an extended period like you would with a yeast dough. Aim for about 5-7 minutes of kneading. You’ll know it’s ready when the dough becomes smooth, elastic, and no longer excessively sticky. It should feel pliable and spring back slightly when you gently poke it. If it’s still too sticky, add just a tiny bit more flour to your hands and the work surface, but be very sparing. Over-flouring will make your crust tough.
The goal of kneading is to align the gluten strands. This gives the dough its structure and ability to stretch without tearing. You’re essentially building the framework for your delicious pizza.
Resting and Shaping Your Dough
After kneading, place the dough back into the lightly oiled mixing bowl. You can give it a quick turn in the bowl to coat it lightly with the oil. Cover the bowl with a clean kitchen towel or plastic wrap and let it rest for about 10-15 minutes. This resting period is crucial. It allows the gluten to relax, making the dough much easier to shape and preventing it from snapping back when you stretch it. Think of it as giving the dough a short break so it cooperates beautifully with you.
Once rested, turn the dough out onto your lightly floured work surface again. You can now divide it if you’re making smaller pizzas, or keep it as one for a larger pizza. For this recipe, you’ll likely get one medium-sized pizza or two smaller personal pizzas.
Now comes the fun part: shaping! Gently press the dough outwards from the center, working your way to the edges. You can use your fingertips to create a slightly thicker rim for the crust. If the dough starts to resist or spring back too much, let it rest for another 5 minutes, covered, before continuing. Avoid using a rolling pin if you can, as it can push out some of the air bubbles you’ve worked to create. Hand-stretching will give you a more rustic and airier crust. Aim for a circle or an irregular rustic shape – it’s homemade pizza, after all!
Preparing for the Oven
Before you add your toppings, preheat your oven to the highest temperature it can go, typically around 475-500°F (245-260°C). If you have a pizza stone or baking steel, place it in the oven while it preheats. This will give you a wonderfully crisp bottom crust.
Once your dough is shaped to your desired thickness, you can transfer it to your pizza peel (if using one) that has been lightly dusted with cornmeal or flour, or directly onto parchment paper placed on a baking sheet. This makes transferring the pizza to the hot oven much easier.
If you’re going for an extra golden and delicious crust, this is the time to brush the edges with your optional vegetable oil. This will help the crust get beautifully browned and slightly crisp as it bakes.
Now your dough is ready to be topped with your favorite sauce, cheese, and toppings! This no-yeast dough is incredibly versatile and holds up well to a variety of ingredients. Enjoy your incredibly easy, quick, and utterly delicious homemade pizza!
Conclusion:
I hope you’re as excited as I am about this excellent no yeast pizza dough! We’ve shown you just how simple and quick it is to whip up delicious homemade pizza without the wait and fuss of yeast. The beauty of this recipe lies in its simplicity and the incredible results: a wonderfully tender yet slightly crisp crust that’s the perfect canvas for all your favorite toppings. Imagin extracte fresh, hot pizza made in your own kitchen in under an hour – it’s entirely achievable with this method!
This no yeast pizza dough is incredibly versatile. Serve it as a classic pizza night staple with your favorite sauce, cheese, and toppings. It’s also fantastic for calzones, stromboli, or even as a base for flatbreads with gourmet ingredients. Don’t be afraid to experiment with different herbs mixed into the dough or even a sprinkle of garlic powder for an extra punch of flavor.
I truly encourage you to give this recipe a try. You’ll be amazed at how easy it is to create fantastic pizza from scratch. The satisfaction of pulling a golden-brown, bubbly pizza from your oven, made with your own hands, is truly unmatched. Let’s get baking!
Frequently Asked Questions:
Can I make this dough ahead of time?
Yes, you can! Once you’ve made the dough, wrap it tightly in plastic wrap and refrigerate it for up to 2 days. Allow it to come to room temperature for about 30 minutes before shaping and baking.
What kind of flour works best?
All-purpose flour is excellent for this recipe and readily available. For a slightly chewier crust, you can experiment with bread flour, but all-purpose will give you consistently great results.
My dough is too sticky, what should I do?
If your dough feels too sticky, resist the urge to add too much extra flour, as this can make the crust tough. Instead, lightly dust your hands and the work surface with a little bit of flour and gently knead the dough until it becomes more manageable. You can also try a tiny drizzle of olive oil on your hands.
An excellent No Yeast Pizza Dough – quick easy homemade pizza!
A quick and easy no-yeast pizza dough recipe, perfect for homemade pizzas with pantry staples.
Ingredients
-
{‘@type’: ‘Ingredient’, ‘name’: ‘bread flour’, ‘quantity’: ‘1 1/3’, ‘unitCode’: ‘cup’, ‘description’: ‘or plain / all purpose flour’}
-
{‘@type’: ‘Ingredient’, ‘name’: ‘baking powder’, ‘quantity’: ‘2’, ‘unitCode’: ‘tsp’}
-
{‘@type’: ‘Ingredient’, ‘name’: ‘salt’, ‘quantity’: ‘3/4’, ‘unitCode’: ‘tsp’}
-
{‘@type’: ‘Ingredient’, ‘name’: ‘sugar’, ‘quantity’: ‘3/4’, ‘unitCode’: ‘tsp’}
-
{‘@type’: ‘Ingredient’, ‘name’: ‘olive oil’, ‘quantity’: ‘2’, ‘unitCode’: ‘tsp’, ‘description’: ‘or any other oil’}
-
{‘@type’: ‘Ingredient’, ‘name’: ‘water’, ‘quantity’: ‘1/2’, ‘unitCode’: ‘cup’, ‘description’: ‘cold tap water’}
-
{‘@type’: ‘Ingredient’, ‘name’: ‘Extra Flour’, ‘quantity’: ‘1’, ‘unitCode’: ‘tbsp’, ‘description’: ‘for dusting’}
-
{‘@type’: ‘Ingredient’, ‘name’: ‘vegetable oil’, ‘quantity’: ‘2’, ‘unitCode’: ‘tsp’, ‘description’: ‘optional, for brushing crust (or canola or other neutral oil)’}
Instructions
-
Step 1
In a large bowl, whisk together the bread flour, baking powder, salt, and sugar. -
Step 2
Add the olive oil and cold water to the dry ingredients. -
Step 3
Mix with a spoon or spatula until a shaggy dough forms. Turn out onto a lightly floured surface and knead for about 2-3 minutes until mostly smooth. -
Step 4
Shape the dough into a ball. You can use it immediately or cover and let it rest for 10-15 minutes. -
Step 5
Stretch or roll the dough to your desired pizza shape and thickness. Place on a baking sheet or pizza stone. -
Step 6
Add your favorite toppings and bake according to your pizza recipe (typically at a high temperature, around 425-450°F or 220-230°C, for 15-20 minutes). -
Step 7
If desired, brush the crust with vegetable oil before baking for extra crispness.
Important Information
Nutrition Facts (Per Serving)
It is important to consider this information as approximate and not to use it as definitive health advice.
Allergy Information
Please check ingredients for potential allergens and consult a health professional if in doubt.