Crunchy Cottage Cheese Chips-Healthy Snack Recipe
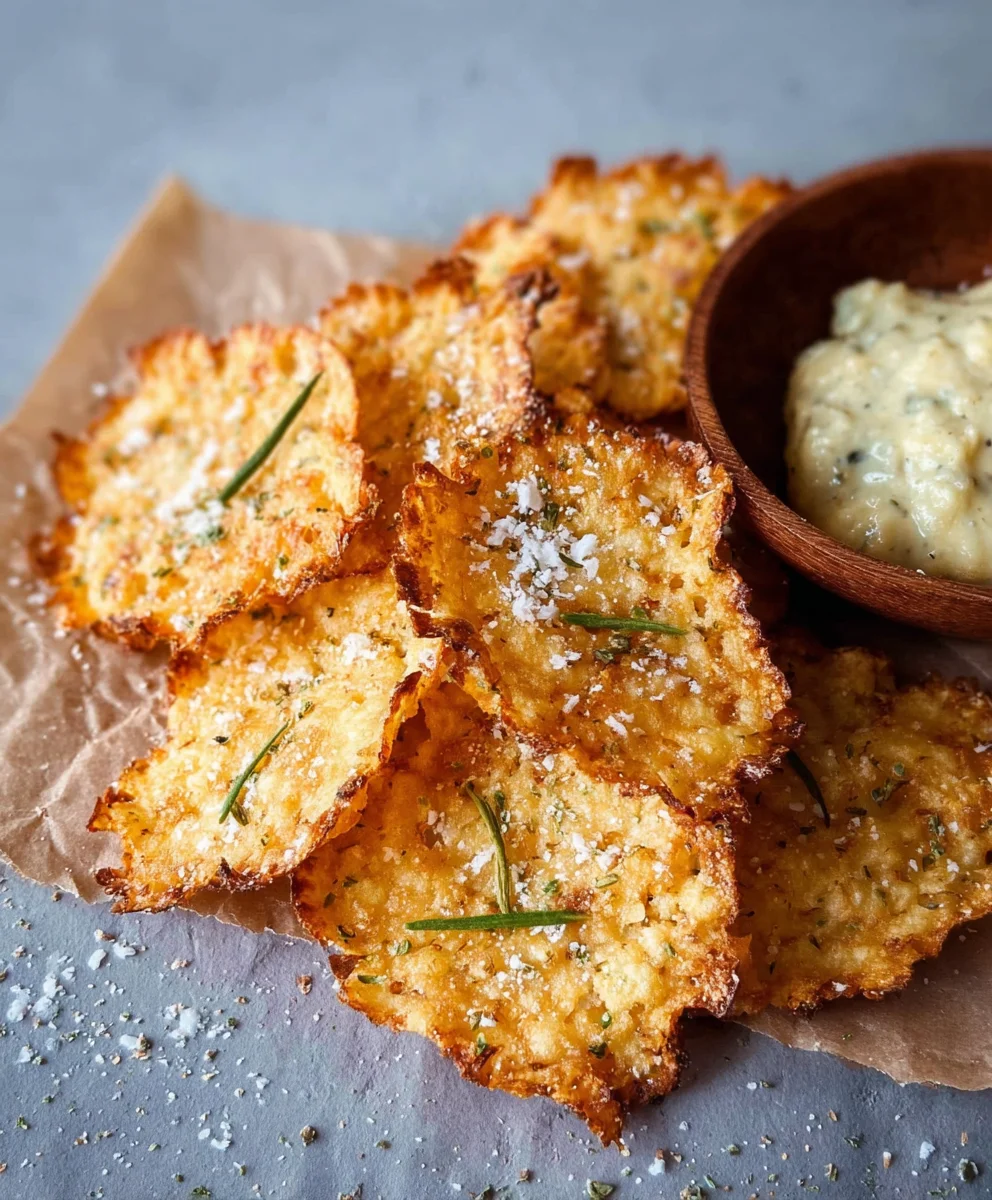
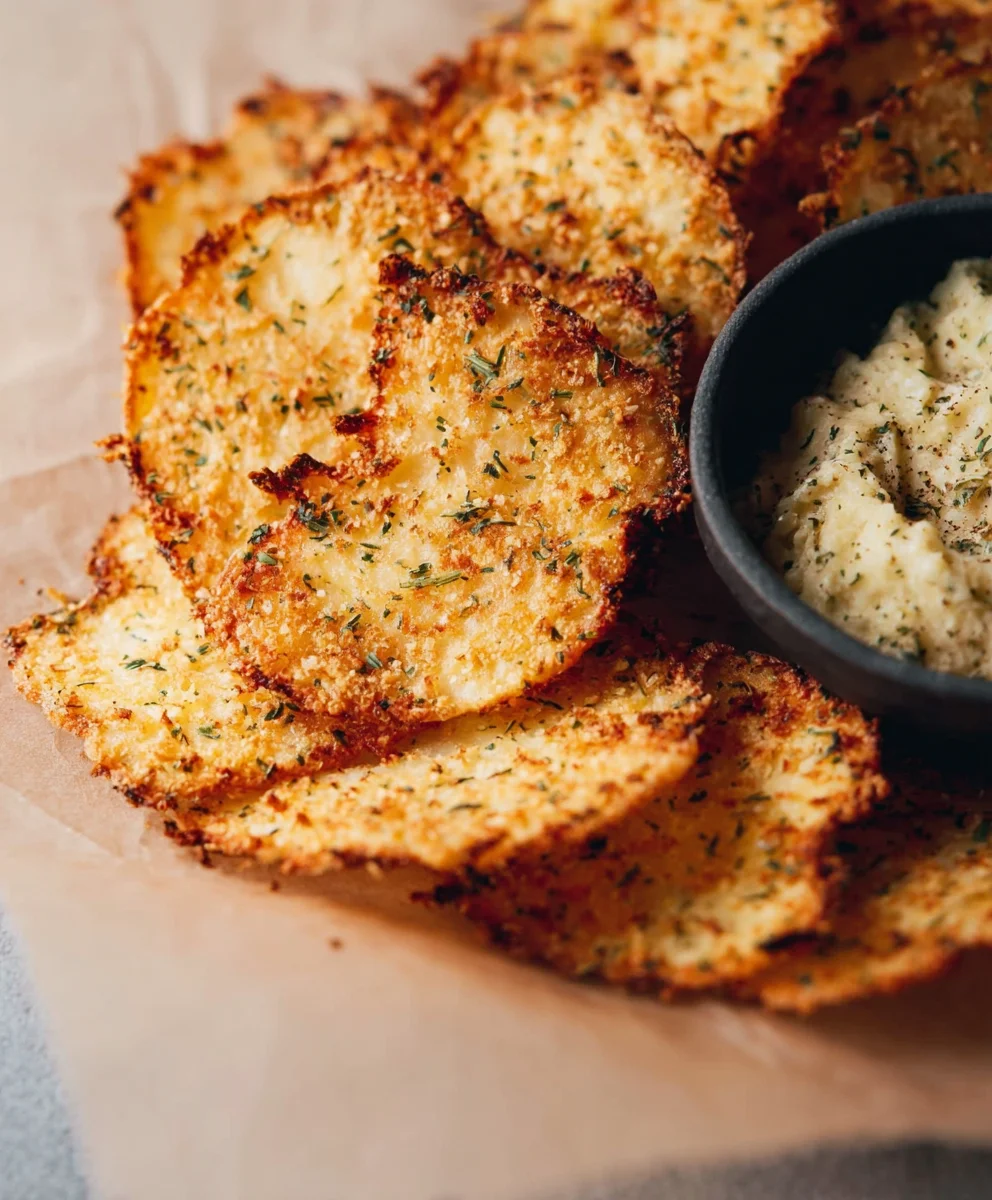
Cottage Cheese Chips are the crunchy, cheesy revelation you’ve been waiting for! If you’re anything like me, you’ve probably scrolled past countless “healthy chip” recipes, only to be disappointed by bland cardboard or complicated processes. But these Cottage Cheese Chips are a game-changer. They’re incredibly addictive, surprisingly simple to make, and tap into that primal desire for a satisfying crunch without the guilt. What makes them so special? It’s the magic of cottage cheese transforming into crispy, golden delights that are bursting with savory flavor. Imagin extracte a snack that’s packed with protein, wonderfully versatile, and disappears from the plate at lightning speed. Whether you’re looking for a post-workout treat, a healthier movie night companion, or just an afternoon pick-me-up, these delightful Cottage Cheese Chips are about to become your new go-to. Get ready to experience a snack that’s both nourishing and downright delicious.
Ingredients:
- 1 cup cottage cheese
- 1 large egg
- 1/4 cup grated Parmesan cheese
- 1 tablespoon chopped fresh chives (or 1 teaspoon dried chives)
- 1/4 teaspoon garlic powder
- 1/8 teaspoon black pepper
Crispy Cottage Cheese Chips Preparation
Phase 1: Mixing the Base
The foundation of these delightful cottage cheese chips is, of course, the cottage cheese itself. For the best texture and flavor, I highly recommend using full-fat cottage cheese. The higher fat content contributes to a richer taste and a more satisfying crispness once baked. If you prefer a lighter version, low-fat will work, but the final texture might be slightly less robust.
In a medium-sized mixing bowl, place the 1 cup of cottage cheese. Now, we’ll introduce the binder: 1 large egg. Crack the egg directly into the bowl with the cottage cheese. Whisk the egg and cottage cheese together thoroughly. You want to ensure the egg is fully incorporated, creating a smooth, homogenous mixture. Don’t worry if there are a few small curds of cottage cheese remaining; they’ll soften during the baking process. The goal here is to create a unified base that will hold all our delicious flavorings.
Next, we’re going to add the savory elements. Sprinkle in the 1/4 cup of grated Parmesan cheese. The Parmesan cheese not only adds a wonderful salty and nutty flavor but also aids in creating a crispy exterior. Follow this with the fresh herbs. If you’re using fresh chives, finely chop about 1 tablespoon of them and add them to the bowl. Fresh chives provide a delicate oniony bite that complements the cheese beautifully. If fresh chives aren’t readily available, you can certainly substitute with 1 teaspoon of dried chives. For an extra layer of savory depth, add 1/4 teaspoon of garlic powder. Finally, season with a pinch of black pepper – just 1/8 teaspoon is usually sufficient, but you can adjust to your personal preference.
Once all the ingredients are in the bowl, stir everything together until it’s well combined. You should have a thick, slightly lumpy batter, studded with the green chives and golden Parmesan. Make sure to scrape the bottom and sides of the bowl to incorporate all the ingredients. This mixture will be the base for our chips, so getting this right is key to a fantastic final product.
Phase 2: Forming and Baking the Chips
Now comes the fun part – transforming this simple mixture into crispy, dippable chips! Preheat your oven to 350°F (175°C). It’s important to have your oven fully heated before you start forming the chips to ensure even cooking and optimal crisping.
Line a large baking sheet with parchment paper. Parchment paper is essential here as it prevents the chips from sticking to the baking sheet, making cleanup a breeze and ensuring the chips release easily once baked. If you don’t have parchment paper, you can lightly grease the baking sheet, but parchment paper is highly recommended for the best results.
You have a couple of options for shaping your cottage cheese chips. The most straightforward method is to use a small spoon or a cookie scoop to drop small dollops of the batter onto the prepared baking sheet. Aim for dollops that are about 1 to 1.5 inches in diameter. You want them to be relatively thin to ensure they crisp up nicely. Leave about 1 to 2 inches of space between each dollop, as they will spread slightly during baking. Alternatively, if you prefer more uniformly shaped chips, you can spread the batter thinly and evenly onto the parchment paper using an offset spatula, and then cut them into desired shapes before or after baking. However, for a rustic and easy approach, the dollop method is fantastic.
For thinner, crispier chips, you can gently flatten each dollop with the back of a spoon or your fingertip. The thinner they are, the faster they will bake and the crispier they will become. Think of them as mini pancakes, but much thinner.
Place the baking sheet in the preheated oven. Now, we bake! The baking time will vary depending on the thickness of your chips and your oven. Start by baking for 12-15 minutes. At this point, the edges of the chips should be starting to turn golden brown. Keep a close eye on them, as they can go from perfectly golden to burnt very quickly.
For even crisping, you might want to carefully flip the chips about halfway through the baking process, around the 8-10 minute mark. This is optional, but it can help ensure both sides achieve a delightful crispness. Continue baking for another 5-8 minutes, or until the chips are golden brown all over and feel firm to the touch. They should be easily lifted from the parchment paper. If some chips are browning faster than others, you can carefully remove them from the baking sheet to prevent burning while the rest continue to bake.
Phase 3: Cooling and Enjoying
Once your cottage cheese chips are baked to perfection, remove the baking sheet from the oven. This is a crucial step for achieving maximum crispness. Allow the chips to cool on the baking sheet for about 5-10 minutes. They will continue to firm up and crisp as they cool. After this initial cooling period, carefully transfer the chips to a wire rack to cool completely. Cooling them on a wire rack allows air to circulate all around them, preventing any residual moisture from making them soggy.
Once completely cooled, your homemade cottage cheese chips are ready to be enjoyed! They are incredibly versatile. You can serve them plain as a light and healthy snack. They are also fantastic as a vehicle for your favorite dips, like salsa, guacamole, or a creamy hummus. Their slightly cheesy and savory flavor makes them a great addition to a cheese board or as a crunchy topping for salads and soups. Store any leftover chips in an airtight container at room temperature for up to 3-4 days. They are best enjoyed within the first day or two for optimal crispness.
Conclusion:
Congratulations on embarking on the delicious journey of making your own Cottage Cheese Chips! We hope this recipe has shown you just how simple and rewarding it is to create a healthy, protein-packed snack that’s bursting with flavor. These crispy, savory bites are incredibly versatile and a fantastic alternative to traditional potato chips. Remember, the key to perfect Cottage Cheese Chips lies in achieving that ideal thinness and ensuring they bake until golden and crisp. Don’t be afraid to experiment with the seasonings – the possibilities are endless!
For serving, these chips are amazing on their own, but they also pair beautifully with your favorite dips like guacamole, salsa, or a creamy hummus. They make a fantastic addition to lunchboxes, picnic baskets, or as a guilt-free accompaniment to soups and salads. Feel free to get creative with your flavor profiles! Try adding smoked paprika for a hint of smokiness, garlic powder and onion powder for an “everything bagel” vibe, or even a pinch of chili flakes for a spicy kick. The beauty of Cottage Cheese Chips is their adaptability to your personal taste preferences.
We encourage you to make these Cottage Cheese Chips again and again, refining your technique and discovering new flavor combinations. They are a testament to how wholesome ingredients can be transformed into something truly delightful and satisfying. Enjoy sharing your homemade creations with friends and family!
Frequently Asked Questions:
Q: How do I ensure my Cottage Cheese Chips are crispy and not soggy?
A: The most important factors are ensuring your cottage cheese is as dry as possible before spreading and baking. Blotting it with a paper towel can help remove excess moisture. Also, spread the mixture very thinly and evenly onto your baking sheet. Baking until the edges are golden brown is a good indicator of crispness. If they still feel a little soft after the initial bake, you can pop them back in for a few extra minutes, keeping a close eye to prevent burning.
Q: Can I make Cottage Cheese Chips ahead of time?
A: Yes, absolutely! Once cooled completely, store your Cottage Cheese Chips in an airtight container at room temperature. They should stay crispy for up to 3-4 days. However, they are best enjoyed within the first couple of days for optimal texture.
Q: What if I don’t have parchment paper?
A: While parchment paper is highly recommended for easy cleanup and to prevent sticking, you can use a silicone baking mat if you have one. If neither is available, lightly greasing your baking sheet with a neutral oil spray or a very thin layer of oil can help, but be aware that cleanup might be more challengin extractg.
Crunchy Cottage Cheese Chips
A simple and healthy recipe for crispy cottage cheese chips, perfect for snacking or dipping.
Ingredients
-
1 cup cottage cheese
-
1 large egg
-
1/4 cup grated Parmesan cheese
-
1 tablespoon chopped fresh chives
-
1/4 teaspoon garlic powder
-
1/8 teaspoon black pepper
Instructions
-
Step 1
Preheat your oven to 350°F (175°C). Line a large baking sheet with parchment paper. -
Step 2
In a medium-sized mixing bowl, combine 1 cup cottage cheese and 1 large egg. Whisk until thoroughly combined. -
Step 3
Add 1/4 cup grated Parmesan cheese, 1 tablespoon chopped fresh chives, 1/4 teaspoon garlic powder, and 1/8 teaspoon black pepper. Stir until well combined, creating a thick batter. -
Step 4
Drop small dollops (about 1 to 1.5 inches in diameter) of the batter onto the prepared baking sheet, leaving space between them. Gently flatten each dollop with the back of a spoon for thinner chips. -
Step 5
Bake for 12-15 minutes, or until the edges begin to turn golden brown. For even crisping, you can carefully flip the chips halfway through. -
Step 6
Continue baking for another 5-8 minutes, or until golden brown and firm to the touch. Remove from oven and let cool on the baking sheet for 5-10 minutes before transferring to a wire rack to cool completely.
Important Information
Nutrition Facts (Per Serving)
It is important to consider this information as approximate and not to use it as definitive health advice.
Allergy Information
Please check ingredients for potential allergens and consult a health professional if in doubt.