Easy Pickled Red Onions- Quick & Flavorful Recipe
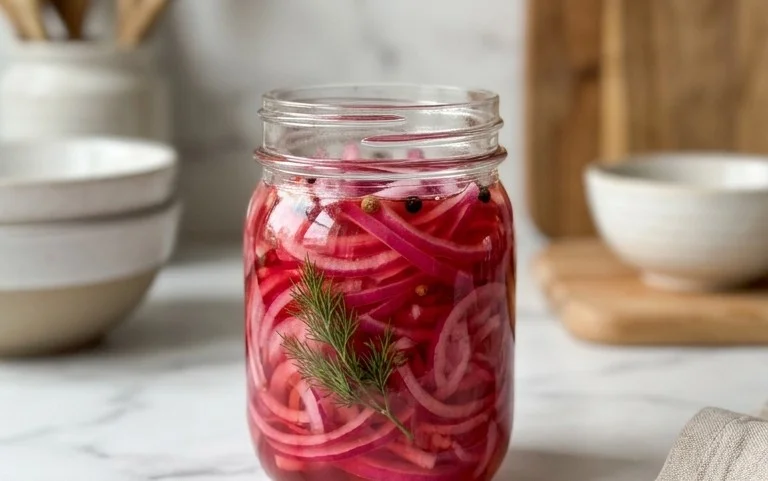
Pickled red onions are the vibrant, zesty secret weapon every kitchen needs. I’ve always been captivated by their electric pink hue and the instant burst of tangy sweetness they bring to any dish. Forget bland, forget boring; these pickled red onions are a game-changer. They transform humble tacos into gourmet creations, elevate a simple salad into a flavor explosion, and add that perfect pucker to sandwiches and burgers. What makes them so special, you ask? It’s that magical alchemy of crisp onion texture meeting a bright, acidic brine that’s both refreshing and deeply satisfying. They’re incredibly easy to make, require just a handful of pantry staples, and the reward is a versatile condiment that lasts for weeks. Trust me, once you start making your own pickled red onions, you’ll wonder how you ever lived without them.
Pickled Red Onions: A Versatile Kitchen Staple
There’s a reason why pickled red onions have become a darling of kitchens everywhere. Their vibrant color, delightful tang, and satisfying crunch transform ordinary dishes into something truly special. From topping tacos and sandwiches to gracing salads and grain bowls, these ruby-red gems are incredibly versatile and surprisingly easy to make. Forget the store-bought versions with their sometimes-muddled flavors; making your own pickled red onions allows you to control the sweetness, the acidity, and the spice. It’s a simple process that yields impressive results, and I’m excited to share my go-to recipe with you. Once you try them, you’ll wonder how you ever lived without them!
Ingredients:
Instructions:
Let’s get started on making these beautiful pickled red onions! The process is straightforward, and the magic happens as the onions sit in their brine, transforming from sharp and pungent to sweet, tangy, and tender.
First, we need to prepare our onions. The key here is to slice them thinly and evenly. This ensures that they pickle uniformly and have the perfect texture – not too tough, not too mushy. Take your 2 medium red onions (or 3 smaller ones) and peel off the papery outer layers. Trim off the top stem end and the root end. You can either halve the onions vertically, and then slice them thinly, or slice them into rounds. I personally prefer thinly slicing them into half-moons, as this creates visually appealing strands that are easy to pick up with a fork. Aim for slices that are about 1/8-inch thick. The thinner you slice them, the quicker they will pickle and the more tender they will become. Place your thinly sliced onions into a clean glass jar or a heat-proof bowl. A jar with a lid is ideal for storing them later, so consider using one that can hold all your sliced onions.
Next, it’s time to create our pickling brine. This is where the flavor really comes together. In a medium saucepan, combine the 1 1/4 cups of water, 1 1/4 cups of white vinegar, and 3 tablespoons of sugar. I like to use a good quality white vinegar, as it provides a clean, sharp acidity. For the sugar, you can use granulated sugar, but I also love experimenting with coconut sugar or even a touch of maple syrup for a slightly different flavor profile. Just be mindful that alternative sweeteners might slightly alter the color. Add 1 tablespoon of sea salt to the mixture. Sea salt dissolves beautifully and contributes a pure, clean saltiness without any additives. If you enjoy a little kick, now is the time to stir in your red pepper flakes. I usually start with 1/4 teaspoon and add more if I’m feeling adventurous. This optional ingredient adds a subtle warmth that complements the tang of the vinegar and the sweetness of the sugar.
Now, we’ll heat the brine. Place the saucepan over medium heat and stir the ingredients constantly until the sugar and salt have completely dissolved. You don’t need to bring this mixture to a rolling boil; just heat it enough so that everything is well incorporated and the liquid is hot. Once dissolved, remove the saucepan from the heat. The hot brine is crucial for the pickling process as it helps to slightly soften the onions and infuse them with flavor more effectively.
Carefully pour the hot brine over the sliced red onions in your jar or bowl. Make sure that all the onions are submerged in the brine. If you’re using a jar, you might need to gently press down on the onions to ensure they are fully covered. The liquid should come up to just cover the onions. If it seems a bit short, you can add a tiny splash more vinegar and water (in equal parts) to top it off, but be sure to dissolve a pinch more sugar and salt in it if you do.
Now comes the waiting game, but it’s a delicious anticnon-alcoholic ipation! Let the onions cool at room temperature for about 30 minutes to an hour. During this time, you’ll see the onions start to change color, becoming a beautiful, translucent pink. After they’ve cooled down, cover the jar tightly (if using a jar) and transfer it to the refrigerator. The magic really happens over the next few hours, and even better by the next day. I find that they are truly at their best after at least 24 hours in the fridge. The flavors will meld, the onions will become tender yet still retain a pleasant crunch, and the acidity will mellow out to a perfect balance.
These pickled red onions will keep in the refrigerator for at least 2-3 weeks. They are incredibly versatile. Use them on avocado toast, in your favorite salads, as a topping for burgers, or even mixed into tuna salad for an extra zing. Their bright flavor and beautiful color make any dish more appealing. Enjoy experimenting with them!
Conclusion:
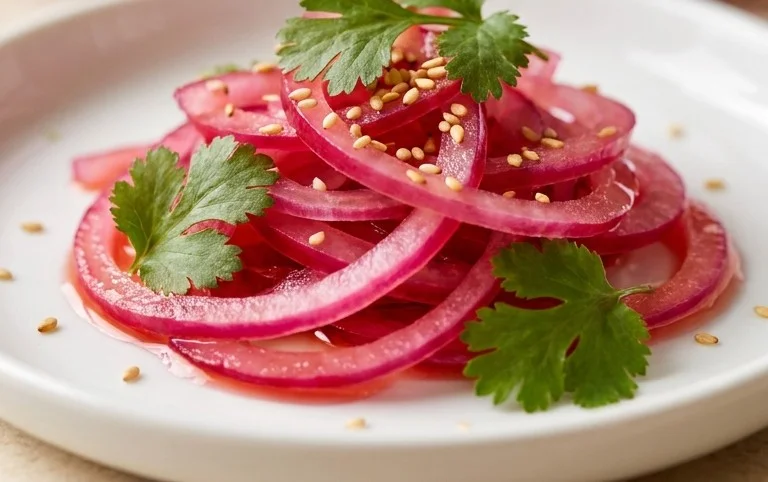
And there you have it – a simple, vibrant, and incredibly versatile recipe for pickled red onions! This is more than just a condiment; it’s a flavor-boosting powerhouse that elevates so many dishes. The beautiful pink hue alone is enough to brighten any plate, but the tangy, slightly sweet crunch is what truly makes it special. Whether you’re a seasoned cook or just starting out, this recipe is a fantastic addition to your culinary repertoire. It’s quick to make, requires minimal effort, and the results are consistently impressive. Don’t hesitate to give these pickled red onions a try; I promise you won’t regret it!
These beauties are perfect as a topping for tacos, burgers, sandwiches, salads, avocado toast, and even grilled fish or roasted vegetables. They add a delightful zing and visual appeal that transforms ordinary meals into something extraordinary. Feel free to experiment with variations too! For a spicier kick, add a pinch of red pepper flakes. If you prefer a sweeter profile, a touch more sugar can be used. Some even enjoy infusing them with herbs like dill or thyme during the pickling process. The possibilities are endless!
Frequently Asked Questions:
How long do pickled red onions last?
When stored properly in an airtight container in the refrigerator, your pickled red onions can last for up to 2-3 weeks. You’ll notice the flavor continues to develop and deepen over time, though they are best enjoyed within the first couple of weeks for optimal crunch and freshness.
Can I use a different type of onion?
While red onions are preferred for their vibrant color and slightly milder, sweeter flavor when pickled, you can technically use other onions like white or yellow. However, they won’t achieve the same beautiful pink hue, and their flavor profile might be sharper.
What if I don’t have white vinegar?
If you don’t have white vinegar, apple cider vinegar or rice vinegar are excellent substitutes. They will impart a slightly different but still delicious tang to your pickled red onions.
Pickled Red Onions
Quick and easy pickled red onions, perfect for tacos, sandwiches, salads, and more. A vibrant and tangy condiment.
Ingredients
-
2 medium red onions ((or 3 small ones))
-
1 1/4 cup water
-
1 1/4 cup white vinegar
-
3 tbsp sugar
-
1 tbsp sea salt
-
1/4-1/2 tsp red pepper flakes ((optional))
Instructions
-
Step 1
Thinly slice the red onions into rings or half-moons. -
Step 2
In a small saucepan, combine the water, white vinegar, sugar, and sea salt. -
Step 3
Heat the mixture over medium heat, stirring until the sugar and salt are dissolved. Do not boil. -
Step 4
Place the sliced onions in a clean glass jar. If using, add the red pepper flakes. -
Step 5
Pour the warm brine over the onions, ensuring they are fully submerged. -
Step 6
Let the mixture cool to room temperature, then cover and refrigerate. They are best after at least 30 minutes, but will continue to improve with time.
Important Information
Nutrition Facts (Per Serving)
It is important to consider this information as approximate and not to use it as definitive health advice.
Allergy Information
Please check ingredients for potential allergens and consult a health professional if in doubt.