Easy Cherry Turnovers – Simple Sweet Pastry Recipe
Easy Cherry Turnovers are about to become your new best friend in the kitchen. Forget complicated pastry techniques and hours spent in prep; these delightful little pockets of joy are designed for maximum flavor with minimal fuss. There’s something inherently comforting and celebratory about a warm, flaky turnover bursting with sweet-tart cherry filling. They’re the perfect treat for a quick breakfast, a delightful afternoon pick-me-up, or an impressive yet simple dessert to share. What truly makes these easy cherry turnovers so special is their approachable nature. You don’t need to be a seasoned baker to achieve beautifully golden, puffed-up pastries that will have everyone asking for the recipe. We’re talking about that satisfying crunch giving way to a molten cherry center – pure bliss! Get ready to impress yourself and your loved ones with this foolproof recipe.
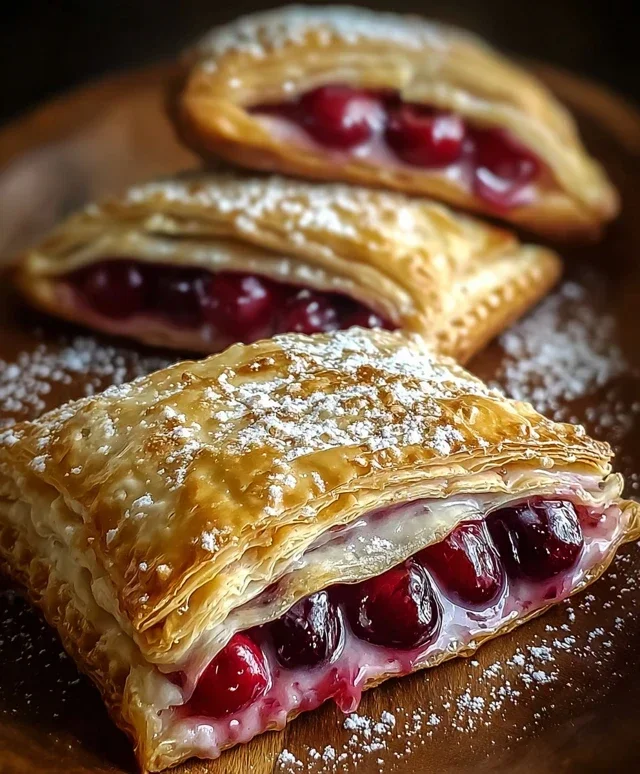
Easy Cherry Turnovers
There’s something incredibly satisfying about a warm, fruit-filled pastry. These easy cherry turnovers are my go-to when I’m craving a delightful treat that looks impressive but requires minimal effort. They are perfect for a casual brunch, an afternoon pick-me-up, or even a simple dessert after dinner. The flaky, golden puff pastry encasing a sweet and tart cherry filling is a winning combination that always brings smiles.
One of the best things about this recipe is how forgiving it is. Even if you’re new to baking, you’ll find these turnovers a joy to make. The store-bought puff pastry is a game-changer, saving you tons of time and effort. Plus, using pre-made cherry pie filling means you get that delicious fruit flavor without any fuss. Let’s get started on creating these little pockets of happiness!
Ingredients:
Preparing the Dough and Filling
The foundation of our delicious turnovers is, of course, the puff pastry. Make sure to thaw your puff pastry according to the package directions. This usually means leaving it in the refrigerator overnight or on the counter for about 30-40 minutes. You want it to be pliable enough to work with but still cool. Overly warm puff pastry can become sticky and difficult to handle, leading to a less-than-ideal texture. Once thawed, gently unfold the pastry sheets onto a lightly floured surface. If your sheets are quite large, you might consider cutting them in half to make smaller, more manageable turnovers, but for a standard size, one sheet will yield two turnovers.
Next, let’s talk about the cherry filling. Whether you’re using fresh cherries that you’ve already prepped and cooked down into a compote, or the convenience of canned cherry pie filling, ensure it’s not overly wet. If using canned, you can drain off any excess liquid to prevent the pastry from becoming soggy. The goal is a thick, luscious filling that will hold its shape within the pastry. If you’re feeling adventurous and have fresh cherries, remember to pit them and cook them down with a little sugar and cornstarch until thickened. This adds an extra layer of homemade goodness!
Assembling the Turnovers
Now for the fun part – assembling these delightful parcels!
1. Cutting and Filling the Pastry: Carefully unfold your thawed puff pastry sheets. Using a sharp knife or a pizza cutter, cut each sheet into two equal rectangles. You should end up with four rectangles in total. Take one pastry rectangle and, using a spoon, place about 2 tablespoons of cherry pie filling onto one half of the rectangle, leaving a border of about 1/2 inch around the edges. Be careful not to overfill, as this can cause the filling to ooze out during baking. Repeat this with the remaining pastry rectangles and filling.
2. Sealing the Turnovers: In a small bowl, whisk together the large egg and 1 tablespoon of milk. This is your egg wash, which will give the turnovers a beautiful golden sheen and help them seal. Lightly brush the edges of the pastry rectangles that are exposed around the filling with this egg wash. This is crucial for creating a good seal. Now, gently fold the other half of the pastry rectangle over the filling, creating a turnover shape. Press down firmly along the edges with your fingers to seal them completely. You can also use the tines of a fork to crimp the edges, which not only ensures a tight seal but also adds a decorative touch.
3. Creating Vents and Baking Preparation: To allow steam to escape from the turnovers as they bake, which prevents them from puffing up too much and potentially bursting, you need to create a few vents. Using a sharp knife, make two or three small slits in the top of each turnover. This will let the steam escape gracefully, resulting in perfectly puffed pastries. Place the assembled turnovers onto a baking sheet lined with parchment paper. This prevents sticking and makes for easier cleanup. For an extra rich and glossy finish, brush the tops of the turnovers with the remaining egg wash.
4. Baking to Golden Perfection: Preheat your oven to 400°F (200°C). This higher temperature is key to achieving that signature puff pastry crispness and golden color. Carefully place the baking sheet with the turnovers into the preheated oven. Bake for approximately 18-22 minutes, or until the turnovers are puffed up, beautifully golden brown, and the filling is bubbling slightly through the vents. Keep an eye on them, as oven temperatures can vary, and you want them perfectly cooked without burning.
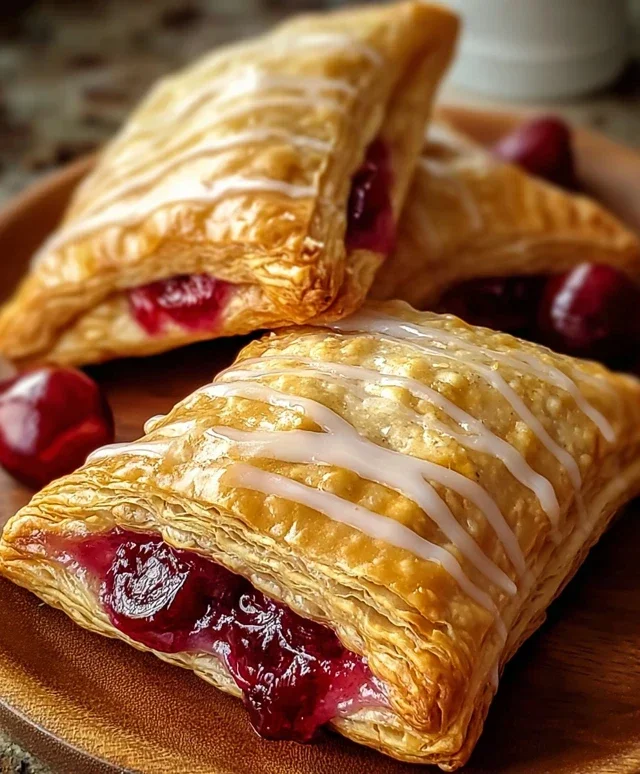
5. Making the Glaze and Finishing Touches: While your turnovers are baking, prepare a simple yet delicious glaze. In a medium bowl, whisk together the 1 cup of powdered sugar, vanilla extract, and 2-3 tablespoons of milk. Start with 2 tablespoons of milk and add more, a teaspoon at a time, until you reach your desired drizzling consistency. You want a glaze that is thick enough to coat the pastry but thin enough to drizzle easily. Once the turnovers are out of the oven and have cooled slightly for about 5-10 minutes (you don’t want them piping hot, but still warm), drizzle the glaze generously over the tops. For an extra touch of elegance, you can also dust them with a little additional powdered sugar just before serving.
These easy cherry turnovers are best enjoyed warm, when the pastry is at its flakiest and the filling is wonderfully gooey. They are a delightful treat that I’m sure you’ll love as much as I do. Enjoy!
Conclusion:
And there you have it – our delightfully simple recipe for Easy Cherry Turnovers! We’ve shown you just how straightforward it is to whip up these sweet, flaky pastries, perfect for any occasion. The beauty of these turnovers lies in their minimal effort and maximum reward. They’re a fantastic way to enjoy the bright, tart-sweet flavor of cherries encased in a golden, buttery crust. Whether you’re a begin extractner baker or just looking for a quick dessert, this recipe is a winner.
These versatile treats are wonderful served warm, perhaps with a scoop of vanilla ice cream or a dollop of whipped cream for an extra touch of indulgence. They also make a charming addition to afternoon tea or a potluck. Don’t be afraid to get creative with the filling – while cherries are classic, feel free to experiment with other fruits like blueberries, raspberries, or even a mixed berry blend. You could also add a pinch of cinnamon or a splash of almond extract to the cherry filling for a unique twist.
We truly encourage you to give these Easy Cherry Turnovers a try. They are a testament to the fact that delicious, homemade desserts don’t need to be complicated. Enjoy the process, savor the aroma as they bake, and most importantly, relish every bite!
Frequently Asked Questions:
Can I use fresh cherries instead of canned?
Absolutely! If using fresh cherries, you’ll want to pit them and may need to cook them down slightly with a bit of sugar and cornstarch to achieve a similar consistency to canned pie filling. This might add a little extra time but can result in an even fresher flavor.
How should I store leftover cherry turnovers?
Once cooled, store any leftover turnovers in an airtight container at room temperature for up to two days, or in the refrigerator for up to four days. They are best enjoyed fresh, but can be gently reheated in a warm oven or toaster oven to crisp them up again.
Easy Cherry Turnovers
Simple and delicious cherry turnovers made with store-bought puff pastry, perfect for a quick dessert or snack.
Ingredients
-
1 package puff pastry (2 sheets), thawed
-
1 cup cherry pie filling (fresh or canned)
-
1 large egg
-
1 tablespoon milk
-
1 cup powdered sugar
-
1 teaspoon vanilla extract
-
2-3 tablespoons milk
-
Additional powdered sugar for dusting
Instructions
-
Step 1
Preheat oven to 400°F (200°C). Line a baking sheet with parchment paper. -
Step 2
Unfold the thawed puff pastry sheets onto a lightly floured surface. Cut each sheet into 4 equal squares. -
Step 3
Spoon about 2 tablespoons of cherry pie filling into the center of one half of each pastry square, leaving a small border. -
Step 4
Whisk together the egg and 1 tablespoon of milk. Brush the edges of the pastry squares with the egg wash. -
Step 5
Fold the other half of the pastry over the filling to create a triangle. Press the edges firmly with a fork to seal. -
Step 6
Place the turnovers on the prepared baking sheet. Cut a few small slits in the top of each turnover to allow steam to escape. Brush the tops with the remaining egg wash. -
Step 7
Bake for 15-20 minutes, or until golden brown and puffed. -
Step 8
While the turnovers are baking, prepare the glaze by whisking together 1 cup of powdered sugar, 1 teaspoon vanilla extract, and 2-3 tablespoons of milk until smooth. Add more milk if needed to reach desired drizzling consistency. -
Step 9
Let the turnovers cool slightly on a wire rack, then drizzle with the powdered sugar glaze. Dust with additional powdered sugar if desired.
Important Information
Nutrition Facts (Per Serving)
It is important to consider this information as approximate and not to use it as definitive health advice.
Allergy Information
Please check ingredients for potential allergens and consult a health professional if in doubt.