Honey Sesame Chicken Recipe- Easy & Delicious
Honey sesame chicken is a dish that always brings a smile to my face. It’s a classic for a reason, isn’t it? That irresistible combination of sweet and savory, with that delightful little crunch, just hits all the right notes. We’ve all been there, craving that takeout favorite, but what if I told you that making truly phenomenal honey sesame chicken at home is not only achievable but also incredibly rewarding? Forget those overly-sugary, gloopy versions. We’re talking about tender, juicy chicken coated in a perfectly balanced, glossy sauce, infused with the nutty aroma of toasted sesame seeds. It’s the kind of meal that makes weeknights feel special and weekend gatherings even more memorable. Get ready to master the art of this beloved sweet and savory sensation!
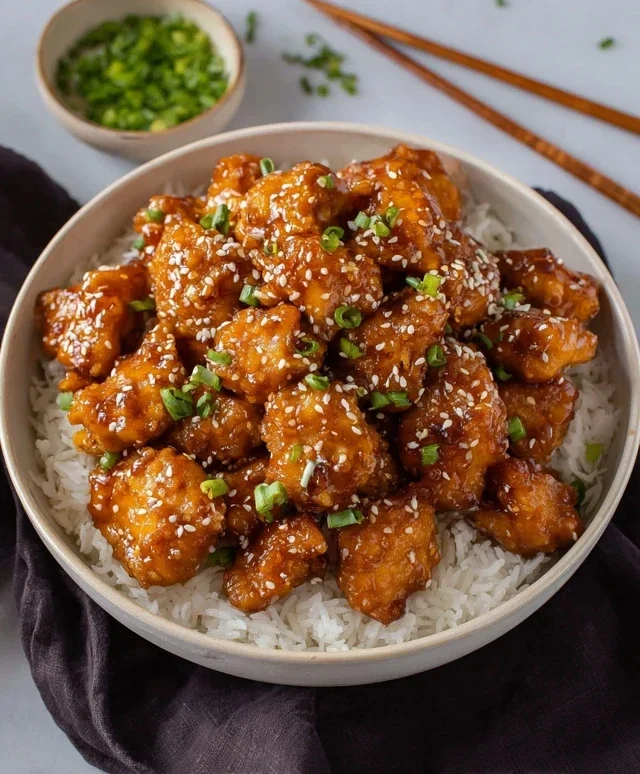
Honey Sesame Chicken
Get ready to experience a taste sensation that’s both sweet and savory, with a satisfying crunch! This Honey Sesame Chicken recipe is a weeknight savior, delivering restaurant-quality flavor right in your own kitchen. Forget those takeout menus; with a few simple steps, you can recreate this beloved dish that’s perfect for pleasing picky eaters and impressing dinner guests alike. The combination of tender chicken, a crisp coating, and that irresistible sticky honey-sesame glaze is truly a winning formula.
Ingredients:
Cooking Instructions:
Let’s get started on creating this delicious Honey Sesame Chicken! The key to a great Honey Sesame Chicken is achieving that perfect balance of crispy coating on the chicken and a flavorful, sticky sauce. We’ll break this down into a few manageable steps, focusing on preparing the chicken, making the delightful sauce, and then bringin extractg it all together for that glorious finish.
1. Preparing the Chicken for Frying
First, we need to get our chicken pieces ready for their crispy transformation. In a medium bowl, combine the chicken pieces with the chicken bouillon powder, white pepper, and 1 tablespoon of water. Give everything a good toss to ensure the chicken is evenly coated with these seasonings. This step is crucial for infusing flavor deep into the chicken itself before it even hits the fryer. Next, in a separate bowl, whisk together the two large eggs until they are well beaten. Add the seasoned chicken to the egg mixture and let it marinate for about 10-15 minutes. This egg bath will help the coating adhere beautifully.
While the chicken is marinating, let’s prepare our dredgin extractg station. In a shallow dish or pie plate, whisk together the all-purpose flour, cornstarch, baking powder, and salt. The combination of flour and cornstarch is our secret to achieving that extra crispy, airy coating. The baking powder acts as a leavening agent, making the batter lighter and more brittle when fried. Stir in the 1/4 cup of water and 2 teaspoons of vegetable oil until you have a smooth, pourable batter. It should be thick enough to coat the chicken but not so thick that it becomes heavy. Once the chicken has had its time in the egg bath, it’s time to dredge it. Remove each piece of chicken from the egg, letting any excess drip off, and then dip it into the batter, ensuring it’s fully coated. Place the battered chicken pieces on a wire rack set over a baking sheet while you prepare the oil for frying. This prevents them from sticking and allows air to circulate, ensuring an even coating.
2. Frying the Chicken to Golden Perfection
Now for the fun part: frying! Heat about 1-2 inches of neutral oil, such as vegetable or canola oil, in a large skillet or wok over medium-high heat. You’re looking for the oil to reach around 350-360 degrees Fahrenheit. If you don’t have a thermometer, you can test the oil by dropping a tiny bit of batter into it; it should sizzle and float to the surface immediately. Carefully add the battered chicken pieces to the hot oil in batches, making sure not to overcrowd the pan. Overcrowding will lower the oil temperature, resulting in soggy chicken instead of crispy. Fry the chicken for about 4-6 minutes per batch, turning them occasionally, until they are golden brown and cooked through. You’ll notice them puff up slightly as they fry. Once they’re beautifully golden and crispy, remove them from the oil using a slotted spoon and place them back on the wire rack to drain. This step ensures maximum crispiness and removes any excess oil.
3. Crafting the Irresistible Honey Sesame Sauce
While the fried chicken is resting and maintaining its crunch, we can whip up the star of the show: the honey sesame sauce. In a small saucepan over medium heat, combine the light soy sauce, oyster sauce, rice vinegar, and ketchup. Stir these ingredients together until they are well combined. The oyster sauce adds a savory depth, the rice vinegar brings a pleasant tang, and the ketchup contributes a touch of sweetness and helps with the glossy sheen of the sauce. Let this mixture simmer gently for about 2-3 minutes, stirring occasionally, until it thickens slightly. You’re aiming for a consistency that will beautifully coat the back of a spoon. This sauce is incredibly versatile and can be adjusted to your personal taste preferences. If you like it sweeter, add a little more honey (though this recipe relies on the ketchup and the honey effect from the name, if you have honey on hand, a tablespoon can be added here too!). If you prefer it tangier, a splash more rice vinegar will do the trick.
4. Bringin extractg it All Together
Now it’s time for the grand finnon-alcoholic ale – coating our crispy chicken in that glorious sauce. Once the sauce has thickened slightly, reduce the heat to low. Add the fried chicken pieces back into the saucepan with the sauce. Gently toss the chicken to coat each piece evenly. You want to work relatively quickly here to prevent the chicken from becoming soggy. The goal is for the sauce to cling to the chicken, creating that signature sticky glaze. Continue to toss for about 1-2 minutes, just until the chicken is thoroughly coated and the sauce is beautifully glossy. Be careful not to overcook the chicken in the sauce, as this can diminish the crispiness achieved during frying.
5. Serving and Garnishing for Maximum Appeal
Your delicious Honey Sesame Chicken is almost ready to be devoured! Transfer the saucy chicken to a serving platter. For an extra burst of flavor and visual appeal, I love to garnish this dish. Sprinkle generously with toasted sesame seeds. Their nutty flavor complements the sweet and savory sauce perfectly. Then, add some freshly sliced green onions for a pop of color and a mild oniony bite. This Honey Sesame Chicken is best served immediately while the chicken is still delightfully crispy. It’s fantastic served over steamed white rice, which will soak up any extra delicious sauce. You can also pair it with steamed or stir-fried vegetables for a complete and balanced meal. Enjoy every single bite of this incredibly satisfying homemade dish!
Conclusion:
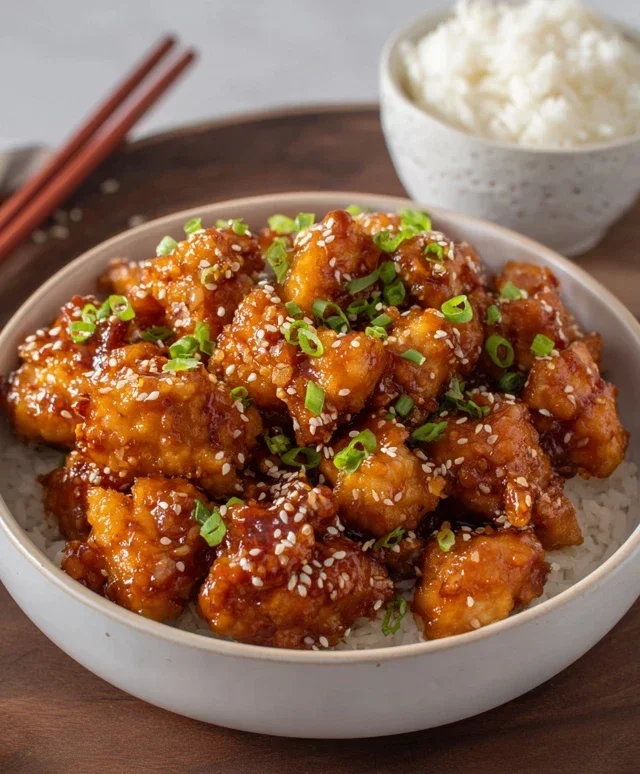
So there you have it! This Honey Sesame Chicken recipe is an absolute winner for a reason. It strikes that perfect balance between sweet, savory, and a hint of nutty goodness from the sesame. The chicken is incredibly tender, coated in a sticky, flavorful glaze that’s simply irresistible. It’s quick enough for a weeknight meal but impressive enough to serve guests. We love pairing it with fluffy steamed rice and crisp steamed broccoli to round out the meal. Feel free to get creative with variations – add some chili flakes for a spicy kick, throw in some chopped bell peppers and onions for extra veggies, or even swap chicken thighs for chicken breast if you prefer. Don’t be afraid to experiment and make this Honey Sesame Chicken your own! I truly encourage you to give this recipe a try; I’m confident you’ll be delighted with the results.
Frequently Asked Questions:
Can I make this Honey Sesame Chicken ahead of time?
While the sauce can certainly be prepared in advance and stored in the refrigerator, it’s best to cook the chicken just before serving for optimal texture and crispiness. You can, however, chop your vegetables and prepare your rice ahead of time to speed up the final assembly.
What kind of chicken is best for this recipe?
Boneless, skinless chicken thighs are generally recommended for their tenderness and ability to stay moist during cooking. However, boneless, skinless chicken breasts can also be used. If using chicken breast, be careful not to overcook it to prevent it from becoming dry.
How can I make the sesame chicken extra crispy?
To achieve extra crispiness, ensure your oil is hot before frying the chicken. Don’t overcrowd the pan; fry the chicken in batches to allow each piece to get direct contact with the hot oil. You can also consider double-frying your chicken for an even crispier coating.
Honey Sesame Chicken
A classic sweet and savory honey sesame chicken recipe, perfect for a weeknight meal.
Ingredients
-
1 1/2 lb chicken breast or thighs (cut into 1 inch pieces)
-
1 teaspoon chicken bouillon powder
-
1/2 teaspoon white pepper
-
1 tablespoon water
-
2 large eggs
-
1/2 cup all-purpose flour
-
1/2 cup cornstarch
-
2 teaspoon baking powder
-
1/2 teaspoon salt
-
1/4 cup water
-
2 teaspoon vegetable oil
-
3 tablespoon light soy sauce
-
1 tablespoon oyster sauce
-
2 tablespoon rice vinegar
-
2 tablespoon ketchup
Instructions
-
Step 1
In a bowl, combine chicken pieces with chicken bouillon powder, white pepper, and 1 tablespoon water. Let marinate for 10 minutes. -
Step 2
In a separate bowl, whisk together the eggs. In another bowl, combine flour, cornstarch, baking powder, and salt. Dredge marinated chicken pieces in the egg mixture, then coat with the flour mixture. -
Step 3
Heat 2 teaspoon vegetable oil in a wok or large skillet over medium-high heat. Fry chicken in batches until golden brown and cooked through. Remove and set aside. -
Step 4
In the same wok, combine 1/4 cup water, light soy sauce, oyster sauce, rice vinegar, and ketchup. Bring to a simmer. -
Step 5
Return the fried chicken to the wok. Toss to coat evenly with the sauce until thickened and glossy. -
Step 6
Serve hot, optionally garnished with sesame seeds.
Important Information
Nutrition Facts (Per Serving)
It is important to consider this information as approximate and not to use it as definitive health advice.
Allergy Information
Please check ingredients for potential allergens and consult a health professional if in doubt.