No-Bake Peanut Butter Energy Bites-Quick Healthy Treat
No-Bake Peanut Butter Energy Bites are about to become your new best friend, and for good reason! We all need those little boosts throughout the day, and these delightful morsels are the perfect solution. Imagin extracte a bite-sized explosion of satisfying peanut butter goodness, packed with wholesome ingredients that fuel your body and tantalize your taste buds. That’s precisely what you get with these amazing treats. People absolutely adore them because they’re incredibly easy to make – no oven required, meaning you can whip them up in minutes whenever a craving strikes. What truly makes these no-bake peanut butter energy bites special is their versatility; they’re fantastic for a pre-workout snack, a healthy afternoon pick-me-up, or even a guilt-free dessert. They strike that perfect balance between indulgence and nourishment, making them a go-to for busy individuals and families alike who want delicious, healthy snacks readily available.
Why You’ll Love Making These
The Ultimate Quick Snack Solution
No-Bake Peanut Butter Energy Bites
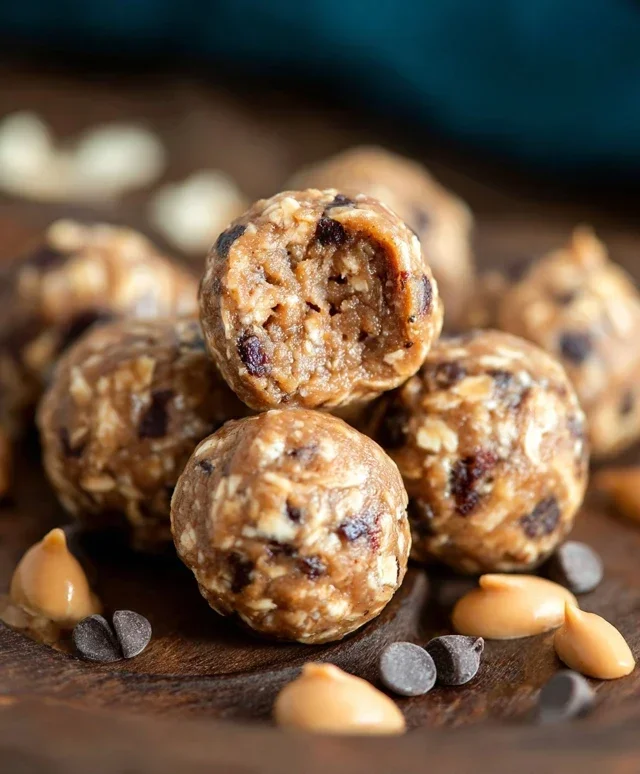
Looking for a quick, healthy, and utterly delicious snack that requires absolutely no oven time? You’ve come to the right place! These No-Bake Peanut Butter Energy Bites are my go-to when I need a little boost of energy, a sweet treat that won’t derail my healthy eating goals, or simply a fun activity to whip up with the kids. They are incredibly simple to make, versatile, and packed with satisfying flavors and textures. The best part? You probably already have all the ingredients in your pantry. Let’s get started on creating these little balls of goodness!
Ingredients:
Instructions:
Phase 1: Gathering and Mixing
The beauty of these energy bites is their simplicity, and it all begin extracts with combining our core ingredients. First, make sure you have a medium-sized mixing bowl ready. Grab your ½ cup of quick oats. Quick oats are essential here because they are smaller and cook faster, making them ideal for no-bake recipes where they won’t be cooked by heat. They also lend a lovely texture to the bites without being too chewy.
Next, measure out your ¼ cup of peanut butter. I personally love using creamy peanut butter for its smooth texture, but feel free to use crunchy if you prefer a little extra bite. Natural peanut butter is a great option, but if you use one that’s very oily, you might want to stir it well before measuring to ensure a good consistency. Now, for the sweetness and binding agent: 2 tablespoons of honey. Honey not only adds a delightful sweetness but also helps to bind all the ingredients together, creating that signature energy bite consistency. If you don’t have honey, you could also use maple syrup or agave nectar, though the flavor profile will slightly change.
In your mixing bowl, add the quick oats, peanut butter, and honey. Using a sturdy spoon or a spatula, begin extract to mix these ingredients together. This is where the magic starts to happen! You’ll want to stir vigorously until everything is well combined. It might seem a little crum extractbly at first, but keep mixing. The peanut butter and honey will gradually coat the oats, and the mixture will start to come together. Don’t be afraid to use a bit of elbow grease to ensure there are no dry pockets of oats remaining. You’re aiming for a cohesive, slightly sticky dough-like consistency that you can easily press together.
Phase 2: Adding the Finishing Touches and Forming the Bites
Once your oat, peanut butter, and honey mixture is well combined and has that doughy feel, it’s time to add our delightful burst of flavor and texture: ¼ cup of mini chocolate chips. Mini chocolate chips are perfect because they distribute evenly throughout the bites and provide those satisfying little pockets of chocolatey goodness. If you’re not a fan of chocolate chips, you could absolutely swap them out for other additions like chopped nuts (almonds, walnuts, or pecans would be delicious!), dried fruit (cranberries, raisins, or chopped apricots), or even a sprinkle of shredded coconut. The possibilities are truly endless, and you can customize these energy bites to suit your personal taste preferences.
Gently fold the mini chocolate chips into the mixture. Again, use your spoon or spatula to ensure they are evenly distributed. You don’t want all the chocolate chips to clump together in one spot. Once the chocolate chips are incorporated, the mixture should be ready to roll. If for some reason your mixture seems too dry and is not holding together, you can add another teaspoon of peanut butter or honey, a little at a time, and mix until it reaches the desired consistency. Conversely, if it’s too wet, you can add another tablespoon of oats.
Phase 3: Shaping and Chilling
Now comes the fun part: forming the energy bites! Take about a tablespoon of the mixture and roll it between your palms to form a small ball. The size of your bites is entirely up to you – some people prefer smaller, bite-sized morsels, while others like them a little larger for a more substantial snack. Aim for a consistent size so they all bake (or chill, in this case!) evenly. The mixture should be sticky enough to hold its shape, but not so sticky that it’s difficult to handle. If it’s sticking to your hands, you can lightly dampen your palms with water or a tiny bit of oil.
Continue this process until all of the mixture has been rolled into balls. As you form each ball, you can place it on a plate or a baking sheet lined with parchment paper. Lining the plate isn’t strictly necessary as these are no-bake, but it can help prevent any potential sticking and makes cleanup a breeze. Once all your energy bites are formed, it’s time to let them firm up. Place the plate or baking sheet with the energy bites into the refrigerator for at least 30 minutes. This chilling time is crucial. It allows the fats in the peanut butter to solidify and the honey to further bind the ingredients, giving the bites their perfect, firm texture. Without this chilling step, they might be too soft and fall apart easily.
Phase 4: Enjoying Your Delicious Creation
After 30 minutes (or longer if you can resist!), your No-Bake Peanut Butter Energy Bites are ready to be enjoyed! They are perfect for a pre- or post-workout snack, a mid-afternoon pick-me-up, or even a healthy dessert. Store any leftovers in an airtight container in the refrigerator for up to a week. They’ll stay fresh and delicious, ready for whenever that energy craving strikes. I love keeping a batch in the fridge for easy access. They are a testament to how simple ingredients can create something so satisfying and good for you. Enjoy every bite!
Conclusion:
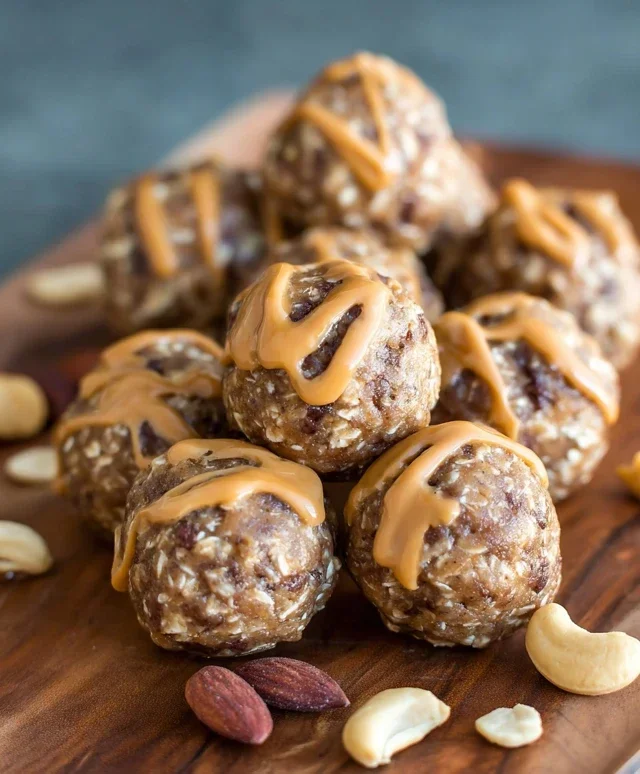
There you have it! A super simple and incredibly delicious recipe for No-Bake Peanut Butter Energy Bites that’s perfect for anyone looking for a quick, healthy, and satisfying snack. These little powerhouses are packed with flavor and goodness, making them an ideal go-to for a pre-workout boost, an afternoon pick-me-up, or even a healthier dessert option. Their versatility is truly a standout feature. You can easily adapt them to suit your tastes and what you have on hand, ensuring you always have a delicious treat ready to enjoy.
I encourage you to give these No-Bake Peanut Butter Energy Bites a try! They’re a game-changer for busy days and healthy eating goals. Feel free to experiment with the variations I’ve suggested – adding different nuts, seeds, or even a touch of chocolate. They store beautifully in the refrigerator for up to a week, making them perfect for meal prep. Enjoy creating and devouring these delightful bites!
Frequently Asked Questions:
Can I make these energy bites nut-free?
Absolutely! If you have a nut allergy or simply prefer to avoid nuts, you can easily substitute the peanut butter with sunflower seed butter or tahini for a delicious nut-free alternative. Just ensure the consistency is similar to peanut butter.
How long do these energy bites last?
These No-Bake Peanut Butter Energy Bites will stay fresh in an airtight container in the refrigerator for up to one week. They can also be frozen for longer storage, though the texture might change slightly upon thawing.
What are some other healthy additions I can include?
The possibilities are endless! Consider adding chia seeds, flax seeds, or hemp seeds for an extra nutritional punch. A sprinkle of cinnamon adds warmth, while a few chocolate chips (dark chocolate is great!) provide a delightful treat. Dried cranberries or other dried fruits can also add a lovely chegrape juicess and sweetness.
No-Bake Peanut Butter Energy Bites
Quick and easy no-bake energy bites perfect for a healthy snack.
Ingredients
-
½ cup quick oats
-
¼ cup peanut butter
-
2 tablespoons honey
-
¼ cup mini chocolate chips
-
1 tablespoon chia seeds
-
1 teaspoon vanilla extract
Instructions
-
Step 1
In a medium bowl, combine the quick oats, peanut butter, and honey. -
Step 2
Add the mini chocolate chips, chia seeds, and vanilla extract to the bowl. -
Step 3
Stir all ingredients together until well combined. The mixture should be slightly sticky. -
Step 4
Roll the mixture into bite-sized balls, about 1 inch in diameter. -
Step 5
Place the energy bites on a plate or baking sheet lined with parchment paper. -
Step 6
Refrigerate for at least 30 minutes to allow the bites to firm up before serving.
Important Information
Nutrition Facts (Per Serving)
It is important to consider this information as approximate and not to use it as definitive health advice.
Allergy Information
Please check ingredients for potential allergens and consult a health professional if in doubt.