Mini Egg Cheesecake Cookie Bars Delight
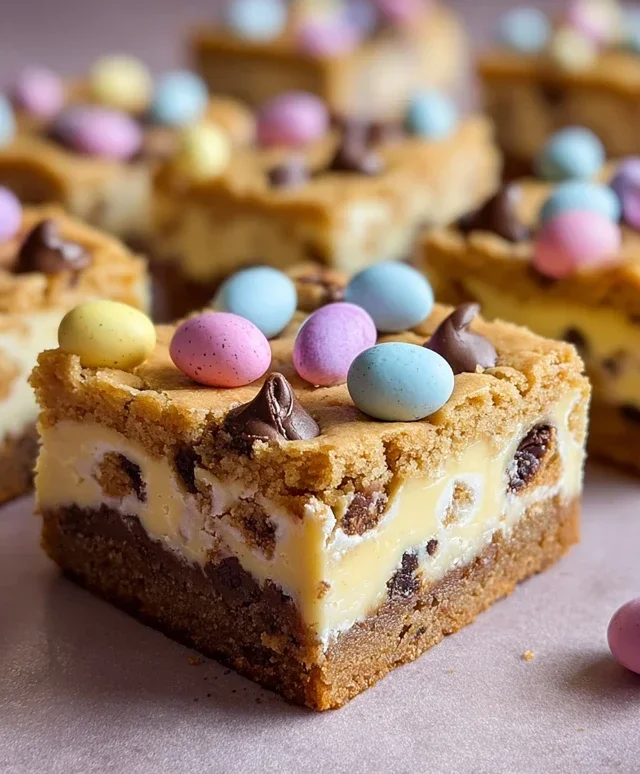
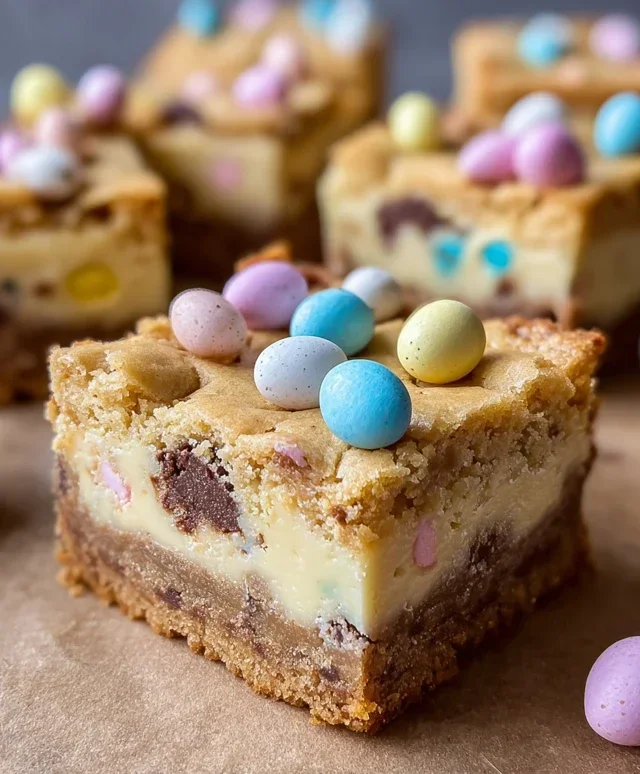
Mini Egg Cheesecake Cookie Bars are more than just a treat; they’re a delightful explosion of textures and flavors that have quickly become a springtime obsession. Imagin extracte a perfectly baked, buttery shortbread-style cookie base, cradling a luxuriously creamy, tangy cheesecake layer. But the magic doesn’t stop there! We then scatter these beauties with vibrant, crunchy Mini Eggs, transforming them into a confection that’s both visually stunning and utterly irresistible. People adore these Mini Egg Cheesecake Cookie Bars because they deliver all the beloved components of a classic cheesecake and a decadent cookie in one convenient, shareable bar. They’re the perfect fusion of familiar comforts and festive flair, making them an absolute showstopper for Easter gatherings, brunches, or simply whenever a sweet craving strikes. Get ready to fall head over heels for this incredible creation!
Mini Egg Cheesecake Cookie Bars
These Mini Egg Cheesecake Cookie Bars are the ultimate indulgence, combining the irresistible textures and flavors of a soft, chewy chocolate chip cookie with a creamy, tangy cheesecake layer, all studded with the delightful crunch and chocolatey goodness of Cadbury Mini Eggs. They are perfect for Easter, a special treat, or whenever you’re craving something truly decadent. The combination of buttery cookie dough, rich cheesecake, and those iconic mini chocolate eggs is simply out of this world. I’ve found that the slight crisp of the mini egg shells adds a wonderful contrast to the soft cookie and smooth cheesecake. Let’s get baking!
Ingredients:
Cookie Dough Preparation
First things first, let’s get our cookie dough base ready. In a large mixing bowl, combine the melted butter with the light brown sugar and the granulated sugar. Whisk these together until they are well combined and have a smooth, glossy appearance. Don’t worry if there are a few small lumps of brown sugar, it’s all part of the charm. Next, crack in your two large eggs, one at a time, beating well after each addition. Stir in the 1 ½ teaspoons of vanilla extract. This mixture forms the foundation of our delicious cookie base.
Now, in a separate medium bowl, whisk together the dry ingredients for the cookie dough: the flour, baking soda, baking powder, and salt. This ensures that the leavening agents and salt are evenly distributed throughout the flour, preventing any pockets of saltiness or uneven rising in our bars. Gradually add the dry ingredients to the wet ingredients, mixing on low speed or by hand with a spatula until just combined. Be careful not to overmix the dough at this stage, as overmixing can lead to tough cookies. The dough will be quite soft and sticky, which is exactly what we want for chewy bars.
Finally, gently fold in the chopped Cadbury Mini Eggs and the chocolate chips. Make sure to reserve a handful of whole or slightly broken Mini Eggs for topping the cheesecake layer later. This step is pure joy, seeing all those colorful speckles and chocolate chunks come together in the dough.
Cheesecake Layer Assembly
In a clean medium bowl, beat the softened cream cheese until it’s completely smooth and creamy. This is crucial for a lump-free cheesecake layer. If your cream cheese isn’t fully softened, you can gently warm it in the microwave for about 15-20 seconds, but be careful not to melt it. Add the ⅓ cup of sugar and the 1 teaspoon of vanilla extract to the cream cheese and beat again until well combined and smooth. Now, crack in the remaining large egg and beat until everything is thoroughly incorporated and the mixture is light and fluffy. This cheesecake filling is wonderfully simple and delicious on its own, but it’s going to be heavenly layered with our cookie dough.
Assembling and Baking the Bars
Preheat your oven to 350°F (175°C). Line a 9×13 inch baking pan with parchment paper, leaving some overhang on the sides. This will make it incredibly easy to lift the baked bars out of the pan for cutting.
Spread about two-thirds of the cookie dough evenly into the bottom of the prepared baking pan. Press it down firmly with your hands or the back of a spoon to create an even layer. This is your cookie base, so make sure it’s consistent!
Next, gently spoon the cheesecake mixture over the cookie dough base. Use an offset spatula or the back of a spoon to spread it into an even layer, trying not to disturb the cookie dough too much. Now for the fun part: crum extractble the remaining cookie dough over the top of the cheesecake layer. You can do this by taking small spoonfuls of dough and gently dropping them over the cheesecake, then gently pressing them down. Don’t worry about covering it completely; gaps are fine as the dough will spread as it bakes. Finally, scatter the reserved whole or slightly broken Cadbury Mini Eggs over the top of the bars.
Bake for 30-35 minutes, or until the edges of the cookie bars are golden brown and set, and the cheesecake layer is mostly firm with a slight wobble in the very center. The Mini Eggs will have softened and some may have slightly melted, which is perfectly normal.
Cooling and Cutting
Once baked, remove the pan from the oven and let the bars cool completely in the pan on a wire rack. This is perhaps the hardest part – waiting for them to cool! For the cleanest cuts, it’s best to chill the bars in the refrigerator for at least 1-2 hours, or even in the freezer for about 30 minutes before cutting. Once chilled, use the parchment paper overhang to lift the entire slab out of the pan. Cut into squares or rectangles using a sharp knife. Enjoy these delightful Mini Egg Cheesecake Cookie Bars!
Conclusion:
These Mini Egg Cheesecake Cookie Bars are an absolute triumph! They perfectly marry the comforting chegrape juicess of a classic cookie with the creamy, tangy richness of cheesecake, all studded with delightful Cadbury Mini Eggs. The textural contrast is simply divine, and the burst of chocolate and candy shell from the Mini Eggs makes them an irresistible treat. I guarantee they’ll be a huge hit with everyone, from seasoned bakers to complete novices. They’re wonderfully versatile too! I love serving them chilled, cut into generous squares, for an afternoon pick-me-up alongside a cup of tea or coffee. They also make a fantastic dessert for Easter gatherings or any celebration where a touch of fun and decadence is desired. Don’t be afraid to experiment with other chocolate eggs or even add a sprinkle of sea salt to the cookie dough for an extra layer of flavor. I truly encourage you to give these Mini Egg Cheesecake Cookie Bars a try – you won’t regret it!
Frequently Asked Questions:
Can I make these bars ahead of time?
Absolutely! These bars are excellent for making in advance. In fact, they often taste even better after a night in the refrigerator, allowing the flavors to meld. Store them in an airtight container in the fridge for up to 3-4 days.
What if I can’t find Mini Eggs?
No problem at all! You can substitute with other chopped chocolate candies, like M&M’s, chopped regular Cadbury Easter eggs, or even just good quality milk chocolate chips. The key is to add a fun, chocolatey element.
How should I store the leftover bars?
Store any leftover Mini Egg Cheesecake Cookie Bars in an airtight container. Keeping them in the refrigerator will help maintain the cheesecake layer’s firmness and freshness.
Mini Egg Cheesecake Cookie Bars
Decadent cookie bars with a creamy cheesecake layer and a generous topping of Cadbury Mini Eggs and chocolate chips.
Ingredients
-
1 cup butter, melted
-
¾ cup light brown sugar
-
½ cup sugar
-
2 large eggs
-
1 ½ tsp vanilla extract
-
2 ¼ cups flour
-
1 tsp baking soda
-
½ tsp baking powder
-
½ tsp salt
-
1 ½ cups Cadbury mini eggs
-
1 cup chocolate chips
-
1 (8 oz.) block of cream cheese, softened
-
⅓ cup sugar
-
1 large egg
-
1 tsp vanilla extract
Instructions
-
Step 1
Preheat oven to 350°F (175°C). Grease and flour a 9×13 inch baking pan. -
Step 2
In a large bowl, combine melted butter, ¾ cup light brown sugar, and ½ cup sugar. Beat until smooth. -
Step 3
Beat in 2 large eggs and 1 ½ tsp vanilla extract until well combined. -
Step 4
In a separate bowl, whisk together flour, baking soda, baking powder, and salt. -
Step 5
Gradually add the dry ingredients to the wet ingredients, mixing until just combined. Stir in 1 ½ cups Cadbury mini eggs and 1 cup chocolate chips. -
Step 6
Press half of the cookie dough evenly into the prepared baking pan. -
Step 7
In a medium bowl, beat softened cream cheese and ⅓ cup sugar until smooth. Beat in 1 large egg and 1 tsp vanilla extract until combined. -
Step 8
Spread the cheesecake mixture evenly over the cookie dough base. -
Step 9
Crumble the remaining cookie dough over the cheesecake layer. -
Step 10
Bake for 30-35 minutes, or until the edges are golden brown and the center is set. Let cool completely before cutting into bars.
Important Information
Nutrition Facts (Per Serving)
It is important to consider this information as approximate and not to use it as definitive health advice.
Allergy Information
Please check ingredients for potential allergens and consult a health professional if in doubt.